
After you have opened the image you are doing the animation to, creat a new layer, then set your Foreground Colour to white, then grab the Brush Tool, and use this brush.
When you have done that, zoom in to your image twice, and place a dot on the image with your brush, make sure you are on the second layer though. When you have done that go to Layer > Layer Style, Then click on Outer Glow, Change the Opacity settings from 75% to 100%, then click on the Contour Box:
And change it from Linear to Half Round.
Then you should have somthing like this:
Now Jump to Adobe Image Ready
Zoom In twice on your Image, then click on your second layer. then move the dot to where you want to start the Animation.
When you have done that clcik the New Frame Button in the Animation Box:
Now you should have 2 frames now. Then Move the dot across, about 5pix across, using the Arrow Keys, on your Key Board, then press the New Frame Button Again, then keep on doing this all around your Image/Text, it takes allot of time and patients....you will end up with about 30 to 200 Frames. When you have finished, go to File > Save Optimized As... Then your done....i added a fade effect at the start and end to mine....
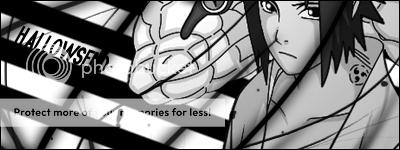
Here's what i got, it had 161 Frame's.
Source:
Photoshop Animation Moving Dot Animation Tutorial


Shout-Out
User Tag List
Thread: Animated Dot Tutorial
Results 1 to 3 of 3
-
11-09-2007 #1
 滚开! 大声笑。I 是令人敬畏的。

- Reputation
- 366
- Join Date
- Sep 2007
- Posts
- 720
- Thanks G/R
- 0/0
- Trade Feedback
- 0 (0%)
- Mentioned
- 0 Post(s)
- Tagged
- 0 Thread(s)
Animated Dot Tutorial

-
11-09-2007 #2
Contributor

- Reputation
- 134
- Join Date
- Apr 2007
- Posts
- 795
- Thanks G/R
- 2/5
- Trade Feedback
- 1 (100%)
- Mentioned
- 0 Post(s)
- Tagged
- 0 Thread(s)
Re: Animated Dot Tutorial
Very nice! I might even Use this for DAgraphic's Banner! Wish I could +Rep you again but I need to spread some around....>.<

XMOD- Greenies are disgusting! Corrupt 2d was here~
-
11-10-2007 #3
Member
- Reputation
- 5
- Join Date
- Jan 2007
- Posts
- 38
- Thanks G/R
- 0/0
- Trade Feedback
- 0 (0%)
- Mentioned
- 0 Post(s)
- Tagged
- 0 Thread(s)
Re: Animated Dot Tutorial
cool. Never knew that till now.


 Reply With Quote
Similar Threads
-
[Animated] Avatar Tutorial
By Phase228 in forum Art & Graphic DesignReplies: 17Last Post: 11-21-2007, 01:11 PM -
Animated Avatar Tutorial by King-Satchmo
By Satchmo in forum Art & Graphic DesignReplies: 18Last Post: 11-14-2007, 10:53 PM -
[Tutorial] Cool Signatures..With Animations!
By Dark_Angel in forum Art & Graphic DesignReplies: 23Last Post: 11-06-2007, 03:08 PM -
Animated avitars tutorial
By Obex in forum Art & Graphic DesignReplies: 2Last Post: 09-17-2007, 10:51 AM -
Tutorial: Creating an animated avatar... just like blizzard staff.
By marick626 in forum Art & Graphic DesignReplies: 23Last Post: 07-12-2007, 02:42 PM
-
OwnedCore Forums
casino news World of Warcraft Pokemon GO MMO Overwatch RTS Casino reviews www.planet-casino.com lucky 8 lucky8 no deposit codes bc game bc game lucky8 -
casino
Casino Gambling Online casinos Casino en ligne bc game bc game bc game no deposit bonus codes roobet Top 10 Casinos Casino reviews Bitcoin casino Paypal Casino Lucky8 1xbit heycasino Blank account Power leveling site Free US account Will pay someone to S3 Gnome Mage for Need help, with an Need Help to save how to close ripway LF Someone from UK with -
CoreCoins
CoreCoins CoreCoins FAQ Shout-Out Banner Ads -
My OwnedCore
My Profile Notifications Settings Buy CoreCoins About Us


Privacy Policy | Cookie Policy | Terms | Contact Us
Available Payment Methods:-


-
Casino
amazon | casino | casino | casino | casino | amazon | amazon | mystake | vave | amazon | casino | amazon | vave | casino | casino | amazon | casino | amazon | casino | amazon | casino | casino | casino | casino | casino | casino | mystake | amazon | casino | amazon | amazon | casino | amazon | casino | amazon | casino | amazon | casino | casino | amazon | casino | casino | amazon | casino | casino | vave | amazon | casino | vave | casino | amazon | casino | amazon | vave | amazon | vave | casino | mystake | casino | amazon