
Lower Spire
Sorry for the slack on the new parts, but my Vegas Pro is struggling and people prefer videos : )
Note: If you can't large a picture, just click on it with your scroll button to open it in a new tab or window, or just right click and hit "Open link in a new window"
The first wing in Icecrown Citadel is called the Lower Spire, containing the bosses; Lord Marrowgar, Lady Deathwhisper, Gunship battle and finaly Deathbringer Saurfang.
Please note, the tactics are the same on 10m as on 25m, the only difference is larger raid, and more tanks. On Lord Marrowgar for instance you use 3 tanks instead of 2. On Deathbringer Saurfang you get 5 blood beasts instead of 2. (Hence 5 groups in 25 and 5 beasts, 2 groups in 10m and 2 beasts.)
When you first enter Icecrown Citadel you will be in the Ashen Verdict Headquarter:
Emblem of Frost and Ashen Verdict Quartermaster location:
There are also class merchants which will repair your armor and sell you the new tier armor in exchange of Emblem of Frost;
There's also a teleporter in the instance, likely the one in Ulduar:
Trash
The trash in ICC is pretty small, in the first wing towards Lord Marrowgar it consist of 5 different mobs, The Damned, Deathbound Ward, Ancient Skeletal Soldier, Nerub'Ar and Servant of the throne.
The Damned:Originally Posted by freak4ever
Nerub'Ar:
Servant of the Throne:
Deathbound Ward:
Ancient Skeletal Soldier:
I will be describing the trash in pictures, so don't whine.
http://i47.tinypic.com/t5g75f.jpg
http://i49.tinypic.com/35be3as.jpg
http://i48.tinypic.com/zxmey0.jpg
http://i50.tinypic.com/zstr4j.jpg
http://i47.tinypic.com/2n08pw5.jpg
http://i46.tinypic.com/1z50nc7.jpg
http://i46.tinypic.com/20fp5cn.jpg
http://i47.tinypic.com/4fvatv.jpg
http://i49.tinypic.com/2eamngy.jpg
http://i48.tinypic.com/dwlsz.jpg
This is what a place without a Deathbound Ward looks like: http://i49.tinypic.com/vhqd6r.jpg
Lord Marrowgar
Lord Marrowgar should be tanked in the middle of the room where he normaly stand. The DPS should spread out behind him, but don’t spread out too much so the healers can’t heal everyone and so you can kill the spikes if they appear. Lord Marrowgar have a big hitbox and so you can stand a fair distance away from him.
Originally Posted by chickowne444
Lord Marrowgar have three abilities he use from time to time.
The first ability is called Saber Lash, it deals 200% of his normal melee strikes, the damage is spread evenly with the tank and the target next to him, so you need two tanks to tank this by standing next to eachother. Otherwise one of the tanks will pretty much get one-hitted by the Saber Lash. The Saber Lash will also prevent the targets to be impaled by the Bone Graveyard.
The second ability is an ability called Cold Flame. Lord Marrowgar will shoot out the Cold Flame against a target and the Cold Flame will go in a straight line until gone. If you stand in the fire you take 6000 frost damage every second for three seconds. The Cold Flame will start at Lord Marrowgar and go towards it’s target, so melee need to be careful with the flame as it may start right on them even if it’s going for another target. It’s adviced to use Frost Resistance Aura or Frost Resistance Totem.
Lord Marrowgar also have an ability called Bone Spike Graveyard. When the ability is cast it will randomly impale a target with a Bone Spike which need to be killed as quick as possible. While impaled the target will take 10% damage per second and immobilize the target. You need to kill the Bone Spike as quick as possible not only due to the 10% damage per second, but Cold Flame can also appear at the target and being impaled and having flame under yourself at the same time is not adviced. Primary the ranged should kill the Bone Spikes but if you’re having trouble or having a melee-dependant group you could take a few melee to assist the rangers.
Lord Marrowgar also have two phases, one being the three abilities listed above, and the other one called Bone Storm. Lord Marrowgar will tell you in an emote ”Lord Marrowgar creates a whirling storm of bone” . This means he will enter phase two and channel the Bone Storm. The Bone Storm is simply a whirlwind, to be more exact, like the warriors Bladestorm, he will channel it and anyone within his hitbox will get hurt, it hits for 1000 on my plate tank but I’m sure cloth will take loads more damage from it, and it deal damage every second so you can go down pretty fast. Along this he will also throw Cold Flames in a cross like this --|--.
He won’t just go around free like a warrior with Blade Storm do, but he will charge targets with the Bone Storm and stay there for five seconds before he charges another place.
The Bone Storm last 30 seconds and the tanks need to taunt him once the Bone Storm is over as you loose the aggro during Bone Storm, he is now tauntable, he weren’t at the release of ICC. Also the DPS and healers should always be a bit away from Lord Marrowgar when the Bone Storm is about to end so they don’t get healing or just body aggro and die.
Once the Bone Storm is over, he will repeat this until he’s dead.
Trash before Lady Deathwhisper
Lady Deathwhisper
The Lady Deathwhisper encounter can be compared to Kel’Thuzad in Naxxramas.
This is a 2-phase encounter.. In the first phase, Lady Deathwhisper is surrounded by a Mana Shield that prevents her from taking any damage until her mana reaches zero, phase 2 begins. . In the 10 man version, Deathwhisper has 3.3 million mana, which means you need to deal 3.3 million damage until her Mana Shield goes down.
In phase one she will cast Shadow Bolts on random raid members which deal ~8000damage, she will also throw Death and Decay on random raid members which work just like a Death Knights Death and Decay, Lady Deathwhispers Death and Decay last 10 seconds and is green instead of red.
However this is not everything. She will also spawn adds in one side of the room which will change once they have spawned there. They will start spawning on the left side (as you face Lady Deathwhisper) and then on the right side, then left side etc until the mana shield is down. The adds she spawn are called Cult Adherents and Cult Fanatics. Adherents are a caster that deal shadowfrost damage, they have a magic shield and cast an ability called Curse of Torpor on random raid members that will increase the cooldown of all yours spells by 15 seconds. If the regular CD on, let’s say Arcane Barrage is 3seconds it will be 18 seconds with this curse on. Need to be dispelled as quick as possible! Fanatics are melee that deal physical damage and and possess the cleave ability, so face them away from everyone else but the tanks. The cleave is not too strong but could still be a pain if it hits the wrong target or crit.
Both add types have an ability called Dark Transformation which make them deal 100% more damage, and both can also be empowered by Lady Deathwhisper, granting them new abilities, turning their damaging abilities into AoE abilities and preventing them from being interrupted. This can be dispel and purge-abled and should be purged or dispelled as quick as possible.
Lady Deathwhisper will from time to time revive a fallen add and turn them into reanimated adherents or fanatics. Reanimated adherents are 99% immune to magical damage and reanimated fanatics are 99% immune to physical damage, so they need to be killed by melee and ranged dps as appropriate. Reanimated fanatics have a self-buff called Vampiric Might that increases their damage dealt by 25% and also heals them for 300% of the damage they deal, a tank should kite the Reanimated Fanatics around and avoid being hit, their movement speed is limited so you can easily kite them. A tip is to have a protection paladin tanking the Reanimated Fanatics as they deal holy damage and gain their thread through holy damage so the 99% physical damage redution shouldn’t be a problem, keeping the threat. The Reanimated Adherents can be tanked by anyone with a big manapool as spell damage won’t be reduced by armor, but any tank can tank them except protection paladins due to the holy damage being the threat source.
Fanatic - Need to be kited.
To do this phase, have your tank and melee DPS take care of the adds. They will spawn on the left and right side from time to time in sets of three, so make sure your tank is always ready to pick up a new set. The left side will always spawn two fanatics and one adherent and the right side will always spawn two adherents and one fanatic. If a reanimated adherent spawn, have your casters handle it. Most of the time the rangers should be on the boss to break down Lady Deathwhisper’s mana shield to enter phase 2.
In her 10-man version, she does not mind control players like she does in the 25-man, so the only real dangers you face is Deathwhisper's Empowerment ability and not being able to keep up with add spawns. Once you figure out a good way to balance your DPS, you shouldn't have any trouble of crushing Deathwhisper's mana and enter phase 2. When I do this instance we usually kill the adds 20 seconds before they spawn on the other side, so the melee should not go directly to the other side but go and hit some on Lady Deathwhisper to help them breaking down the Mana Shield, however, when it’s around 8 seconds go to the side where the adds will spawn so you are ready to kill them quick.
When Lady Deathwhispers mana shield is down she will attack the raid. Similar to Kel'thuzad, her main attacks are frost spell - a single target Frostbolt that, unresisted, hits for around ~40000 damage but can be interrupted and you should interrupt it, and an AoE Frostbolt Volley that hits your raid for about ~10000 damage. She also have an ability called Touch of Insignificance which is cast on the target currently tanking ger and reduces its threat gain by 20% per application. This stacks up to 5 times and, without an off-tank, will result in your tank's
loss of threat generation and the DPS can’t continue DPSing without overaggroing. You shouldn’t taunt Lady Deathwhisper at any specific stacks as you do with Gormok the Impaler in Trial of the Crusader, but you should taunt her as soon as the debuff is gone to avoid DR.
She will also summon Vengeful Shades in this phase that act much like the ghosts in Sethekk Halls in that they will follow a player, except when they reach said player they will die in a 15-yard AoE explosion that deals around 18000 damage. Make sure to watch out for them and move away from them if you're near one of them. They dissappeared after a few seconds but during the time they are spawned they are very dangerous for the raid. Being hit by two of this at the same time will make you die unless you have a big health pool.
Lady Deathwhisper will still cast Death and Decay during phase 2 so you need to avoid this. This is pretty much all, easily compared as said to Kel’Thuzad as of the adds in the beginning, and if you switch the two scarabs which Lich King spawn when Kel’Thuzad is at 30% with the blue ghosts and the Void Zones with the Death and Decay.
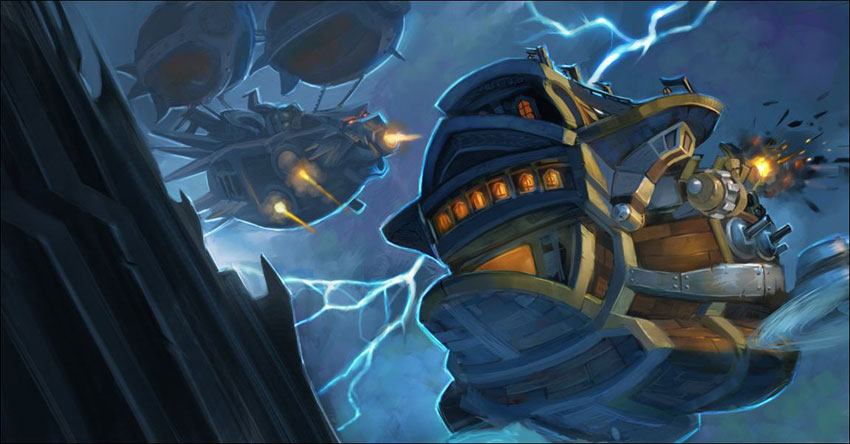
Gunship Battle
Depending on your faction, you will take control of one of the ships that normally float around icecrown that act as quest hubs. This means Orgrim’s Hammer and The Skybreaker. After taking the elevator up right after Lady Deathwhisper, the horde will go right and take control of Orgrim's Hammer and alliance will go to the left and take control of The Skybreaker. The adds here are very easy, just AoE them down.
When you are at your ship, make sure everyone has a jet-pack equipped, even if they are not assigned to go over to the other ship, as it is a good idea to have one in case someone who is going over dies. Once everyone have a jetpack and equipped you start the fight by talking to either Saurfang(Horde) or Bronzebeard(Alliance).
The goal of the encounter is to destroy the other ship by using the cannons located on the side of the ship. When I do this I always assign the lowerst DPS to take the cannons if they are not needed, i.e. AoEer for taking the adds that will spawn, explained later on. The goal of the gunners is to build up "heat" by using the cannon blast in order to maximize the second ability, which convert all the heat into extra damage. The trick is to make sure you don’t overheat your gun while shooting cannon balls onto the other ship.
A Battle mage will eventually spawn from time to time on the enemy ship and your cannons will get frozen. When this happens the melee, one tank, and a healer or two jump over to the other ship and kill the mage You should have atleast two melee for this fight to jump over. While over there the opposing leader (Bronzebeard Muradin if you’re horde. Saurfang if you’re alliance) gains a stacking buff which increases his damage done. If the tank starts getting into trouble and the damage input is too big, everyone on the enemy ship should jump back to your own ship and the leaders damage buff will reset. You need to kill the mages as the cannons are the only weapon you have to damage the enemy ship.
When the Sorcerer is alive, this will happend to your cannons:
A portal will also appear above your own ship and spawn several marines and 2 sergeants periodically. Skybreaker Sergeants do a wounding strike which reduces healing taken by 25%. They also have a Bladestorm. Kill those as quick as possible, I had a hunter and mage on the task, on 10man you want to kill the NPCs one by one and on 25m you want to AoE them, it’s the fastest way, of course depending on the gear.
After a while both the sergeants and the marines will gain a stacking buff called experienced, which increases their damage by 30% and attack and casting speed by 20% per stack. They also periodically gain a buff called desperate resolve, which increases armor by 60% and attack speed by 60%, the buff lasts 30 seconds. If they are not tanked they will use an ability called burning pitch, this deals siege damage to your ship.
Throughout the entire fight the enemy will constantly be shooting mortar-rockets over, they are very easy to avoid, first of it take a few seconds before they hit their destination and a round red/orange circle will appear on your ship where they will strike.
Repeat everything until you’ve won.
Deathbringer Saurfang
Deathbringer Saurfang has a unique power-user (mana, energy etc) called Blood Power, which you can see under his healbar on the portrait in place of a mana bar. For every Blood Power Deathbringer Saurfang get he will also deal 1% more damage and grow in size, once he reaches 100, he uses a very powerful debuff called ”Mark of the Fallen Champion” described later. He gains 1 Blood Power every time one of his abilities or one of his summoned Blood Beast deals damage. The key to the fight lies in controlling the amount of Blood Power he gains. If you don’t kill the Blood Beasts he will get Blood Power very quick and will usually result in a wipe.
When I did this our two healers stood on either side of the walkway where the teleporter is located, and our ranged DPS is spread out in about 12yards away from eachother. The range is becuase of two things. First, Saurfang has a targetted ability called Blood Nova which causes an AoE splash around a random raid member. If you spread out only the target getting the Blood Nova debuff will take damage and no-one else resulting in Saurfang won’t regen as much Blood Power as he would do if you stood in a bulk.
With the healers positioned in a central location, the Blood Beasts should be dragged down in the middle of the room when they spawn. From there, the ranged DPS will kill the Blood Beasts, while our melee stays on the boss. Note this: The Blood Beasts are NOT immune to immobilize effects or anything like this, so you can use slow/frost traps/concussive shot etc. We tend to always have a frost trap down so people can kite them around it if the DPS is low which it usually isn’t, have a shaman with a non-glyphed Thunderstorm and a druid with Typhoon is also adviced to push the Blood Beasts back if they get too close. Keep in mind that if a Blood Beast reach anyone and hit them, Saurfang will gain Blood Power, so it's best to avoid having melee DPS on them and they should absolutely NOT be tanked, if you are tanking them, Deathbringer Saurfang will get alot of Blood Power. Tanks and melee DPS will need to be careful to avoid using multi-target/AoE abilities when the Blood Beasts first spawn to avoid aggro. Especially Protection Paladins need to take care of Hammer of the righteous and Consecration and Avenger’s Shield here, and warrior with glyphed Devastate, Bear with glyphed Maul etc.
Another ability you'll need to be aware of is Boiling Blood. This is a damage over time effect placed on a random raid member that deals a healable amount of physical damage every 3 seconds for 24 seconds. It’s not the damage of this ability which is the pain, it’s all the Blood Power Saurfang gain, he receive 1 Blood Power every time it tick and 8 Blood Power during the whole DoT. You can remove this by using immunity abilities, such as Divine Shield and Iceblock, you should use those abilities if you can. If the rest of his abilities are being dealt with properly this should be the majority of the Blood Power he gains during the encounter.
One more ability you need to watch out for… Rune of Blood. He will be placing it on the target he is currently fighting, should be your tank. This causes his melee attacks to deal an extra ~5000 on the tank he used it on, and heal him for 5 times that amount. This counts as an ability dealing damage, so he gains 1 Blood Power per melee swing while he's hitting a tank with Rune of Blood active. You can deal with this ability in two ways, either you have 2 tanks, meaning the tank WITHOUT the Rune of Blood taunt Deathbringer Saurfang and when he get the Rune of Blood, the other tank will taunt Deathbringer Saurfang, that way avoiding him being healed and gain Blood Power. The other way is ignoring the Rune of Blood, just have 1 tank instead of 2 tanks and just increase the healing on the tank during the duration and just accept the extra Blood Power gain. However I recommend having 2 tanks as Blizzard increased the healing he receive from the Rune of Blood, there were a bug where he only got healed for 5000-6000 when he hit the tank, this have been fixed and he should now heal 50-100k if I’m correct. So I recommend having 2 tanks.
Remember as he deal 1% more damage per Blood Power he gain, the healers will need to heal Deathbringer Saurfang for extra as he’s taking 99% increased damage at the end of the Blood Power as Saurfang use Mark of the Fallen at 100 Blood Power.
Deathbringer Saurfang will also Frenzy at 25% HP, increasing his attack speed by 30%.
Once Saurfang reaches 100 Blood Power, he casts a debuff called Mark of the Fallen Champion. This empty all his Blood Power, taking him back to 0 Blood Power and he will loose the damage buff, but he will deal ~5000 damage to the raidmember which is affected by the Mark of the Fallen Champion. He will also get Blood Power as he hit the tank while a raid member possess Mark of the Fallen Champion. The debuff will last through the whole fight and cannot be removed by immunity effects. Even if you combat res the person which had the Mark of the Fallen Champion they will still have the Mark of the Fallen Champion on them. If the player die, Saurfang will be healed for 5% of his total health. It will simply have to be healed through. Remember, as he will gain Blood Power faster when someone is affected by the Mark of the Fallen champion he will be able to throw another Mark sooner than the first one due to this. It’s pretty easy to kill him within one or two Marks on 10m if your damage is decent.


User Tag List
Results 1 to 15 of 27
-
12-21-2009 #1
 Elite drone

- Reputation
- 445
- Join Date
- May 2009
- Posts
- 1,710
- Thanks G/R
- 2/7
- Trade Feedback
- 1 (100%)
- Mentioned
- 0 Post(s)
- Tagged
- 0 Thread(s)

Icecrown Citadel Instance, tactics, explanation etc, questions allowed.
Last edited by Vinland; 01-23-2010 at 08:15 AM.


-
12-21-2009 #2
Elite drone
- Reputation
- 445
- Join Date
- May 2009
- Posts
- 1,710
- Thanks G/R
- 2/7
- Trade Feedback
- 1 (100%)
- Mentioned
- 0 Post(s)
- Tagged
- 0 Thread(s)
Reserved for The Plagueworks.
Last edited by Vinland; 12-21-2009 at 09:27 AM.
-
12-21-2009 #3
Elite drone
- Reputation
- 445
- Join Date
- May 2009
- Posts
- 1,710
- Thanks G/R
- 2/7
- Trade Feedback
- 1 (100%)
- Mentioned
- 0 Post(s)
- Tagged
- 0 Thread(s)
Reserved for The Crimson Hall.
-
12-21-2009 #4
Elite drone
- Reputation
- 445
- Join Date
- May 2009
- Posts
- 1,710
- Thanks G/R
- 2/7
- Trade Feedback
- 1 (100%)
- Mentioned
- 0 Post(s)
- Tagged
- 0 Thread(s)
Reserved for Frostwing Halls & Lich King.
-
12-21-2009 #5
Active Member

- Reputation
- 72
- Join Date
- Feb 2008
- Posts
- 118
- Thanks G/R
- 0/0
- Trade Feedback
- 0 (0%)
- Mentioned
- 0 Post(s)
- Tagged
- 0 Thread(s)
Nice
 Btw you forgot your name at the pic where you show us coldflame and bone storm

-
12-21-2009 #6
Elite drone
- Reputation
- 445
- Join Date
- May 2009
- Posts
- 1,710
- Thanks G/R
- 2/7
- Trade Feedback
- 1 (100%)
- Mentioned
- 0 Post(s)
- Tagged
- 0 Thread(s)
Öh, thanks, whatever, not breaking exploiting anything so Blizzard can't do anything, hiding it 'cause of fans! : POriginally Posted by gfour
-
12-21-2009 #7
Active Member
- Reputation
- 72
- Join Date
- Feb 2008
- Posts
- 118
- Thanks G/R
- 0/0
- Trade Feedback
- 0 (0%)
- Mentioned
- 0 Post(s)
- Tagged
- 0 Thread(s)
Haha, oh btw +2repOriginally Posted by Vinland
-
12-21-2009 #8
Member
- Reputation
- 9
- Join Date
- Jan 2009
- Posts
- 139
- Thanks G/R
- 0/0
- Trade Feedback
- 0 (0%)
- Mentioned
- 0 Post(s)
- Tagged
- 0 Thread(s)
VERY nice guide. I can see you put a lot of effort into it. +Rep. But I can only give 1 rep =\
-
12-21-2009 #9
Member

- Reputation
- 3
- Join Date
- Jul 2008
- Posts
- 30
- Thanks G/R
- 0/0
- Trade Feedback
- 0 (0%)
- Mentioned
- 0 Post(s)
- Tagged
- 0 Thread(s)
Can I make a suggestion? On Lord Marrowgar its ALOT easier if you get all the healers to stack under him because they never get hit by Coldflame so they can heal without having to dodge fire.
-
12-21-2009 #10
Elite drone
- Reputation
- 445
- Join Date
- May 2009
- Posts
- 1,710
- Thanks G/R
- 2/7
- Trade Feedback
- 1 (100%)
- Mentioned
- 0 Post(s)
- Tagged
- 0 Thread(s)
Added that, thanks, never thought about it really as maybe they get hit by Saber Lash : )Originally Posted by chickowne444
-
12-21-2009 #11
Member
- Reputation
- 14
- Join Date
- Dec 2008
- Posts
- 84
- Thanks G/R
- 0/3
- Trade Feedback
- 0 (0%)
- Mentioned
- 0 Post(s)
- Tagged
- 0 Thread(s)
+rep for the good work!
-
12-21-2009 #12
Member
- Reputation
- 5
- Join Date
- Jul 2008
- Posts
- 28
- Thanks G/R
- 0/0
- Trade Feedback
- 0 (0%)
- Mentioned
- 0 Post(s)
- Tagged
- 0 Thread(s)
+Rep for usefull and complete guide =)
-
12-21-2009 #13
Member
- Reputation
- 17
- Join Date
- Oct 2008
- Posts
- 81
- Thanks G/R
- 0/0
- Trade Feedback
- 0 (0%)
- Mentioned
- 0 Post(s)
- Tagged
- 0 Thread(s)
+rep will +2 when finished
I also think that the layout is fairly bad.
-
12-21-2009 #14
Member
- Reputation
- 4
- Join Date
- Apr 2007
- Posts
- 22
- Thanks G/R
- 0/0
- Trade Feedback
- 0 (0%)
- Mentioned
- 0 Post(s)
- Tagged
- 0 Thread(s)
Should say something about soul alarms i could imagine that would gib quite a few raids.
-
12-26-2009 #15
Member
- Reputation
- 17
- Join Date
- Oct 2008
- Posts
- 81
- Thanks G/R
- 0/0
- Trade Feedback
- 0 (0%)
- Mentioned
- 0 Post(s)
- Tagged
- 0 Thread(s)
Sorry for being a bit vague, but what I mean is that the layout is fairly bad (not bad bad, but not good either) is because it just seems like the pictures are just thrown in, there's a few paragraphs they break and a few of them look clearly misplaced. The pictures should be placed on separate lines to preserve paragraph structure as well as to look organized and consistent.
Also, what I mean by finished, when you've done the last bosses of IC (they're not released yet, so it'll take a while) then i'll add the 2 rep, just 1 for now.Last edited by jerry_teps; 12-26-2009 at 12:39 AM.


 Reply With Quote
Similar Threads
-
[Video] Instanced Icecrown Citadel 3.3.3
By Classicclean in forum World of Warcraft ExplorationReplies: 2Last Post: 04-27-2010, 11:57 AM -
[Question] Allowing a race to have another class.
By necroslord in forum WoW EMU Questions & RequestsReplies: 7Last Post: 01-05-2009, 02:17 PM -
[Question] Allowing a race to hace another class.
By necroslord in forum WoW ME Questions and RequestsReplies: 4Last Post: 12-27-2008, 03:25 PM -
[Exloration] Under Icecrown Citadel
By Muramasa in forum World of Warcraft ExplorationReplies: 6Last Post: 11-22-2008, 03:40 PM
-
OwnedCore Forums
casino news World of Warcraft Pokemon GO MMO Overwatch RTS Casino reviews www.planet-casino.com lucky 8 lucky8 no deposit codes bc game bc game lucky8 -
casino
Casino Gambling Online casinos Casino en ligne bc game bc game bc game no deposit bonus codes roobet Top 10 Casinos Casino reviews Bitcoin casino Paypal Casino Lucky8 1xbit heycasino Remote Keylogger Scam help - Reward [QUESTION]recalling Gamecard Duplicator Scam [Question] Valid Excuse Need some help to start DEMONOID invite codes How do I get a WOTLK Cd Sold an account legit, -
CoreCoins
CoreCoins CoreCoins FAQ Shout-Out Banner Ads -
My OwnedCore
My Profile Notifications Settings Buy CoreCoins About Us


Privacy Policy | Cookie Policy | Terms | Contact Us
Available Payment Methods:-


-
Casino
stake | shuffle | stake | shuffle | here | MRQ Casino | shuffle | shuffle | shuffle | casino | this | shuffle | shuffle | Blockchain gambling | casino | shuffle | stake | russian | shuffle | here | shuffle | shuffle | stake | shuffle | shuffle | stake | stake | this url | stake | stake | stake | shuffle | shuffle | shuffle | shuffle | shuffle | freebet tanpa | shuffle | Free casino games | shuffle | here | iLucki Casino | shuffle | casino | this url | shuffle | shuffle | shuffle | shuffle | shuffle | stake | shuffle | HashLucky Casino | shuffle | shuffle | Instant Payout Methods | shuffle | shuffle | Aviator game casino | shuffle