
Well hello all. Im new here but i think i may bje able to provide a very long and detailed post that will help a lot of us n00bs out with private servers in general.
>>>to all admins!!! <<<
please. do not get mad at me because this is to long. remove the post. send me a pm. and i will more than happily upload it to a fileshare website for all of the users here on mmowned. so if its to long. just remove it. im new. and i didnt see any rules that were stickied. so like i said. if its too long, i apologize.
Pretty much the main point of this post is as follows
1. tell what sql does, and how its used
2. set up a php enabled website using apache
3. tell the basics of how to set the sql up for an ascent server
4. how to create a php site that will create user accounts for you
5. how everything works together
if you don’t need those questions answered. lol don’t read the post!
ok. so lets get started then. First off we are going to do this in a way that not many of the tuts tell you how to do this, but, i will explain what is going on to the best of my ability and i hope that in the end youll be able to understand everything a lot easier!
1. What is a MySQL databse and what does it do???
A MySQL database is a powerfull tool used by many different programming languages. Generally it just sorts a large amount of data based upon a certain colum in the database.
lets say that you have a huge list of people and the passwords they want.
lets get this list and write it out so you can see what you have to make.
username= jim password=god
username= bob password= dog
username= steve password= 1337
username= namehere password= passwordhere
ok. as you can see that hurts to look at, and trying to find a certain name out of a list of 100s of people could be very hard if you have in in something like excel. So to simplify this we use a mysql databse. In the database we actually use THREE yes i said three inputs. Those three inputs are: username, password, accnt.
Why do we use three???? wel lthe bigest reason is so that you can order the acounts by some definable variable other than jim or steve. When you setting up the acounts themselves you would have to use a number of some sort and define in the database itself that for every new user they have the next humber. So jim is accnt number 1. bob is 2 seteve is 3 and so on. more on how to set that up in the database itself later. right now were trying to get the idea of a database across. in the cae of ascent it has a huge list of items and creatures and all that. How do you think they store your character on a server? they have your accnt number or username or wahtever and they have a list of characters youve made in a mysql database. or something like that. (im not 100 percent on that, ive never looked very heavily in it, im still a n00b. just have a lot to say, and a lot of help)
ok so now we know a few things about a mysql database.
1 they are used to store data
2 they are generally ordered by number
and so ons.
Setting up a php enabled website with apache and mysql
ok. this is where my tut starts to vary greatly from the others. so. if your jsut looking for how to set one up and could care less of how everything works heres some posts you should check out. (much thanks to all of you that posted these!!! without them many of us would not have a server!!!)
guide by: J9sjam3
guide by: joetherogue
guide by: Zerger1
guide by: V1cTorY
guide by: Herleybob
guide by:KingMitch
once again. thats not all of them. and i give credit to those who have made an ascent guide. they have all helped!
also. i dont know ascent by heart. im just giving the the basic ideas and knowledge of how they work.
ok. so. all of those server guides have on very large thing in comon. They all use mysql and they all have the database set up on the computer. Some of the repacke out there ven come with apache and configure it for you!!!
what were going to do now is set up apache php mysql, all at once. so lets get going.
first off im going to show you how to install and then what is going on.
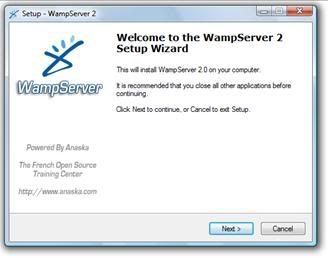
1. download WAMP server HERE(srry about the adds)
wamp will install and configure all of your services for you. so run the installer.
2
Simply hit next.
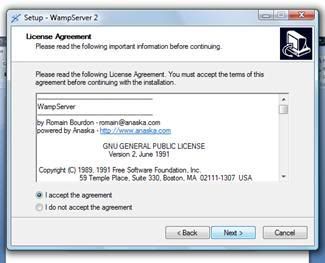
3
Accept the agreement, hit next.
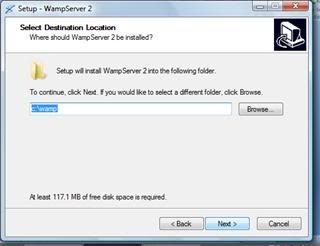
4
Set where you want to download everything to. The default will work fine.
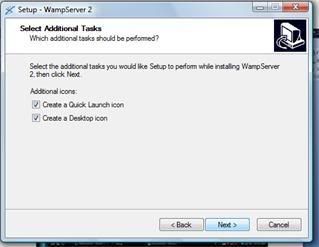
5
This is completely up to you. Its easier if you do. Just because WAMP for some reason cant be set up start up? L
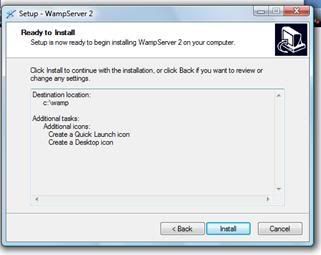
6
This just confirms everything for you. Simple enough. NEXT!!!
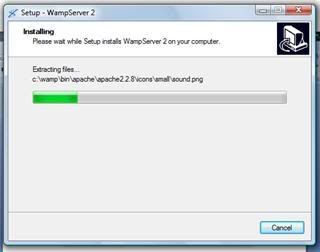
Hmmmm instalssss I hate to wait.
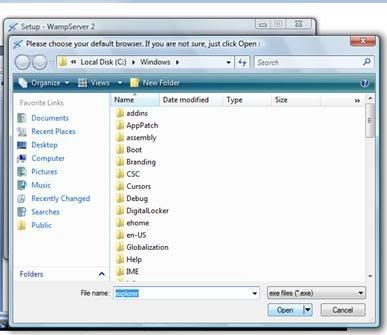
7. now its completely installed. A little window is going to pop up. All this is doing is asking what your default web browser is. To be fully honest it doesn’t matter at all. It doesn’t affect you unless you use wamp to open up phpmyadmin. But even then it doesn’t really matter.
8 once again. Another thing that doesn’t matter at all. The wamp homepage is just a silly little php script that shows whats going on on your server. Pretty much useless. Click yes if you want. I could care less.
9 the firewall is blocking apache. Your going to want that to run. So click unblock and allow it to do things on your interwebs
As you can see I am using vista. I wouldn’t suggest using It if you are making a server. It uses up a lot of resources. You don’t need a lot 24/7 but its nice to keep everything running at its best. If you can avoid using vista, I would recommend you do. Get an xp professional, or windows server. But if you must use vista.
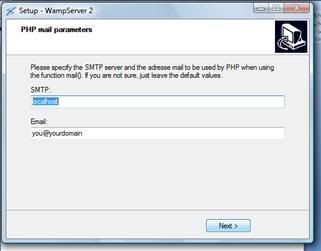
10. input some info if you want. I just keep it standard. It wont really matter that much. When it does mater, youll know how to change it.
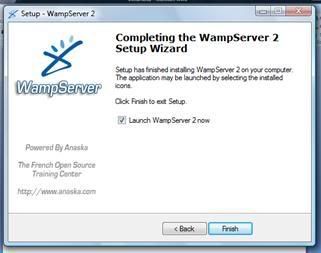
11 congrats your done!!! Enjoy the finish button screen.
12. Ok now lets learn how to use our server and what our server is doing.
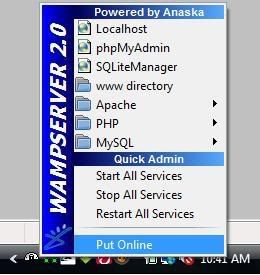
One of the nicest things with wamp is that it has a nice little control panel in thesystem tray of your computer. O wow how handy you say. Yes. It is handy. What can you do with it??
Click on that little speedometer looking thing in your system bar and this little thing will hop on up. You see your basic things to handle everything. Pretty easy to handle. the big thing to note is the wwwdirectory. This is where you put all of the files of your server. With apache server the index file is run when a user requests your webpage. So if you don’t have an index page (named index.html or index.php or whatever) the user will just see a list of files in that folder. Great for transferring some files between you and some close friends I guess.
Ok. Now here is a major big detail. WAMP server installs and configures everything for you. No. I don’t know how to change all of the settings. If you want everything completely configured for you, set up your own apache server and install myql and php on your own. Its not to hard. They have a bunch of videos on how to do it over at youtube. But, wamp will set up php myadmin. The folder is outside of your server so it is impossible to access it just by going to your website then going to the folder that has phpmyadmin in it. The only way is to click on the speedometer and then phpmyadmin. Were not going to be using that to much as navicat is a lot easier to use. But more on that later. Right now were focusing on what is configured. PHP is configured, apache is configured and mysql is configured. Everything done for you. Apache is the web server and hosts the files for you. Php is a server side script that is only executable on a web server. Mysql is the database system (we’ve already gone over that) to connect to the mysql database you need to use a password in the php scripts themselves. (more on how to do that later) the password that is set for the mysql is no password. By no password I mean like its blank. Left completely blank. So when a program asks for your mysql password, you would leave it blank. Yes this is a possible security threat. No I do not know how to change it. Yes you can set up apache php and mysql on your own. Once again. Use youtube. I’m here to tell you what’s going on, the other guides will tell you completely step by step of how to do it.
Ok so we have everything configured now. Lets get this mysql thing to work with your ascent server.
From what ive seen all of the repacks come with a file that is used to create your mysql databases. The databases are split up into tables. What is contained in those tables are different set of information. So, depending on the repack your using depends on the databases you will create.
So follow the repacks instructions on what databases to create. The tables are what hold the info. So lets set up those tables and databases. Were going to use navicat lite. Its small and free!!!
Download HERE
Im not going to tell you how to install this one. Its pretty easy. Im going to tell you how to connect tho.
Go to file. Click new connection. And a little window will pop up. In the connection name put something that will remind you this is your wamp server and ascent databases. I don’t care what you put. Lol for hostname/ipadress put localhost. For port put 3306 if it doesn’t have a default. For user name put root. For password your going to leave it blank. Now. at the bottom click test connection. If it works congrats. If it don’t. whet the f were you doing different from my guide??? Hit ok and boom. You can now browse your databases. Now, your going to have a couple of default databases. Those will be mysql and information_schema. Do not. I repeat do not delete those. Bad things will happen to you if you do. And I don’t want to help you fix those as ive never done it and don’t plan on it! Well now that we have connected we can create the databases for our ascent server, if you haven’t already done that. Create the database names according to your repack then double click on the database name so it turns green and pops down with some sub tab thingys. Now right click on the database name and click execute batch file. Your going to browse for your batch file that is located in your repack. Do this for all the sql databases the repack give you according to what they give you. When editing your ascent config files and the such do everything that the repack tells you to do. When editing if there is talk of connecting to the mysql database you need to keep these things the same:
Server is always “localhost”
Username is always “root”
And the password is always “” or better put as leave it blank.
Now lets look at what we have just done.
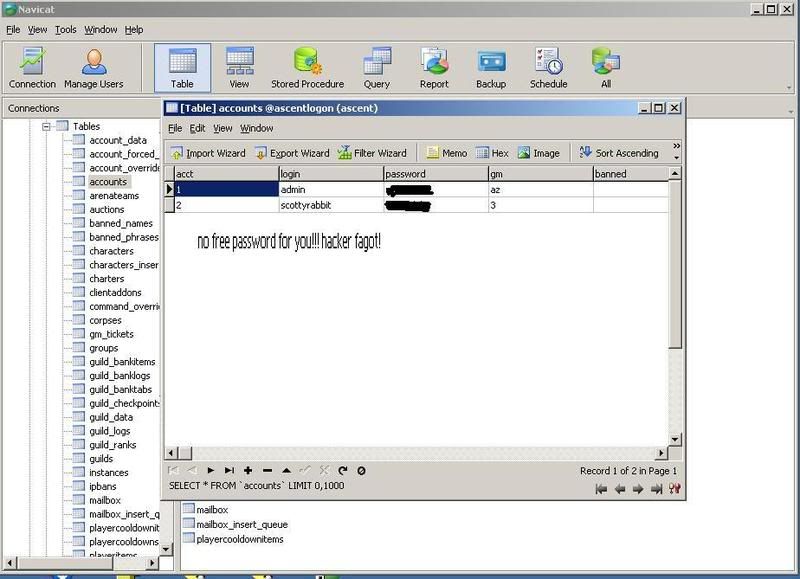
By creating those databases we have set it up so that ascent can access them. Ascent is programmed to access those databases and get certain bits of info out of them. Infact one of those databases contains a table that holds all of the account info. The database that holds the account info will be decided by your repack, but it should be to hard to find. So lets find it now. In my case its under the database that I created named “ascentlogin” I double click on that database in navicat and it will show me all of the tables located in that database. Look through the tables and just look at some of what is held in there. Don’t edit them unless you know what your doing. Ill tell you how to edit them later. But. Look specifically at the table that holds the account info. Give those a browse through. There probably wont be more than one account in there. If there is more than one then its up to you if you delete them or keep them in there for the person who made the repack. But youll want to keep the admin login. So lets look at that admin login. For me there are a few columns: acct login password gm banned. And that’s all I have. Some may have email, last ip, and so on. Its not to big of a deal once you know how to use them.
Take a look at your first column. In my case acct. do you see how that is a number? Well that number is set to autoincriment. That simply means that every time you create a new account it will just make the next account 2. And the account after 3. And the account after 4. Etc etc. That’s the indexing column that we slightly talked about earlier. This allows you to see how many users you have total and also lets us keep track of accounts and access them using php. More on the php later. The main point is to notice that everything else can be set to a number of different things. But acct is set to automatically insert a numerical value based on the last highest acct number. This will be used later in a few different ways. For now just understand that its being set as a value and why its being set as a value.
Okay. Lets look at what weve done so far. We have set up a webserver that has mysql php and apache completely configured. Weve integrated out ascent sql databases. We now know what the mysql databases do.
Setting up an account creator page
Now that we have everything set up and we know what the mysql databases do we can now create a website using php that will create user accounts for you. So lets begin with the basic concepts.
Php can interact with mysql by connecting to the database and inserting values or finding values, search values and a list of other things. We are going to focu on how to insert those values and a way to display every input of a table. (if you were to do this with a very large server it would take along tome to load the site. Were doing this to show the idea of outputting a mysql table for you to easily see.)
So lets start with getting code out of the mysql database. Im going to post a small code that will work for you to get the info out of your database. If you want to use this code on your website, please do. Just copy and paste it into notepad and save it as index.php or whatever you want. Just make sure to save it as blahblahblah.php
Everything within the code that has // before it is whats called comenting out. If you were to copy and past all of what you see below into notepad and save it as index.php the user wouldn’t see any of those comments. They are mainly used so that programmers can leave comments or hints as to how their code works.
Ok. Wow. My head really hurts. So now we have set up how to output the data. Try the code above out for yourself!!Code:[PHP 1]<html xmlns="http://www.w3.org/1999/xhtml"> 2<head> 3<meta http-equiv="Content-Type" content="text/html; charset=utf-8" /> 4<title>Untitled Document</title> 5</head> 6<body> 7<?php 8// every php script will start with <?php there is no getting around it. 9//Php can however be thrown into the html coding wherever in the page itself. 10// It just has to be saved as a .php file so it can read the php scripting. 11 12//first we create a variable to store the mysql conection info to. 13// in this case $connection is the variable. Mysql_connect(�localhost�,�root,��); 14// is the mysql query that tells the webserver to connect to the mysql 15//database named �localhost� using the username �root� and the 16//password �� <-notice that we left the password blank because of our 17//mysql database set up by wamp. 18 19$connection=mysql_connect("localhost","root",""); 20 21//Test to see if the connection exists by testing to see if there is 22//nothing set to the variable 23 24if (!$connection) { 25 echo "Could not connect to MySQL server!"; 26 exit; 27 } 28 //what we have just done is created an if then statement. If 29//$connection doesn�t have a value the webserver would say (or echo) 30//on the page �could not connect to mysql server!� this is used to 31//clear up errors if there are any. 32 33//Choose the database and save the save info to a variable same as 34//the connection but now we are choosin the database. In this case 35//ascentlogin to find the account info. We still use the variable $connection 36//to tell what username and password to use when connecting to the 37// database. So we set the database info to the variable $db 38 39 $db=mysql_select_db("ascentlogin",$connection); 40 41//Again, test to see if the selection was successful, if it was not, 42//there will be nothing in the $db variable 43 44 if(!$db) { 45 echo "Could not select database"; 46 } 47 48 49 50//Create the query to get the results from the database, 51//this uses MySQL language, again, saving the query to a variable 52 53 54 $sql="SELECT acct, username, password FROM acounts ORDER BY acct DESC"; 55 56 57// looking at what is in the code. It first defines a variable $sql. 58//This variable equals the mysql query of getting acct username and 59// password from the table �accounts� and putting them in order by 60//acct starting with the highest value. This is where having that one colum 61//being used as the index and being set to auto increment come 62//in handy. Its getting all of the info from the table and ordering the info by 63// acct. If we didn�t have acct it would be a lot harder to do and to be 64//honest I haven�t learned how to do that yet. But using it 65//like this works very well. 66 67 $mysql_result=mysql_query($sql,$connection); 68 69// what just happened in the above line is the query of getting the info 70//and using the connection to get the info. And setting It all to a 71// simple variable. Connection and all of the info all in one. Easy to 72//use later on. 73 74//now we have to check to make sure that our table isn�t empty. 75// If it is empty then we may have some troubles. So were going 76//to use the mysql_num_rows query to 77//check the variable $mysql_result for data. 78 79 80 $num_rows=mysql_num_rows($mysql_result); 81 if ($num_rows == 0) { 82 83//compares the variable $num_rows to 0 and says that if it is 84//equal to 0 then to echo , or print, out �sorry no accounts created� 85 86 echo �sorry no accounts created�; 87 } 88 89// if $num_rows is not equal to zero the script tells the web server 90//to continue on to the else. This is a classic example of an if then statement. 91//If $num_rows is equal to 0 then the program will print 92//out �sorry no accounts created� else it will do the following ending 93 94 else { 95 96// within the else statement we are going to open up a while loop. 97//These are hard to explain. Just follow the code and try to think 98//of how the machine would execute it. Perhaps somebody else 99//will be able to explain the php while loops better. Im still a n00b to ya know. 100 101 while ($row=mysql_fetch_array($mysql_result)) { 102 103//A lot of things are going on, using a while loop, setting a 104//variable in the condition for the loop (BAD PROGRAMMING PRACTICE, 105//but there is no better way to do it here) Each time mysql_fetch_array 106// runs, it takes one set of info from the variable and saves it to an array, 107//then deletes that from the original variable. This way, all the 108//information can be extracted from the original variable if we keep 109// pulling the information out one block at a time. Once there is no 110//more information in $mysql_result, $row will be cleared, allowing the 111//while loop to continue to the next section of code. 112 113 $acct=$row["acct"]; 114 $username=$row["username"]; 115 $password=$row["password"]; 116 117//so that was a big step there. Very hard to understand. What 118//happened goes something like this. Way up at the beginning in 119// the start of the while loop we set $row to be equal to the array of 120//all the info in the table. So. At first it sets $row to equal the entire 121//table. Then it takes �acct� �username� and �password� from the table 122// itself and sets the arrays from the table to three new variables. 123//Next were going to echo out every result of the table. There is a 124//way to limit them, but this tut is long enough. So we are just going 125//to echo everything out from the tables. Notice how we do this. 126 127 echo "<h2>$acct</h2>"; 128 129//echo tells the webserver to print out something. In the case its teeling 130//it to print out the variable $accnt with the <h2> tag. Notice that 131//<h2> is html to make certain texts bigger. Beuce we put the echo 132//command and then � we are able to use html to format what is said by the php. 133 134 echo "<p>$username</p>"; 135 echo "<p>$password</p>"; 136 137//Put a line between results, remember, its not doing just one accnt. 138// Its doing all of them. It would get crouded if we didn�t put a line. 139//Notice that once again. We use the html command of starting a new line. 140 141 echo "<br>"; 142 } //End of while loop 143 } // End of else 144 145//Now that we are all done with accessing the database, we need to 146//close the connection we opened in the beginning 147 148 mysql_close($connection); 149 ?> 150</body> 151</html> [/PHP]
Now. Lets start a whole new page for your new website. Lets make an account creation page.
Congratualations everyone. Its done your done reading no less.Code:<head> <title>create a new account</title> </head> <body> Subject: <br> <form action="yourpostingpagename.php" method="post"> //first big thing to notice. Above it says // <form action="yourpostingpagename.php" method=”post”> //what this does is tells the machine what page its acting on. Its kinda // weird to think about. But. You have to have it in there. Obviously //change it to the name of the page that you create. <input type="text" name="username" value="Enter username" maxlength="32" size="20"> //this creates an input box for you to input the username. Notice how //it defines the maxlenght and size and name. value is just what it //says in the box before someone clicks on it to add their info in. <br><br> password: <br> <textarea wrap="virtual" name="password" rows="12" cols="32">Enter password here</textarea> // ok. So this is another way to input data. However. This is much larger. //And takes up a lot of space. Im jus tputting it here so you can //see another way to input data. Notice how this time the value isn’t // defined. It is put inbetween the carrots //<textarea wrap=….. cols=”32>ENTER PASSWORD HERE</texarea> <br> <p>Burning Crusade Enabled? </p> <input type="checkbox" name="flags" value="1" checked> //what we have done with this line will be used later. Rather than a //field of text we created a check box for the user to say if they have //the burning crusade enabled or not. This is kind of important. I //would want a person with the burning crusade to be able to use it. //Well use this check box more soon. Just remember that its name is flags. <input type="submit" value="Submit"> </form> <?php //connection info to database $host = 'localhost'; $user = 'root'; $password = “''; $dbName =’ascentlogin’; //once again we are creating variables and setting them to a value. //This time the value is the logon information. This is used in huge //pages that have a lot of loging in going on. $connection = mysql_connect($host, $user, $password) or die(mysql_error()); $db = mysql_select_db($dbName, $connection) or die(mysql_error()); // we are introducing another way of checking for errors here. //Rather than an if then statement we are now simply saying or die. //Then it will show the mysql error. Simple enough. if ($_POST['flags'] == 1) {$tbc = "8";} else {$tbc = "0";} //OMFG!!! What is that!! Ok. Lets take this slow… first. //Remember above? When we created the check box? //Well. Look at what its values and such are? //Notice how its name is flags.. and if its checked. // The value is one…. Well look at the if then statement. //If $_post[‘lfags’]==1 (if the check box is equal to 1) {$tbc=”8”;} //so if its checked it sets the variable $tbc to be equal to 8. // Other wise it is equal to zero. // insert new entry in the database if entry submitted if (isset($_POST['username']) && isset($_POST['password']) && trim($_POST['username']) && trim($_POST['password'])!= '') { // we started another lovely if then statement. What this does is //check to make sure the user submitted something. If they did we // trim it up and clean it up and such. Then set it equal to a database. //Im not 100% about how all of this goes and such but, it works. // Perhaps someone could illuminate the subject for us? // for easier handeling we set the stuff equal to the variables and such $username= $_POST['username']; $password= $_POST['password']; // ok. Here is where it gets hairy. We put the stuff into the table! $sql = "INSERT INTO accounts (acct , username, password , flags) VALUES (NULL , '$username' , '$password' , '$tbc')"; //ok. Just look at that. Does it make sense or not. // Most of it should make a little bit of sense. Were setting the //variable $sql to be equal to a mysql query. In this case the query to //INSERT INTO our selected table. Since we are creating an account //for someone we are going to be inserting into our accounts table. //Next notice what it inserts. The other things to check are the acct and //flags. Remember that acct was the value that is supposed to be auto //incremented? It’s the number one. Well to make it auto increment //the table has whats called a null value. Pretty much saying the the //database takes care of this value and nothing is inserted into it. //We have to mention it to make sure that it is created correctly tho. // Flags, if you didn’t know already, are used in the table to tell the //server if this player has the burning crusade or not. So that’s why //we set it to 8. 8 tells the server that they do have the burning crusade. //And our if then statement set $tbc to be equal to 0 or 8. So were set J $result = mysql_query($sql, $connection) or die(mysql_error()); // that above line just executed the variable. Rember we weren’t //actually inserting into the database. We were setting the variable //to be equal to the mysql insert query. And $connection is our //connection info to our database. So everything has been takin care of. //So. If there were problems it dies. Notice how it is set to //or die(mysql_error()); so if it wasn’t dead by now. //it executes the bottom code. echo "<font size = 32>Article successfully posted.</font>"; //YEA!!!! It worked. Woo hooo we are so cool. echo "<br><a href=whateveryouwanttolinkto.php >Go back</a>"; //this is another little link of love and notice once again how we used // echo then input the html coding and it creates a link. } // end if new //statement that we made way up at the top. Way way up there. lol ?> </body> </html>
What can I do with all that I have learned???
Well. What cant you do. You’ve created a website. You’ve created a private wow server. You created a homepage to display all of your users. Your held back by nothing at this point. The only thing holding you back is time.
one of the biggest things to notice with php is the syntax. if you mess that up, your very very screwed. and thats no good. notice all those lines of code... now notice what they end with ; at the end of everystatement youll find ; make sure you use them corrdectly. this will cuase you a lot of frustration if you dont.
Hopefully you enjoyed my tut. Thanks all!
“a man is not defined by his acts, but by his wisdom”


User Tag List
Results 1 to 10 of 10
-
04-12-2008 #1
 Member
- Reputation
- 2
- Join Date
- Apr 2008
- Posts
- 13
- Thanks G/R
- 0/0
- Trade Feedback
- 0 (0%)
- Mentioned
- 0 Post(s)
- Tagged
- 0 Thread(s)
Ascent, PHP, MySQL, Apache and how they work together

-
04-12-2008 #2
Contributor

- Reputation
- 270
- Join Date
- Jun 2007
- Posts
- 1,380
- Thanks G/R
- 0/0
- Trade Feedback
- 0 (0%)
- Mentioned
- 0 Post(s)
- Tagged
- 0 Thread(s)

If YOU made this guide its good


-
04-12-2008 #3
Banned
- Reputation
- 179
- Join Date
- Jan 2008
- Posts
- 1,396
- Thanks G/R
- 0/0
- Trade Feedback
- 0 (0%)
- Mentioned
- 0 Post(s)
- Tagged
- 0 Thread(s)
Quadruple post (That or 5, i didnt check the other page)
-
04-12-2008 #4
Contributor
- Reputation
- 100
- Join Date
- May 2007
- Posts
- 911
- Thanks G/R
- 0/0
- Trade Feedback
- 0 (0%)
- Mentioned
- 0 Post(s)
- Tagged
- 0 Thread(s)
Nah it's 6 time post

-
04-12-2008 #5
Member
- Reputation
- 2
- Join Date
- Apr 2008
- Posts
- 13
- Thanks G/R
- 0/0
- Trade Feedback
- 0 (0%)
- Mentioned
- 0 Post(s)
- Tagged
- 0 Thread(s)
ok. so ive emailed the admins ive edited my posts ive tried to delete them. what origanally happened was i created the tutorial (yes i did it myself, i spent 5 hours on it. and am very proud of it) when i tried to post the tutorial i got a mysql error and i considered the post lost and it wasnt posted. So i went back copied double checked my syntax. i was missing a comma. lol. so its fixed. i dont know how many times i reposted.
i would like to apologize for all of the reposts and hop that this tut can be looked on as a good amount of help and not as some spamming *******s atempt to gain a bit of recognition. like i said. i put 5 hours into this. and did severything completely from scratch.
-
04-12-2008 #6
Banned
- Reputation
- 179
- Join Date
- Jan 2008
- Posts
- 1,396
- Thanks G/R
- 0/0
- Trade Feedback
- 0 (0%)
- Mentioned
- 0 Post(s)
- Tagged
- 0 Thread(s)
Nice guide anyways. The pictures and explanations are great, +Rep
-
04-13-2008 #7
Member
- Reputation
- 1
- Join Date
- Apr 2008
- Posts
- 9
- Thanks G/R
- 0/0
- Trade Feedback
- 0 (0%)
- Mentioned
- 0 Post(s)
- Tagged
- 0 Thread(s)
like i said when i posted on the other one... good guide
this time though... +Rep
-
04-13-2008 #8
Member
- Reputation
- 2
- Join Date
- Apr 2008
- Posts
- 13
- Thanks G/R
- 0/0
- Trade Feedback
- 0 (0%)
- Mentioned
- 0 Post(s)
- Tagged
- 0 Thread(s)
thanks all for the mainly good reviews. even though i did post like a spambot. lol. if you ever need some help let me know. ill try ta help ya out, for free too. and if i cant ill direct you to the place to be.
-
04-19-2008 #9
Member
- Reputation
- 1
- Join Date
- Apr 2008
- Posts
- 10
- Thanks G/R
- 0/0
- Trade Feedback
- 0 (0%)
- Mentioned
- 0 Post(s)
- Tagged
- 0 Thread(s)
Very Nice, I learn something new everyday lol
-
04-22-2008 #10
Member
- Reputation
- 57
- Join Date
- Apr 2008
- Posts
- 344
- Thanks G/R
- 0/0
- Trade Feedback
- 0 (0%)
- Mentioned
- 0 Post(s)
- Tagged
- 0 Thread(s)
+rep Made A REALLY GOOD GUIDE!
:Swift Leveling: <Cheap Swift Power Leveling>
https://swiftleveling.webs.com/

 Reply With Quote
Similar Threads
-
Gold Sales on RMAH and how they work
By Jaerin in forum Diablo 3 GeneralReplies: 24Last Post: 08-09-2012, 01:10 PM -
[Ranks] And how they work
By Dombo in forum Community ChatReplies: 6Last Post: 07-07-2009, 03:51 PM -
Ascent, PHP, MySQL, Apache and how they work together
By scottyrabbit in forum WoW EMU Guides & TutorialsReplies: 2Last Post: 04-13-2008, 06:49 AM -
WoW Taxi-planes and theroies on how they work. Messing with the Zepplin and boats
By SomeWhiteGuy in forum World of Warcraft GeneralReplies: 27Last Post: 08-13-2007, 07:03 AM
-
OwnedCore Forums
casino news World of Warcraft Pokemon GO MMO Overwatch RTS Casino reviews www.planet-casino.com lucky 8 lucky8 no deposit codes bc game bc game lucky8 -
casino
Casino Gambling Online casinos Casino en ligne bc game bc game bc game no deposit bonus codes roobet Top 10 Casinos Casino reviews Bitcoin casino Paypal Casino Lucky8 1xbit heycasino 57 BE priest EU ViXan's Account Any way of getting an Account GIVE AWAYS! Would this work? My first phising site. Giving 2 rep for the Damn, I got screwed over. Lvl 80 tauren -
CoreCoins
CoreCoins CoreCoins FAQ Shout-Out Banner Ads -
My OwnedCore
My Profile Notifications Settings Buy CoreCoins About Us


Privacy Policy | Cookie Policy | Terms | Contact Us
Available Payment Methods:-


