![[FRAPS] Setup and Use](https://www.ownedcore.com/forums/images/styles/OwnedCoreFX/addimg/menu4.svg)
In this tutorial I'm going to show you how to configure FRAPS to take footage in games.
If you do not have a registered copy of fraps, you can download a free trial at FRAPS show fps, record video game movies, screen capture software. You could probably also find a fully registered version somewhere on the net.
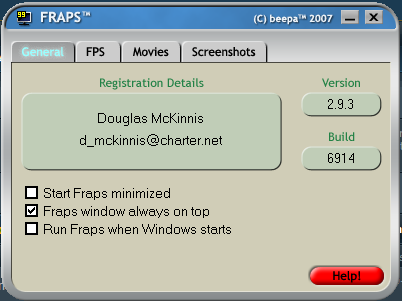
Firstly, install fraps. I installed fraps to my D Drive. When you open up fraps it should look similar to this:
The three configurable settings on this page are pretty self explanatory. Lets move on to the next tab.
You can see in the picture the way I have my settings. These settings are all visual and really based on user preference. For a detailed description of each of the settings, read the quoted text below.
1 - The Overlay Display Hotkey lets you assign a button that will toggle the frame rate counter between the four corners and off. To change the Hotkey, click in the box and type a new key to be assigned this function. Clicking Disable will stop the Hotkey from having any effect.
2 - The Benchmarking Hotkey lets you assign a button that can be used to determine the average frame rate between any two points in a game. To change the Hotkey, click in the box and type a new key to be assigned this function. Clicking Disable will stop the Hotkey from having any effect.
3 - The overlay corner indicates the region of the screen that the framerate counter will be displayed in. Choose a corner that doesn't obstruct important information in the game's display. If you select Disabled the frame rate counter will not be displayed on screen.
4 - Selecting "Only update overlay once a second" will only change the frame rate counter once a second.
On Vista machines that use the 3D desktop you can enable the option to "Monitor Desktop Window Manager". This will show the framerate counter for the DWM and also allow you to take screenshots and record movies from the desktop.
5 - The "Stop benchmark automatically" option allows you to specify a fixed duration for the benchmark. Once the number of seconds has elapsed the benchmark will automatically stop and the results will be written to disk.
6 - Finally, detailed benchmark statistics can also be saved to disk. These are written in standard CSV files that can be imported directly into a spreadsheet. All files are automatically named/timestamped and saved in the benchmarks subdirectory. Currently there are 3 files written for each benchmark when this option is enabled:
# FPS - Contains the frame rate value for each second of the benchmark
# frametimes - Contains the time (in milliseconds) of every frame that was rendered in the benchmark
# minmaxavg - Contains the total frame count, benchmark duration, minimum, maximum, and average frame rate values.
On this tab, you will find most of the settings you will want to be tinkering with. For starters, define where Fraps will save your video. I have chosen a folder inside my Fraps folder, because it is easy to remember, and I have about 300 GB of space on this hard drive. Fraps footage can take up many GB, so choose a drive that has lots of space.
Also, set your recording hotkey. I like F9, because it is the first button of a series of 4. This means I can find it without looking at it by moving my finger over the space between it and the F8 key. It also isn't a key I'm going to be pressing accidentally. The main thing to watch out for is that the key you choose isn't a keybind for a function in the game you're recording.
In choosing whether or not to record sound, it's up to you. It depends whether you want your game sound in your video. I usually disable the recording of sound, sticking to importing sounds or music while editing my video. Annoying things like the beeping of instant messagers can mess up your recording, I advise disabling them if you are going to be recording sound.
Now you need to set your recording options. The first choice is between Half-Size and Full-Size. This is for setting the visual quality of your recording. Fraps can be very taxing on your computer. You should do a test while playing your game and recording at full-size. If you end up lagging or your frame-rate drops to a crawl, I would recommend Half-Size. If your computer can handle it, Full-Size looks much better, though this isn't too important if you're planning to be uploading to youtube.
When choosing your frame-rate, you need to choose something that will be editable by your chosen video editor. 29.97 is a good frame-rate to use, it is commonly accepted, and a preset for most, if not all video editing applications. If you can handle it, bump it up to 60 FPS.
The last tab is the screenshot tab. This tab is pretty self explanatory, remember to set where you want screenshots to be saved. Fraps is a great tool for nabbing screenshots of chat, etc, in game.
---------------------------------------------------------------
Now that you've configured FRAPS you can open your game. If your settings are the way mine are, yellow numbers should appear on one of the corners of your screen. That is your frame-rate.
At any time you can press your recording hotkey (Mine was F9) to begin taking footage. The numbers will turn red, and decrease to at least your specified framerate.
If at any time while recording you alt-tab out of the game or open another window on top of it, recording will stop.
---------------------------------------------------------------
Once you've recorded all your footage, you can go to the folder you defined as the folder to save your recording in. If you took more then 4 minutes of footage in one go, it will most likely be broken into multiple parts. These parts can be 5GB in size. I wouldn't advise forgetting to stop recording, or you could quickly find your drive out of space! Once you have your footage, you're ready to edit it in a video editor.

![[FRAPS] Setup and Use](https://www.ownedcore.com/forums/./ocpbanners/1/2/9/8/0/2/2/01d9781faec8bfe3abf9095ac9e57d1e.jpg)
![[FRAPS] Setup and Use](https://www.ownedcore.com/assets/mm/images/wits.png "TradeSafe Middleman")
![[FRAPS] Setup and Use](https://www.ownedcore.com/forums/images/styles/OwnedCoreFX/addimg/wicc.png "CoreCoins")

Shout-Out
User Tag List
Thread: [FRAPS] Setup and Use
Results 1 to 9 of 9
-
01-17-2008 #1
 Contributor


- Reputation
- 82
- Join Date
- May 2006
- Posts
- 282
- Thanks G/R
- 2/0
- Trade Feedback
- 0 (0%)
- Mentioned
- 0 Post(s)
- Tagged
- 0 Thread(s)
[FRAPS] Setup and Use
Last edited by tsincaat; 01-17-2008 at 04:24 AM.
![[FRAPS] Setup and Use](https://www.ownedcore.com/images/ba/g/b2.gif)
-
01-17-2008 #2
 Active Member

- Reputation
- 22
- Join Date
- Aug 2006
- Posts
- 76
- Thanks G/R
- 0/0
- Trade Feedback
- 0 (0%)
- Mentioned
- 0 Post(s)
- Tagged
- 0 Thread(s)
Nice guide though

-
01-17-2008 #3
Member
- Reputation
- 1
- Join Date
- Apr 2007
- Posts
- 8
- Thanks G/R
- 0/0
- Trade Feedback
- 0 (0%)
- Mentioned
- 0 Post(s)
- Tagged
- 0 Thread(s)
I Love fraps. and what not but the thing is what makes the quality of the video? fraps or when u convert it.
-
01-17-2008 #4
 Member
- Reputation
- 11
- Join Date
- Nov 2006
- Posts
- 151
- Thanks G/R
- 0/0
- Trade Feedback
- 0 (0%)
- Mentioned
- 0 Post(s)
- Tagged
- 0 Thread(s)
Don't forget to mention that if you have a single CPU, that the max you can record at is 1152x864. So when you record in fraps you have to go into video settings in WoW and change the resolution to 1152x864 for best quality. This does not apply to Dual Core.
-
01-18-2008 #5
Contributor
- Reputation
- 82
- Join Date
- May 2006
- Posts
- 282
- Thanks G/R
- 2/0
- Trade Feedback
- 0 (0%)
- Mentioned
- 0 Post(s)
- Tagged
- 0 Thread(s)
Oh well, you mentioned it. Thanks :]Originally Posted by Saltychip
-
01-20-2008 #6
 Contributor
- Reputation
- 114
- Join Date
- Jun 2007
- Posts
- 121
- Thanks G/R
- 0/0
- Trade Feedback
- 0 (0%)
- Mentioned
- 0 Post(s)
- Tagged
- 0 Thread(s)

Nice guid! Doing videos with fraps myself too.
-
01-21-2008 #7
Contributor
- Reputation
- 82
- Join Date
- May 2006
- Posts
- 282
- Thanks G/R
- 2/0
- Trade Feedback
- 0 (0%)
- Mentioned
- 0 Post(s)
- Tagged
- 0 Thread(s)
Thanks! (filler)Originally Posted by Qiukak
-
01-22-2008 #8
Member
- Reputation
- 2
- Join Date
- Jan 2007
- Posts
- 18
- Thanks G/R
- 0/0
- Trade Feedback
- 0 (0%)
- Mentioned
- 0 Post(s)
- Tagged
- 0 Thread(s)
Thanks for this.
-
01-22-2008 #9
Member
- Reputation
- 1
- Join Date
- Jan 2008
- Posts
- 5
- Thanks G/R
- 0/0
- Trade Feedback
- 0 (0%)
- Mentioned
- 0 Post(s)
- Tagged
- 0 Thread(s)
Thanks for this informative post


 Reply With Quote
Similar Threads
-
[GUIDE] How to Setup and Use PQR
By kuukuu in forum WoW Bot Maps And ProfilesReplies: 15Last Post: 02-21-2023, 10:11 PM -
[Bot] How to setup and use Saleman 3 for Honorbuddy, make MILLIONS!
By berryman13 in forum World of Warcraft Bots and ProgramsReplies: 29Last Post: 11-26-2015, 03:21 AM -
How to Setup and use Routes
By Rocker in forum World of Warcraft GuidesReplies: 14Last Post: 08-01-2010, 07:59 PM -
Guide: How to Host and Use a Signature!
By lag in forum Art & Graphic DesignReplies: 4Last Post: 05-07-2007, 03:11 AM -
Can i buy Usa game cards and use them on my EU wow file?
By bait in forum World of Warcraft GeneralReplies: 2Last Post: 02-23-2007, 12:32 PM
-
OwnedCore Forums
casino news World of Warcraft Pokemon GO MMO Overwatch RTS Casino reviews bc game bc game -
casino
Casino Gambling Online casinos Casino en ligne vercel livescore bc game lovable vercel bc game no deposit bonus codes stake Top 10 Casinos Casino reviews Bitcoin casino Lucky8 1xbit heycasino Alittle worried Main Banned. Your fan of this community and BNet question Need phishing site Renting a phished acc, Quick question regarding [Need Help]I'm a bad Giving AWAY Another -
CoreCoins
CoreCoins CoreCoins FAQ Shout-Out Banner Ads -
My OwnedCore
My Profile Notifications Settings Buy CoreCoins About Us


Privacy Policy | Cookie Policy | Terms | Contact Us
Available Payment Methods:-
![[FRAPS] Setup and Use](https://www.ownedcore.com/images/paybutton/paypal.png)
![[FRAPS] Setup and Use](https://www.ownedcore.com/images/paybutton/skrill.png)
![[FRAPS] Setup and Use](https://www.ownedcore.com/images/paybutton/payop.png)
-
Casino
iphone | iphone | iphone | iphone | roborock | iphone | roborock | roborock | iphone | iphone | iphone | iphone | roborock | iphone | iphone | iphone | iphone | iphone | iphone | iphone | iphone | roborock | roborock | roborock | iphone | roborock | iphone | iphone | roborock | iphone | iphone | iphone | iphone | iphone | iphone | iphone | iphone | roborock | iphone | iphone | iphone | roborock | roborock | roborock | roborock | roborock | iphone | roborock | roborock | roborock | Top 5 canadian online casinos 2025 | iphone | iphone | roborock | roborock | roborock | iphone | iphone | roborock | roborock