![My first wallpaper : The Tutorial [Simple]](https://www.ownedcore.com/forums/images/styles/OwnedCoreFX/addimg/menu4.svg)
Step 1 : Make new document in Photoshop. Set size to your comps resolution (I used 1280x1024)
Step 2 : Choose paint bucket tool and pain it to black.
Step 3 : Go to planetrenders.net and find your render (You need to register) (You can also find your render from somewhere else, if you want)
Step 4 : Once you have found your render, go back to Photoshop and open it. Use Eraser tool and erase any background and/or "credits" (Rendered by etc.) from render.
Step 5 : Once you are done, Rectangular Marquee Tool (M) to circle the render.
Step 6: Then copy paste it into your wallpaper background, now you need to resize it.
Step 7 : Go to Edit > Transform > Scale, and size it so it looks good.
Step 8 : Now select Layer 1 in your Layers window. Right click on it and select Blending Options.
Step 9 : Click on Outer Glow (Not only checkbox) So you can see settings.
Set the color to what you want (I chose red), and then modify settings to something like this :
Step 10 : Now you should see something like this :
Congratulations! You are now done with your first wallpaper! If you want it to be more complicated, you can add text, different background, and more pictures! Hope you liked my first graphic tutorial. And remember, if you need any support, dont hesitate to contact me!

![My first wallpaper : The Tutorial [Simple]](https://www.ownedcore.com/forums/./ocpbanners/1/0/6/3/8/1/6/1e102dbc1865060efdd7bf3ae1edf5cc.jpg)
![My first wallpaper : The Tutorial [Simple]](https://www.ownedcore.com/assets/mm/images/wits.png "TradeSafe Middleman")
![My first wallpaper : The Tutorial [Simple]](https://www.ownedcore.com/forums/images/styles/OwnedCoreFX/addimg/wicc.png "CoreCoins")

Shout-Out
User Tag List
Results 1 to 5 of 5
-
09-08-2007 #1
 lol why u mad

- Reputation
- 374
- Join Date
- Sep 2006
- Posts
- 1,646
- Thanks G/R
- 3/1
- Trade Feedback
- 2 (100%)
- Mentioned
- 0 Post(s)
- Tagged
- 0 Thread(s)
My first wallpaper : The Tutorial [Simple]

![My first wallpaper : The Tutorial [Simple]](https://www.ownedcore.com/images/ba/g/b2.gif)
-
09-09-2007 #2
Member
- Reputation
- 1
- Join Date
- May 2007
- Posts
- 19
- Thanks G/R
- 0/0
- Trade Feedback
- 0 (0%)
- Mentioned
- 0 Post(s)
- Tagged
- 0 Thread(s)
Re: My first wallpaper : The Tutorial [Simple]
Great tut for nubbehs =D
-
09-09-2007 #3
Member
- Reputation
- 352
- Join Date
- Jan 2007
- Posts
- 1,502
- Thanks G/R
- 0/0
- Trade Feedback
- 0 (0%)
- Mentioned
- 0 Post(s)
- Tagged
- 0 Thread(s)


Re: My first wallpaper : The Tutorial [Simple]
=/ not to much effect it's black with a render red glow =P but i guess its good for them nubs who say
how i r make w@llypaperzHey Piggy
-
09-09-2007 #4
 Elite User
- Reputation
- 501
- Join Date
- Jun 2006
- Posts
- 1,081
- Thanks G/R
- 1/1
- Trade Feedback
- 2 (100%)
- Mentioned
- 0 Post(s)
- Tagged
- 0 Thread(s)
Re: My first wallpaper : The Tutorial [Simple]
I Actully Like it! It looks Great.
+rep
ill Rep u tomorrow cause i have the 24hr thing.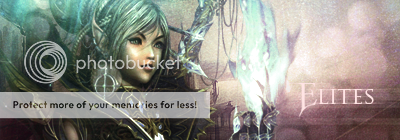
-
09-09-2007 #5
lol why u mad
- Reputation
- 374
- Join Date
- Sep 2006
- Posts
- 1,646
- Thanks G/R
- 3/1
- Trade Feedback
- 2 (100%)
- Mentioned
- 0 Post(s)
- Tagged
- 0 Thread(s)
Re: My first wallpaper : The Tutorial [Simple]
I said it was simple ^^


 Reply With Quote
Similar Threads
-
Should I run the tutorial on a new account first?
By mcnade in forum Pokemon GO ChatReplies: 5Last Post: 08-20-2016, 12:25 AM -
[Rate/showoff] My new/first wallpaper
By Waspp in forum Art & Graphic DesignReplies: 5Last Post: 07-14-2008, 11:38 AM -
[Tutorial] Simple background [Beginners]
By Massimiliano in forum Art & Graphic DesignReplies: 2Last Post: 11-22-2007, 07:01 AM -
My First Wallpaper
By TwisterX in forum Art & Graphic DesignReplies: 9Last Post: 07-26-2007, 03:36 PM
-
OwnedCore Forums
casino news World of Warcraft Pokemon GO MMO Overwatch RTS Casino reviews www.planet-casino.com lucky 8 lucky8 no deposit codes bc game bc game lucky8 -
casino
Casino Gambling Online casinos Casino en ligne bc game bc game bc game no deposit bonus codes roobet Top 10 Casinos Casino reviews Bitcoin casino Paypal Casino Lucky8 1xbit heycasino laundering gold??? WoW EU account give away Looking for workers Renting Scammed Accounts? Tor question, slowly [Request] List of WOW 60 Resto Druid Mailer please ? [Request] Email -
CoreCoins
CoreCoins CoreCoins FAQ Shout-Out Banner Ads -
My OwnedCore
My Profile Notifications Settings Buy CoreCoins About Us


Privacy Policy | Cookie Policy | Terms | Contact Us
Available Payment Methods:-
![My first wallpaper : The Tutorial [Simple]](https://www.ownedcore.com/images/paybutton/paypal.png)
![My first wallpaper : The Tutorial [Simple]](https://www.ownedcore.com/images/paybutton/skrill.png)
![My first wallpaper : The Tutorial [Simple]](https://www.ownedcore.com/images/paybutton/payop.png)
-
Casino
shuffle | casino | russian | this url | shuffle | stake | CryptoRoyal Casino | shuffle | shuffle | shuffle | shuffle | shuffle | freebet tanpa | stake | shuffle | shuffle | casino | stake | stake | casino | Free casino games | stake | iLucki Casino | shuffle | shuffle | HashLucky Casino | shuffle | casino | shuffle | this | shuffle | shuffle | shuffle | shuffle | stake | shuffle | Blockchain gambling | stake | shuffle | shuffle | Instant Payout Methods | shuffle | shuffle | shuffle | casino | shuffle | MRQ Casino | shuffle | this | shuffle | here | shuffle | this url | shuffle | shuffle | shuffle | shuffle | shuffle | shuffle | polish