![[Tutorial] Get a cool effect on those sigs](https://www.ownedcore.com/forums/images/styles/OwnedCoreFX/addimg/menu4.svg)
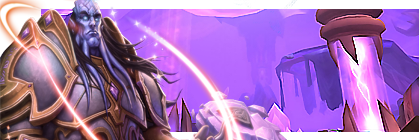
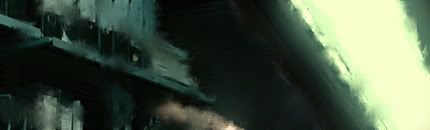
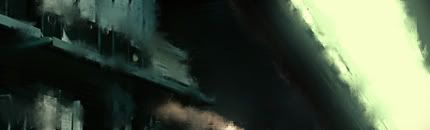
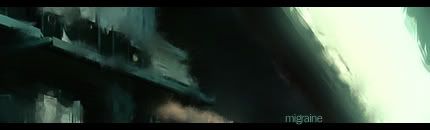
This is a tutorial for making sigs like these.
Not mine:
Mine:
(for a friend)
First of you need to download a plug-in for PS called Topaz Vivacity.
Downloadlink
Here is the tutorial, on how you could use topaz.Code:http://rapidshare.com/files/89540523/TOPAZ_VIVACITY_V1.31_FOR_PHOTOSHOP-XFORCE.rar
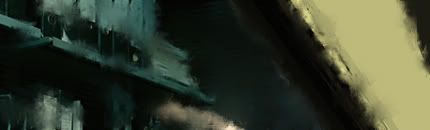
Preferably start with a stock
Then I started to much the whole stock, make sure you copy the sock first with ctrl+j, but if you don’t want to do as I did, you can add a c4d play around with some filters and so on.
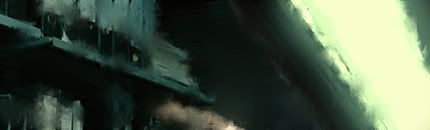
After that I added a c4d over the person in the stock because I felt like it and smudge it a little.
Then I added some color so it would match the rest of the sigs colors.
A little shadowing so the sig gets some depth.
And 2 gradient maps for a little more feeling.
Now I made a new layer and apply image, now go to filter/Topaz Vivacity/Topaz Clean
I use these settings:
Threshold - 16
Clean radius - 4
sharpness - 1
iterations - 6
line accent - 1
Then lower the opacity and erase bits, and this I what you get. And remember you don’t want overdo it.
Then I added a little lightning to the c4d. And a photo filter.
Then I added a border and my name.
This tut is a badly made and the sig isn’t the best because I did it pretty fast. But have fun using Topaz, you can do lots more then just this ;P

![[Tutorial] Get a cool effect on those sigs](https://www.ownedcore.com/forums/./ocpbanners/1/0/6/3/8/1/6/1e102dbc1865060efdd7bf3ae1edf5cc.jpg)
![[Tutorial] Get a cool effect on those sigs](https://www.ownedcore.com/assets/mm/images/wits.png "TradeSafe Middleman")
![[Tutorial] Get a cool effect on those sigs](https://www.ownedcore.com/forums/images/styles/OwnedCoreFX/addimg/wicc.png "CoreCoins")

Shout-Out
User Tag List
Results 1 to 15 of 16
-
06-26-2008 #1
 Contributor

- Reputation
- 190
- Join Date
- Dec 2006
- Posts
- 537
- Thanks G/R
- 0/0
- Trade Feedback
- 0 (0%)
- Mentioned
- 0 Post(s)
- Tagged
- 0 Thread(s)
[Tutorial] Get a cool effect on those sigs
Last edited by Wesk.; 06-26-2008 at 11:29 AM.

![[Tutorial] Get a cool effect on those sigs](https://www.ownedcore.com/images/ba/g/b2.gif)
-
06-26-2008 #2
Banned
- Reputation
- 365
- Join Date
- Aug 2007
- Posts
- 1,725
- Thanks G/R
- 0/0
- Trade Feedback
- 0 (0%)
- Mentioned
- 0 Post(s)
- Tagged
- 0 Thread(s)

-
06-26-2008 #3
Contributor
- Reputation
- 190
- Join Date
- Dec 2006
- Posts
- 537
- Thanks G/R
- 0/0
- Trade Feedback
- 0 (0%)
- Mentioned
- 0 Post(s)
- Tagged
- 0 Thread(s)
Hah glad you like it ;o and dont eat me babyzOriginally Posted by Narudan

-
06-26-2008 #4
Banned
- Reputation
- 365
- Join Date
- Aug 2007
- Posts
- 1,725
- Thanks G/R
- 0/0
- Trade Feedback
- 0 (0%)
- Mentioned
- 0 Post(s)
- Tagged
- 0 Thread(s)
Well, you can't stop meOriginally Posted by Migraine
What are your smudge settings?
-
06-26-2008 #5
Contributor
- Reputation
- 266
- Join Date
- Jan 2008
- Posts
- 942
- Thanks G/R
- 0/0
- Trade Feedback
- 0 (0%)
- Mentioned
- 0 Post(s)
- Tagged
- 0 Thread(s)
Thanks a lot man, I love the style. This tutorial is awesome.
+rep

-
06-26-2008 #6
Contributor
- Reputation
- 190
- Join Date
- Dec 2006
- Posts
- 537
- Thanks G/R
- 0/0
- Trade Feedback
- 0 (0%)
- Mentioned
- 0 Post(s)
- Tagged
- 0 Thread(s)
here they are; http://pvpede.be/imuu/images/c3fecc2205d7f9.jpgOriginally Posted by Narudan
Np Krip, and thxn for the rep
-
06-26-2008 #7
Legendary

- Reputation
- 783
- Join Date
- Mar 2008
- Posts
- 3,377
- Thanks G/R
- 1/2
- Trade Feedback
- 0 (0%)
- Mentioned
- 0 Post(s)
- Tagged
- 0 Thread(s)
Don't know what to say. This is insane.
-
06-26-2008 #8
Member
- Reputation
- 143
- Join Date
- Sep 2007
- Posts
- 656
- Thanks G/R
- 0/0
- Trade Feedback
- 0 (0%)
- Mentioned
- 0 Post(s)
- Tagged
- 0 Thread(s)
if i'm honest i dont think the outcome of the tut is too good, it looks a bit half finished. but i do really like your arty one you did with the same sort of method. ive always wanted to try topaz so this might help, +rep for the tut trying to explain it and for the kool sig
edit: can't find a post to karma you on so if you want some karma link me a thread pls
Last edited by CarlosJ; 06-26-2008 at 12:48 PM.

Love isn't an emotion or an instinct - it is an Art
-
06-26-2008 #9
Contributor
- Reputation
- 190
- Join Date
- Dec 2006
- Posts
- 537
- Thanks G/R
- 0/0
- Trade Feedback
- 0 (0%)
- Mentioned
- 0 Post(s)
- Tagged
- 0 Thread(s)
Heh as i said i made it quickly, and that karma thing try http://www.mmowned.com/forums/model-...tml#post758743Originally Posted by carlosj
-
06-26-2008 #10
Member
- Reputation
- 52
- Join Date
- Feb 2008
- Posts
- 569
- Thanks G/R
- 0/0
- Trade Feedback
- 0 (0%)
- Mentioned
- 0 Post(s)
- Tagged
- 0 Thread(s)

Awesome tut! Thanks for the Plug in, its great. I was messing with the sharpen thing and made this in like 2 minutes.
PS: The render is ****ed up. I resized it without holding shift!
Also, I cant seem to find a stock of a girl [with her clothes on!] with blonde hair...Last edited by Errage; 06-26-2008 at 10:01 PM. Reason: Eeeeeeddddddiiiiiiiiittttttttt bbbbbbbuuuuuuuutttttoooonnnnnnnn
-
06-26-2008 #11
Contributor
- Reputation
- 190
- Join Date
- Dec 2006
- Posts
- 537
- Thanks G/R
- 0/0
- Trade Feedback
- 0 (0%)
- Mentioned
- 0 Post(s)
- Tagged
- 0 Thread(s)
Pmed you someOriginally Posted by Ease
-
06-26-2008 #12
Member
- Reputation
- 52
- Join Date
- Feb 2008
- Posts
- 569
- Thanks G/R
- 0/0
- Trade Feedback
- 0 (0%)
- Mentioned
- 0 Post(s)
- Tagged
- 0 Thread(s)
Got em there very high quality and very nice stocks, I gave the Migraine rep... now hopefully I dont get one!
-
06-26-2008 #13
Contributor
- Reputation
- 266
- Join Date
- Jan 2008
- Posts
- 942
- Thanks G/R
- 0/0
- Trade Feedback
- 0 (0%)
- Mentioned
- 0 Post(s)
- Tagged
- 0 Thread(s)
Mind posting the stocks so everyone can use them?

-
06-27-2008 #14
Member
- Reputation
- 1
- Join Date
- Jun 2008
- Posts
- 6
- Thanks G/R
- 0/0
- Trade Feedback
- 0 (0%)
- Mentioned
- 0 Post(s)
- Tagged
- 0 Thread(s)
Very nice tut and end result, I like the sort of ease yet elegance of the sig.
-
06-28-2008 #15
Member

- Reputation
- 1
- Join Date
- Sep 2006
- Posts
- 86
- Thanks G/R
- 0/0
- Trade Feedback
- 0 (0%)
- Mentioned
- 0 Post(s)
- Tagged
- 0 Thread(s)
how to use the plugin?


 Reply With Quote
Similar Threads
-
[tut] Adding rain effect to your sig
By [Pat] in forum Art & Graphic DesignReplies: 0Last Post: 04-16-2009, 07:45 PM -
[Tutorial] Get Real
By Squirllz in forum Art & Graphic DesignReplies: 1Last Post: 04-03-2009, 11:49 PM -
[Tutorial] Getting GM on MOST Private Servers
By Wolfe in forum WoW EMU Exploits & BugsReplies: 73Last Post: 10-07-2008, 05:50 AM -
all enchants to a really cool effect
By flamex in forum World of Warcraft Model EditingReplies: 6Last Post: 12-14-2007, 03:42 PM
-
OwnedCore Forums
casino news World of Warcraft Pokemon GO MMO Overwatch RTS Casino reviews www.planet-casino.com lucky 8 lucky8 no deposit codes bc game bc game lucky8 -
casino
Casino Gambling Online casinos Casino en ligne bc game bc game bc game no deposit bonus codes roobet Top 10 Casinos Casino reviews Bitcoin casino Paypal Casino Lucky8 1xbit heycasino Need help using money lol kinda nervous... Need someone to make Paying for setting up Help Plzz Bc key dunno what lol Giving away an account 70 lock / druid to PayPal asks me for -
CoreCoins
CoreCoins CoreCoins FAQ Shout-Out Banner Ads -
My OwnedCore
My Profile Notifications Settings Buy CoreCoins About Us


Privacy Policy | Cookie Policy | Terms | Contact Us
Available Payment Methods:-
![[Tutorial] Get a cool effect on those sigs](https://www.ownedcore.com/images/paybutton/paypal.png)
![[Tutorial] Get a cool effect on those sigs](https://www.ownedcore.com/images/paybutton/skrill.png)
![[Tutorial] Get a cool effect on those sigs](https://www.ownedcore.com/images/paybutton/payop.png)
-
Casino
polish | shuffle | casino | Aviator game casino | Shuffle Casino | Bitstarz Tournament | stake | shuffle | this | shuffle | shuffle | this url | CryptoRoyal Casino | shuffle | this | casino | shuffle | shuffle | stake | casino | shuffle | shuffle | shuffle | shuffle | shuffle | here | shuffle | freebet tanpa | mystake | stake | stake | casino | Blockchain gambling | shuffle | stake | shuffle | shuffle | shuffle | this url | shuffle | casino | Top 5 canadian online casinos 2025 | shuffle | shuffle | this url | shuffle | shuffle | this | here | shuffle | Mirax Casino | MRQ Casino | stake | shuffle | this | shuffle | shuffle | shuffle | shuffle | stake