![[Guide] Create a server launcher. EASY WAY](https://www.ownedcore.com/forums/images/styles/OwnedCoreFX/addimg/menu4.svg)
Overview
1 - Things you need
2 - Getting started
3 - Sample code (complete code)
4 – Personalizing the code
5 – Design the form
6 - finalizing
7 - Notes!! (important!!)
1
Quite logically you need visual basic 2008 .net since we will work in it. To get it simply download it from Microsoft, its completely free link is: Downloads
Now you will need some images for the background etc. Just some material really, its not “needed” but if you want it to look good, it needs some images lets continue, shall we?
2
Now, you’re done downloading Vb.net, you’ll have to install it, now ill let YOU figure out how to do this. Once your done, you start up Vb.net now step by step:
1. Click “files”
2. Click “new project”
3. By default it should select “windows forms application” if it hasn’t, select it.
4. Name: something you want.
5. Now you will see a “form” called “Form1” this is the form you will “design” for your application/launcher.
3
Now you double click the form, and a code window will appear. This is where the code will be entered. The code tells the application what to do when something happens, fx. If user clicks button1.
Press Ctrl + a, and delete all the code in there. Now copy past this in
Now this might look VERY confusing, and it is if you’ve never worked with Vb.net, but ill help you guys break it down.Imports System.IO
Imports System.Environment
Public Class Form1
Private Sub button1_Click(ByVal sender As System.Object, ByVal e As System.EventArgs) Handles Button1.Click
Dim fs As New FileStream("realmlist.wtf", FileMode.Create, FileAccess.Write)
Dim s As New StreamWriter(fs)
s.WriteLine("set realmlist winter-wow.servegame.org")
s.Close()
Dim ss As String = startgame("HKEY_LOCAL_MACHINE\SOFTWARE\blizzard entertainment\world of warcraft", "installpath", "WoW.exe")
If ss <> String.Empty Then
My.Settings.wow = ss
My.Settings.Save()
End If
End Sub
Private Function startgame(ByVal RegPath As String, ByVal RegValue As String, ByVal ExeFile As String) As String
Dim retval
Dim installpath As String = String.Empty
installpath = My.Computer.Registry.GetValue(RegPath, RegValue, Nothing)
If Directory.Exists(installpath) Then
ChDir(installpath)
retval = Shell(ExeFile, 1)
Else
With OpenFileDialog1
.InitialDirectory = GetFolderPath(Environment.SpecialFolder.ProgramFiles)
.Title = "Please Select " & ExeFile
.Filter = "Windows Executable *.Exe|*.exe"
.FileName = ExeFile
If .ShowDialog() = Windows.Forms.DialogResult.OK Then
Process.Start(.FileName)
Return .FileName
End If
End With
End If
Return String.Empty
End Function
Private Sub Form1_Load(ByVal sender As System.Object, ByVal e As System.EventArgs) Handles MyBase.Load
End Sub
End Class
4
Lets start personalizing the code, as you properly don’t want your launcher to connect all your players to winter-wow (hehe ) so find:
s.WriteLine("set realmlist winter-wow.servegame.org")
In the code, and change the content between “” to match what you need. Fx. “Set realmlist myserver.org” Just leave the rest, as that is mainly the code to start wow when button1 is clicked.
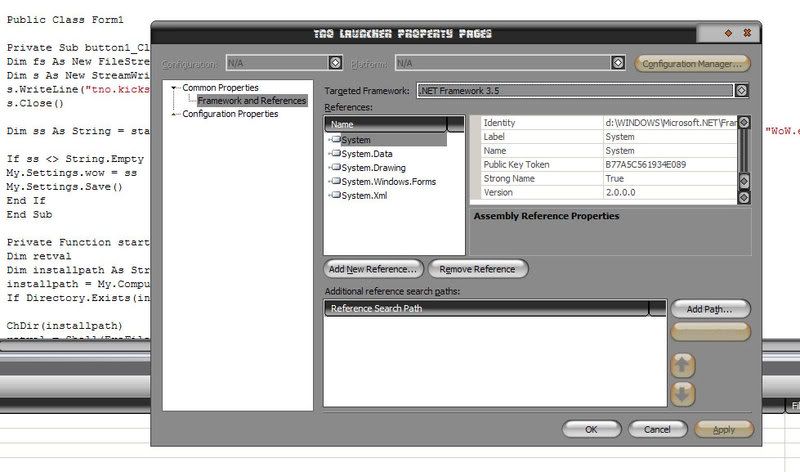
Also go into “project” -> “[name] properties” and then select the tab called “settings”
Inside “settings” you change the first box saying “setting” to “wow” then you click the x and when it asks if you want to save changes, you click yes. Now you should be back in the code window.
5
Now we are going to design the form! There is a lot of things you can do, but for now, lets add a cool background image, and some buttons!
1. Go back to your design by clicking the bar saying “form1[design]”.
2. In the lower right corner you will see a properties window.
3. Inside the properties window you can change tons of things, but for now, we will change the background. So find “background image” and mark it by a single click
4. Now click the little buttons with the 3 dots (…) a window saying “select resources” will pop up. Chose local resource, and click import.
5. Now browse to your picture and mark it, and click open, it will then add it as your background
6. Under “background image” in the properties window, you will see “background image layout” this determines weather your image is stretch or centered or what ever. Consider changing it to what you like.
7. Now, lets change the name of the window, because “form1” isn’t that cool is it?
8. Go to the button of the properties window, there you will find “text” now, change text to what you want your window to display in the top left corner.
9. Also, that ugly icon isn’t cool is it? Lets change it! Scroll up a bit and you will find “icon” now it’s the same as with the background image, once done, you will notice your new icon followed by the name you entered in “text”
10. When your done, you will get an .exe file, but we don’t want it to say the default beneath it do we? (no we don’t) so go to “project” in the top bar, and click the last thing in the menu it will be “{name) Properties”
11. Now a settings window will appear, so lets get down to business. In the tab called “application” you click on “assembly information” now you can change what you like, just not the GUID nor the native language.
12. You may notice it has a little box saying “icon” now go ahead and change it, this is the icon your .exe file will have when its inside your world of warcraft folder or your desktop or what ever.
13. Assembly name, you should change that to {name) Launcher. Fx. Winter WoW Launcher or “Toxic WoW launcher” or what ever, you know what I meen.
14. once done changing what you want, just click the little x.
15. Now we are back on the form again, lets add a button! In the left you can see your “toolbox” this is where you can get all the nifty stuff, now click on button, and draw a button on your form.
16. If you click on the button 1 time, you will notice the properties window changes, so that now you can edit the button, go ahead, change the button settings to your liking fx. An image on it (cos the traditional button isn’t very wowish is it?)
17. now in the toolbox find “open file dialog” and add one of those to the form, don’t worry about it not showing up, it adds it self to the “code” so to say, as it’s a dynamic item.
18. Now you can add a “label” to your form, just like with the button, you can find it in the toolbox. A label is used to have text on your form like “Thank you for using our launcher and playing on our server” or what do I know. Once again, you can modify it in the properties window.
19. This is all you have to have for the application to work (the label isn’t needed)
6
Now, if you did all of this correctly, go to “file” “Save As” and change “location” to where you want it, I normally save mine in c:\ fx c:\winterwow\ or c:\ult launcher\ or something. When you’ve done that, you go to “build” and “build [name]”
When its done building (will take like 1 second or something) you go to your location. Fx. C:\winterwow\Winterwow\Winterwow\bin\Release\ and in there I can see “Winter wow launcher.exe” because that is what I’ve chosen to call my application!
I hope this was fairly easy to understand, now I will show you how mine ended up looking. Have fun messing around with Vb .net, and congratulations with making your first programmed application!
7
Please note, that when you click the button, it creates a new realmlist.wtf for you, so you need to have the .exe file in your world of warcraft folder, but you can make a shortcut to the desktop
-coddingt0n
not my guide BTW but its a great one

![[Guide] Create a server launcher. EASY WAY](https://www.ownedcore.com/forums/./ocpbanners/1/3/9/6/9/4/8/08b6377e7ee13e5b1d2306cbeed08f8c.png)
![[Guide] Create a server launcher. EASY WAY](https://www.ownedcore.com/assets/mm/images/wits.png "TradeSafe Middleman")
![[Guide] Create a server launcher. EASY WAY](https://www.ownedcore.com/forums/images/styles/OwnedCoreFX/addimg/wicc.png "CoreCoins")

Shout-Out
User Tag List
Results 1 to 7 of 7
-
06-12-2008 #1
 Banned
- Reputation
- 117
- Join Date
- Feb 2008
- Posts
- 641
- Thanks G/R
- 0/0
- Trade Feedback
- 0 (0%)
- Mentioned
- 0 Post(s)
- Tagged
- 0 Thread(s)


[Guide] Create a server launcher. EASY WAY
![[Guide] Create a server launcher. EASY WAY](https://www.ownedcore.com/images/ba/g/b2.gif)
-
06-12-2008 #2
Banned
- Reputation
- 444
- Join Date
- Oct 2007
- Posts
- 1,948
- Thanks G/R
- 0/0
- Trade Feedback
- 0 (0%)
- Mentioned
- 0 Post(s)
- Tagged
- 0 Thread(s)
VB.NET ftw. No questions asked.
+Rep x3 and PM me about the Bawx last night and geif updates.
-
06-12-2008 #3
Member
- Reputation
- 1
- Join Date
- Feb 2008
- Posts
- 19
- Thanks G/R
- 0/0
- Trade Feedback
- 0 (0%)
- Mentioned
- 0 Post(s)
- Tagged
- 0 Thread(s)
OMG----- You need to make a video for this!
-
06-28-2008 #4
Member
- Reputation
- 2
- Join Date
- May 2008
- Posts
- 17
- Thanks G/R
- 0/0
- Trade Feedback
- 0 (0%)
- Mentioned
- 0 Post(s)
- Tagged
- 0 Thread(s)
Hi
I'm obviously new to c++ and I have got myself stuck at this point in your guide
going into the project properties I get this boxAlso go into “project” -> “[name] properties” and then select the tab called “settings”
Inside “settings” you change the first box saying “setting” to “wow” then you click the x and when it asks if you want to save changes, you click yes.
as I cant find a box with settings on I assume I have gone wrong somewhere
could you please point out where
tiaLast edited by Blubeard; 07-01-2008 at 08:34 AM.
-
06-29-2008 #5
Member
- Reputation
- 1
- Join Date
- Jan 2008
- Posts
- 32
- Thanks G/R
- 0/0
- Trade Feedback
- 0 (0%)
- Mentioned
- 0 Post(s)
- Tagged
- 0 Thread(s)
Hmm...I believe I've done everything right, but how do I make it into an executable file?
-
06-30-2008 #6
Member
- Reputation
- 4
- Join Date
- May 2008
- Posts
- 14
- Thanks G/R
- 0/0
- Trade Feedback
- 0 (0%)
- Mentioned
- 0 Post(s)
- Tagged
- 0 Thread(s)
OMG IVE BEEN LOOKING FOR ONE OF THESE
thank you, +rep if i could!!
im using this by the time you read this BTW
-
08-05-2008 #7
Member
- Reputation
- 5
- Join Date
- Dec 2007
- Posts
- 12
- Thanks G/R
- 0/0
- Trade Feedback
- 0 (0%)
- Mentioned
- 0 Post(s)
- Tagged
- 0 Thread(s)
as tia said where is the settings tab?

 Reply With Quote
Similar Threads
-
[Repack] eMux-The easy way to create an Arcemu Server on MacOSX
By Goggy96 in forum WoW EMU General ReleasesReplies: 6Last Post: 10-26-2012, 03:18 AM -
[Guide][Aspire] Hearthstone Server Setup [Easy & Newb friendly]
By ZestyJ in forum WoW EMU Guides & TutorialsReplies: 32Last Post: 09-11-2009, 07:30 AM -
[Guide]: How To Make Your Server Public Whid Hamachi The Easy Way:
By metalmonster in forum WoW EMU Guides & TutorialsReplies: 7Last Post: 01-25-2009, 04:53 PM -
[Guide]: How To Make Your Server Public Whid Hamachi The Easy Way: [Guide]
By metalmonster in forum WoW EMU Guides & TutorialsReplies: 6Last Post: 12-12-2008, 09:51 PM -
[nOOb guide] Create a server with custom everything
By c0ddingt0n in forum WoW EMU Guides & TutorialsReplies: 11Last Post: 07-05-2008, 12:38 PM
-
OwnedCore Forums
casino news World of Warcraft Pokemon GO MMO Overwatch RTS Casino reviews bc game bc game bc game bc game bc game bc game bc game bc game bc game bc game bc game bc game bc game bc game bc game bc game bc game bc game bc game bc game bc game bc game bc game bc game bc game bc game bc game bc game bc game bc game bc game bc game bc game bc game bc game bc game bc game bc game bc game bc game bc game bc game bc game bc game bc game bc game bc game bc game bc game bc game -
casino
Casino Gambling Online casinos Casino en ligne Jackpot City no deposit bonus codes roobet Casino reviews Bitcoin casino Paypal Casino Lucky8 1xbit heycasino Stake.com Casino Welcome Betzino Casino France - Royal Panda Casino - How to Play Casino ✅Jackpotcity Casino Neon54 Casino - Bonus, Booming Games Expands ✅Platinum Play Casino ✅ King Billy Casino - -
CoreCoins
CoreCoins CoreCoins FAQ Shout-Out Banner Ads -
My OwnedCore
My Profile Notifications Settings Buy CoreCoins About Us


Privacy Policy | Cookie Policy | Terms | Contact Us
Available Payment Methods:-
![[Guide] Create a server launcher. EASY WAY](https://www.ownedcore.com/images/paybutton/paypal.png)
![[Guide] Create a server launcher. EASY WAY](https://www.ownedcore.com/images/paybutton/skrill.png)
![[Guide] Create a server launcher. EASY WAY](https://www.ownedcore.com/images/paybutton/payop.png)
-
Casino
Bitstarz | Slot machines | Sportsbook | Lucky Dreams Casino | Welcome Bonuses | Crypto Casino | PalmSlots Casino | Casobet | Cresus Casino | BuzzLuck | Oshi Casino | How to Play BlackJack Online | Casino deposit offers | Stake Casino | Casino Reviews | Lucky31 | Lucky8 | Casino | Rollino Casino | Bovada casino | Jackpotcity | Mystake Casino | Dublinbet | Bc Game | Drake Casino | Millionz | InstantPay | No deposit bonus | Casino Bonus | MrGreen