![[Guide]How To Setup a Private Server - Ascent Rev 38XX Branch (Stable)](images/styles/OwnedCoreFX/addimg/menu4.svg)
I posted this on Project Silvermoon a longtime ago ( 6 or 7 months ), and have maintained it since.
.: How to setup a Ascent server :.
.: by Frostblaze :.
Easy tutorial so you can start you private server now!
.: Downloads :.
I made one easy download with everything that you
will need in this tutorial.
You will also need MySQL Server 5.0, I put a link to the download
selection
Rev 9 :
Filebeam - Free Fast File Hosting
Rev 8 :
Filebeam - Free Fast File Hosting
Rev 7 :
Filebeam - Free Fast File Hosting
Rev 6 :
Filebeam - Free Fast File Hosting
RapidShare: 1-Click Webhosting
Rev 5 :
Filebeam - Free Fast File Hosting
RapidShare: 1-Click Webhosting
Rev 4 :
Filebeam - Free Fast File Hosting
RapidShare: 1-Click Webhosting
- There is no problem when creating chars last time I tested it. Executed some more fixes.
Rev 3 :
http://filebeam.com/download.php?file=42d6...27e7f6ac399642a
RapidShare: 1-Click Webhosting
Rev 2 :
Filebeam - Free Fast File Hosting
RapidShare: 1-Click Webhosting
--Only use it if you have exported all character related tables or this is the first time you import it!--
Rev 1 :
RapidShare: 1-Click Webhosting
Filebeam - Free Fast File Hosting
The old one :
Filebeam - Free Fast File Hosting
( Link 2 ) MySQL :: MySQL 5.0 Downloads
.: Tutorial :.
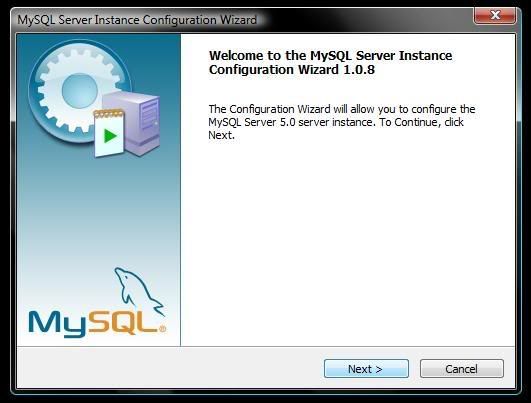
.: Installing MySQL :.
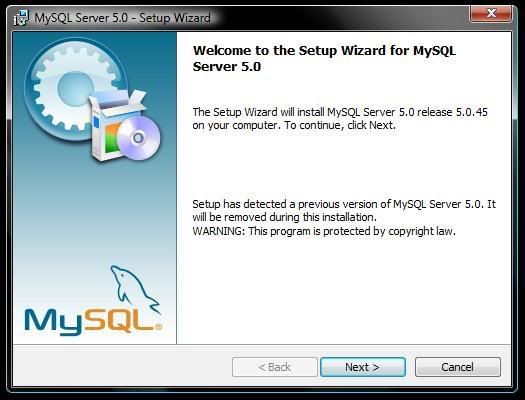
First off you need to download MySQL 5.0 Server ( Link 2 ), after downloading it install it following these
picture, and text instructions.
Click Next.
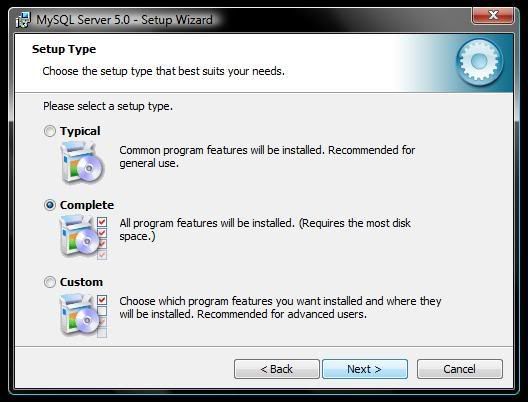
Checkoff Complete, and hit next.
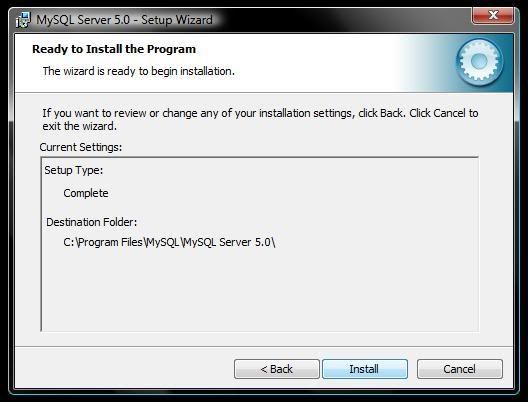
Then hit install.
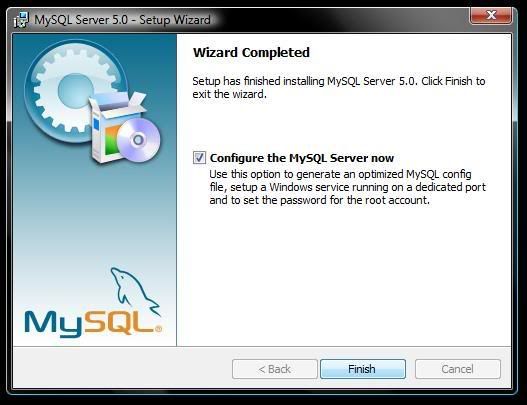
And skip through the little part advertising, and hit finish.
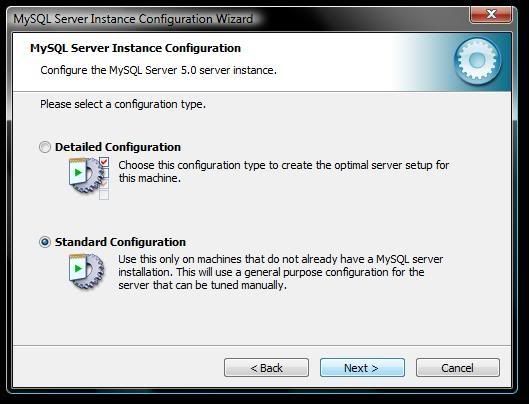
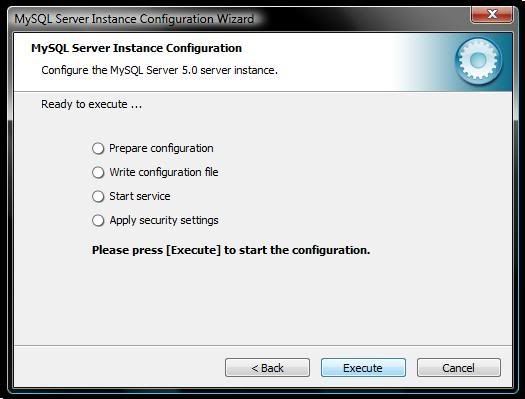
.: MySQL COnfiguration :.
Hit next.
Check off Standard, and then Next.
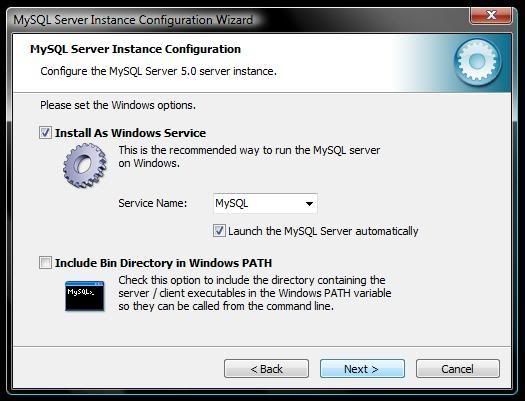
Check Install as Windows Service, MySQL is choisen, and click Launch the MySQL
Server Automaticly.
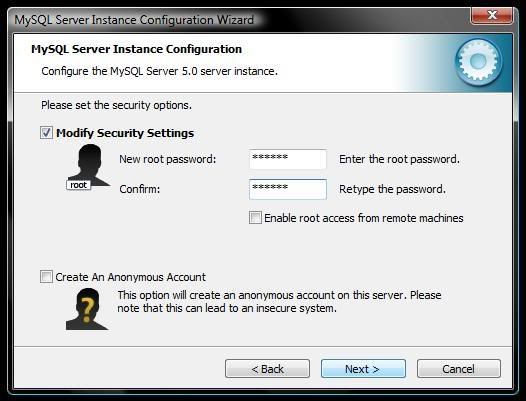
Check modify and type in a password for MySQL, and hit next.
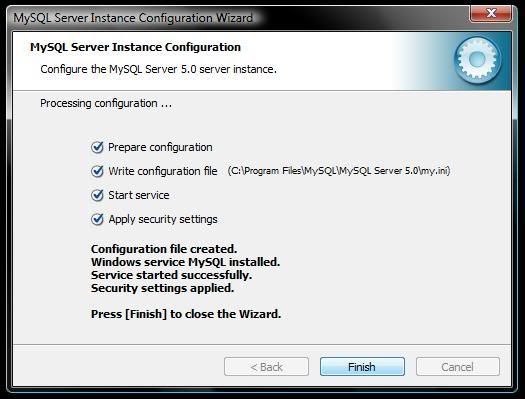
Click Execute.
And Done.
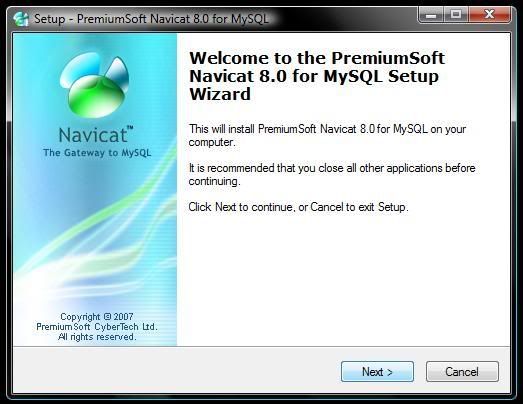
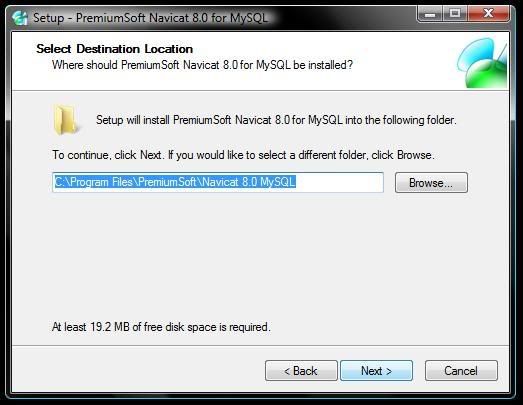
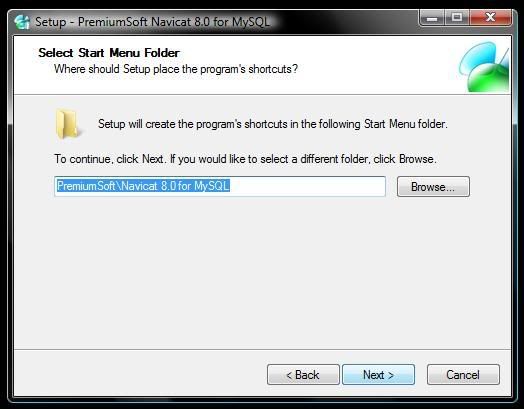
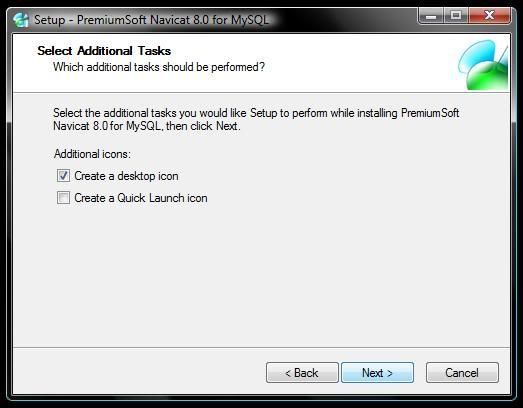
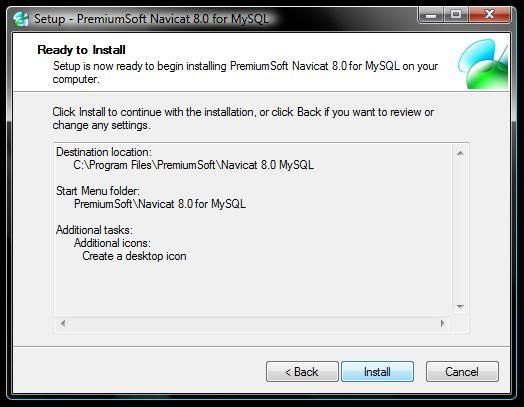
.: Installing Navicat :.
These next 2 sections maybe removed due to Ware, and I will remake Thread without
these to sections and link.
But now to installing Navicat, or you can use SQLyog if you want, but the TuT is not
using it.
Hit next.
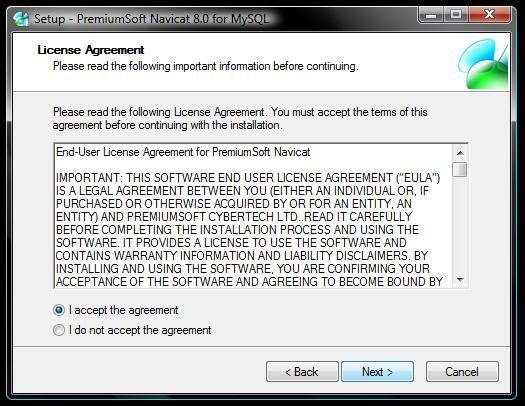
I agree, and hit next.
Next.
Next.
Next.
Install.
Done.
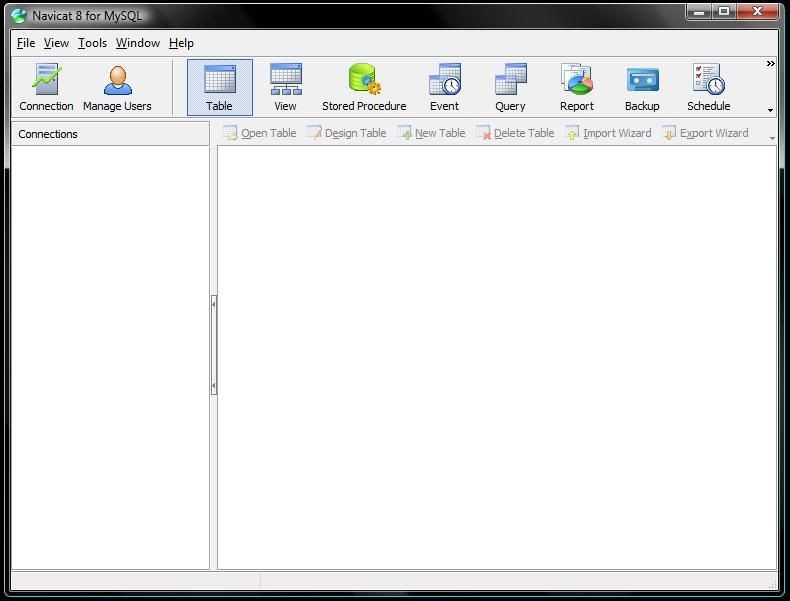
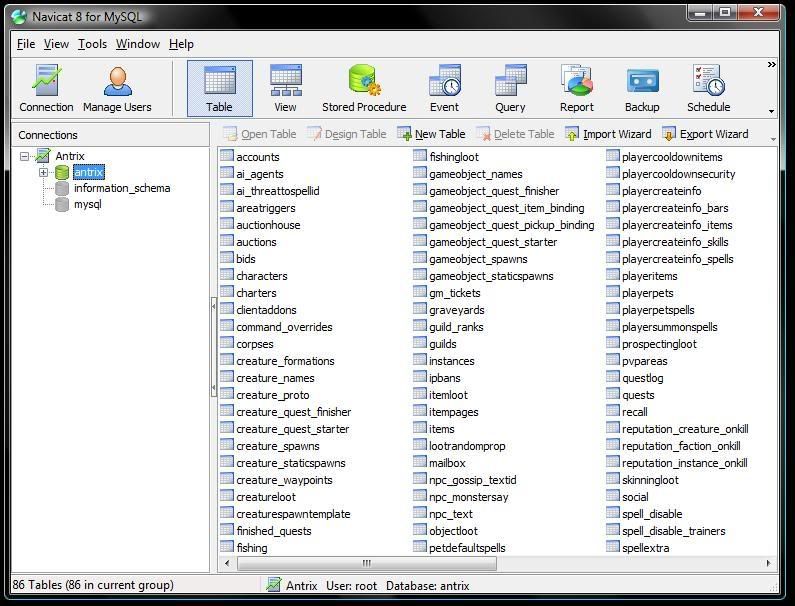
.: Installing a Database by using Navicat:.
Start Navicat
Click connections at the top.
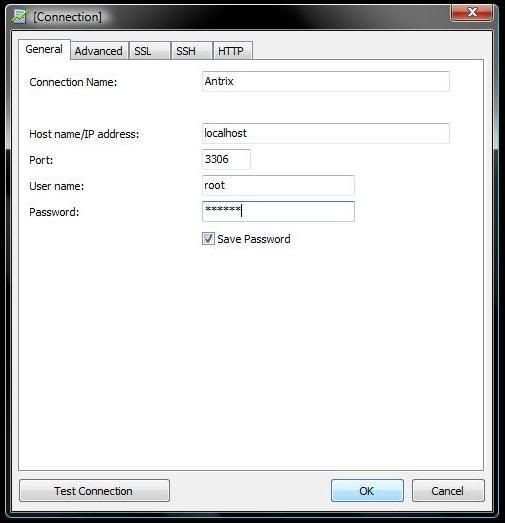
Connection name call it Antrix, and enter the password you made for MySQL Server, and
hit test connection, and it should say it worked. Then hit Ok.
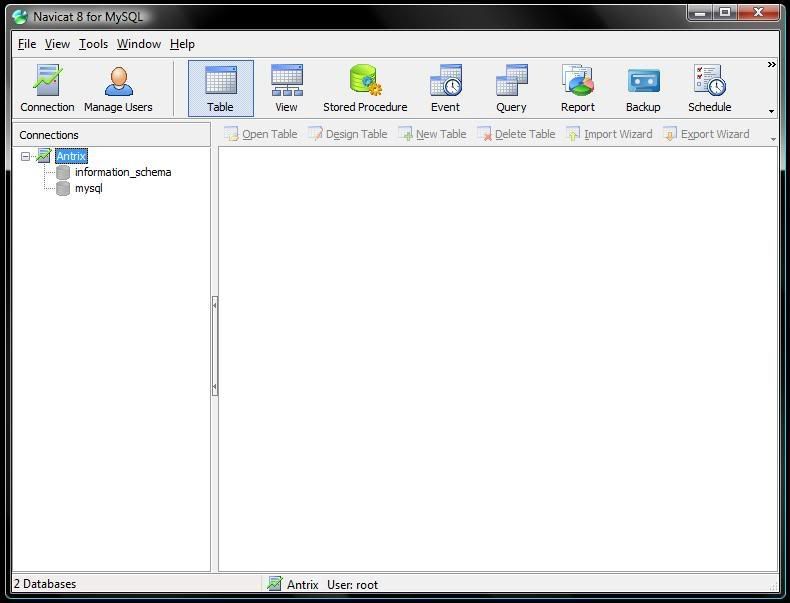
Click on Antrix Connection you just made.
There should be information_schema, and mysql, and there maybe Test.
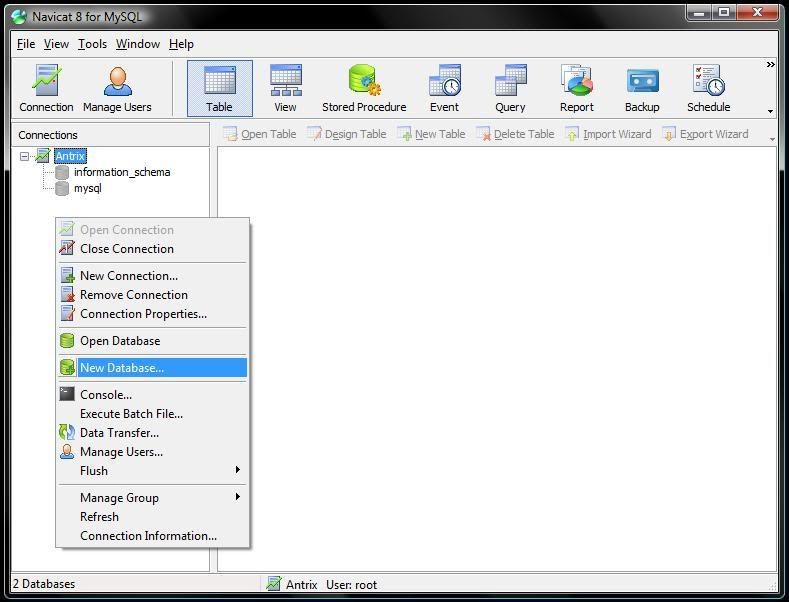
Right click anywhere in connections and hit create new Database.
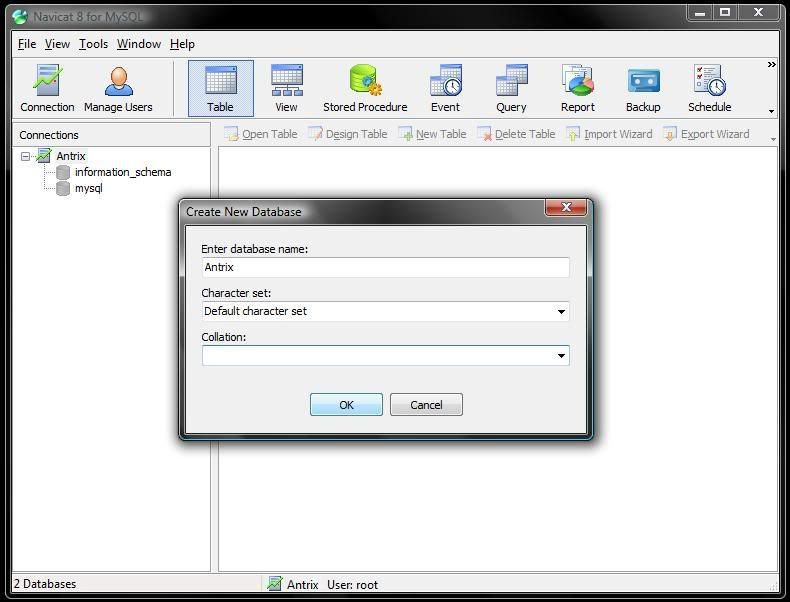
Call it Antrix, and hit ok.
There should now be a new Database in there named antrix.
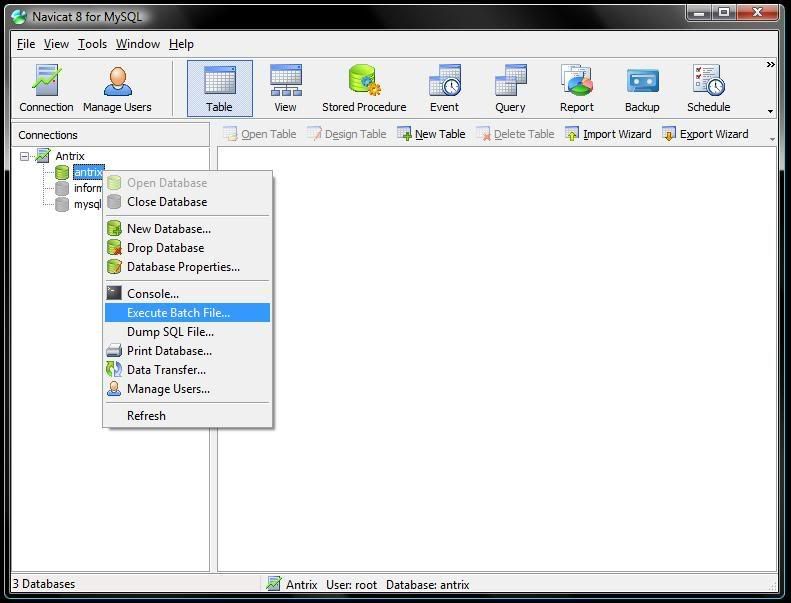
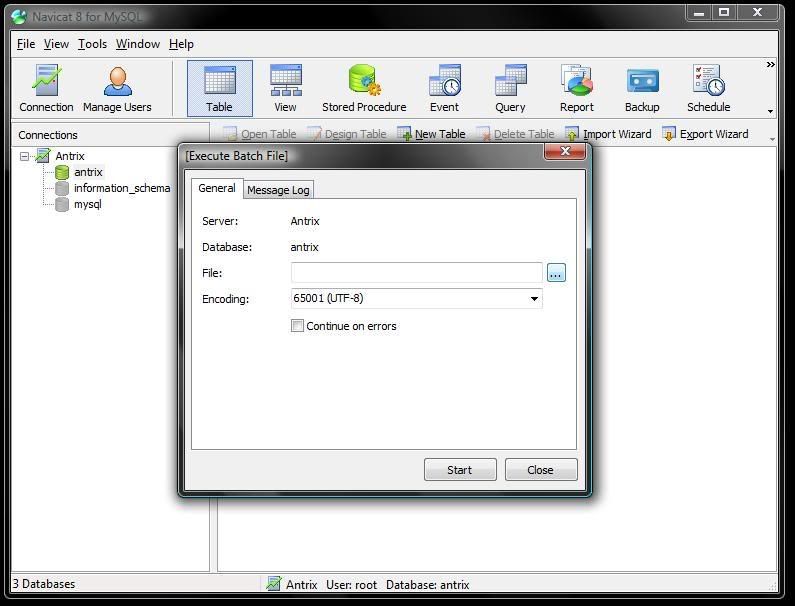
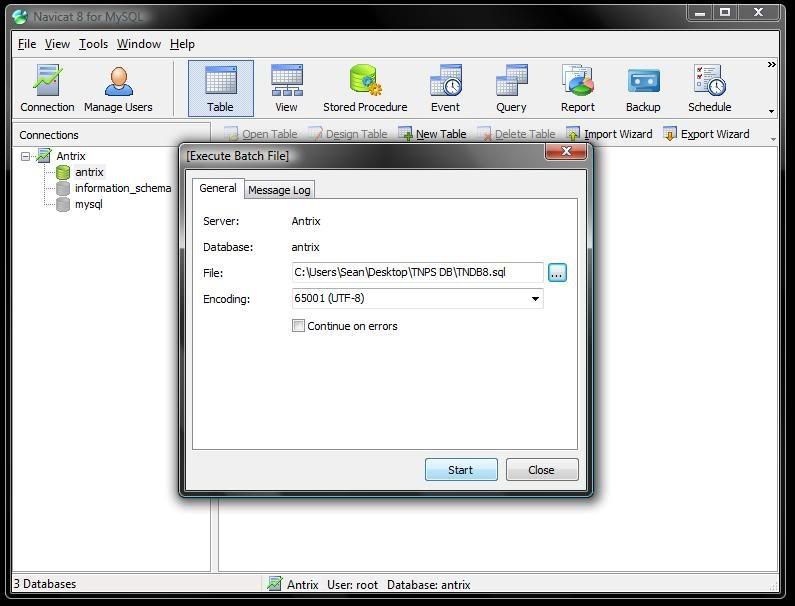
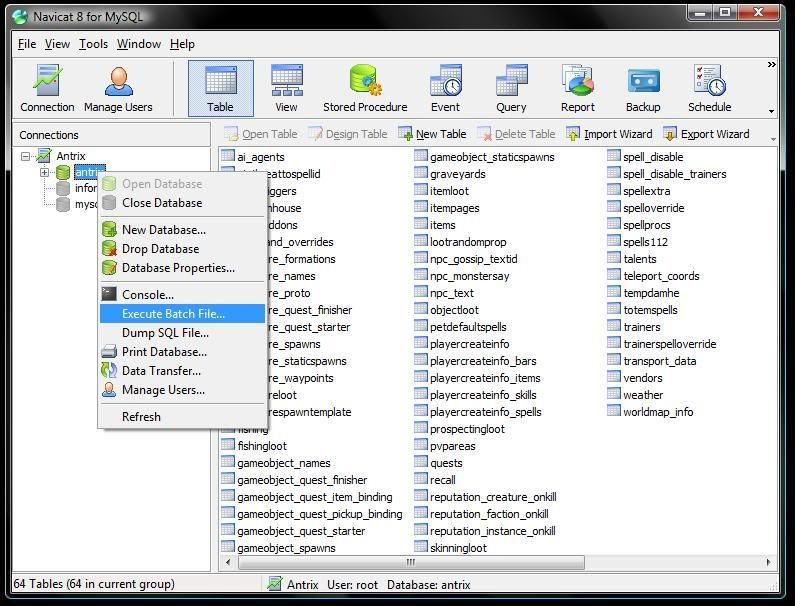
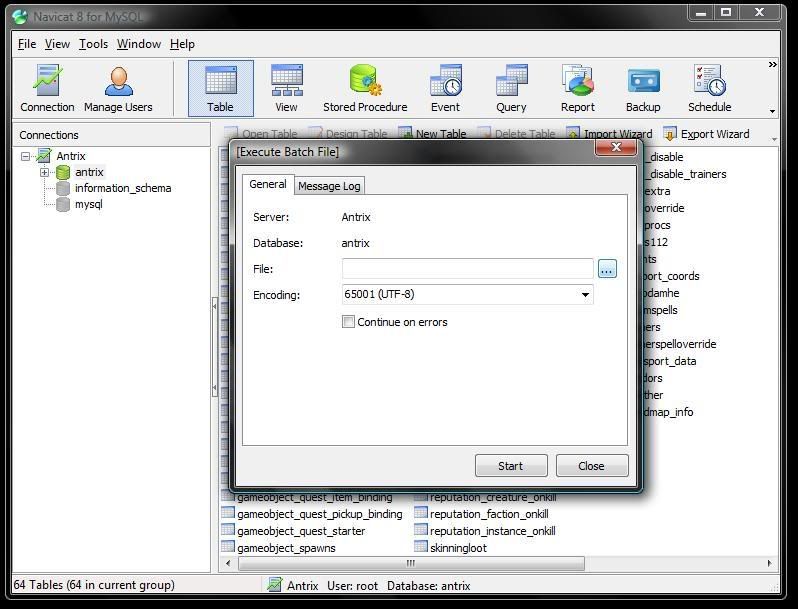
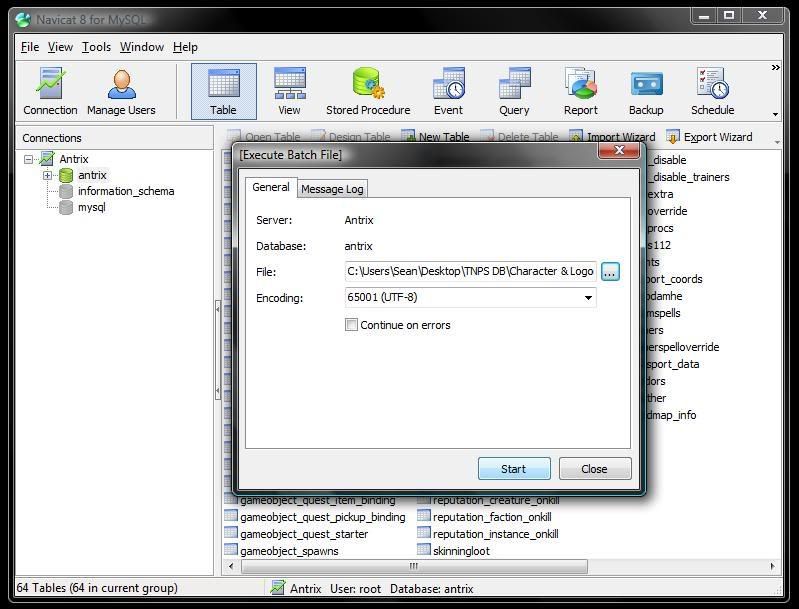
Now Right click on antix database, and click on Execute Batch File.
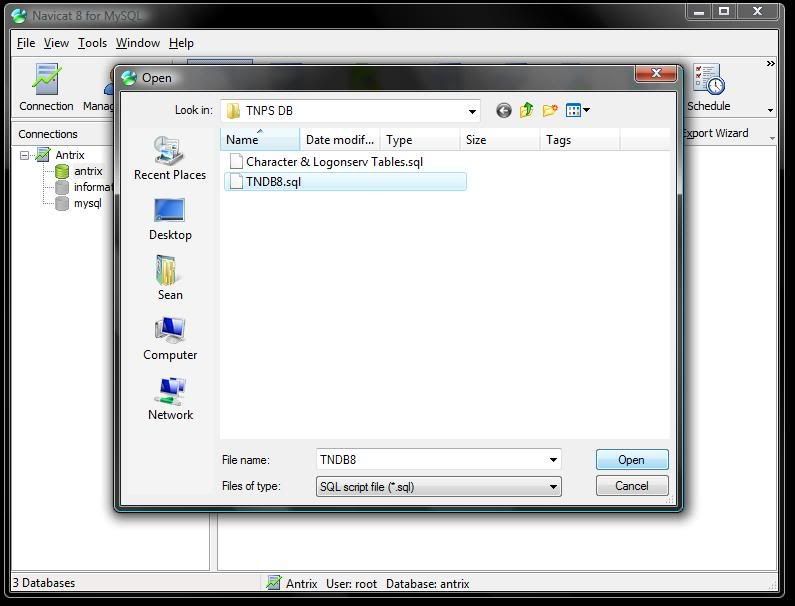
Click on File.
Go to the package's folder from link 1, and choose the ncdb_world.sql and hit ok, and hit ok again.
If you finished the executing of the ncdb_world.sql you have to execute the ncdb_char.sql.
This part may take away, and I think it works better on SQLyog.
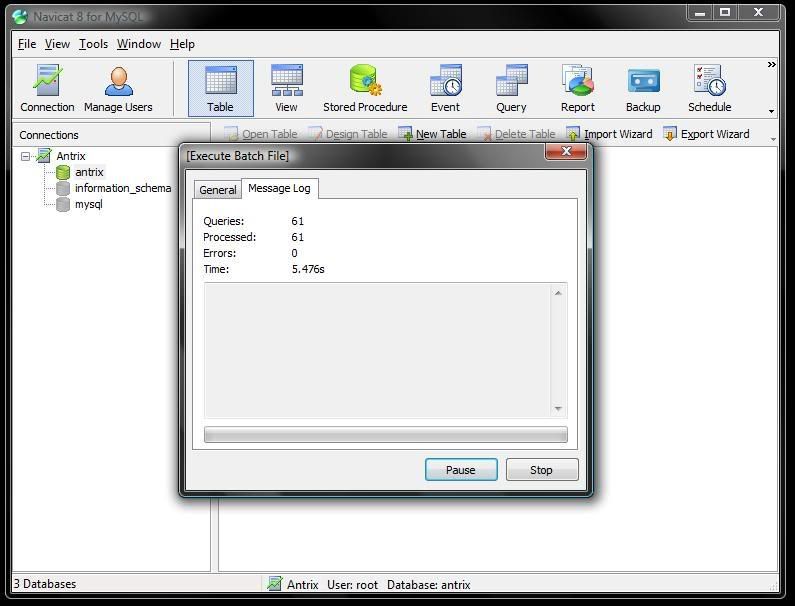
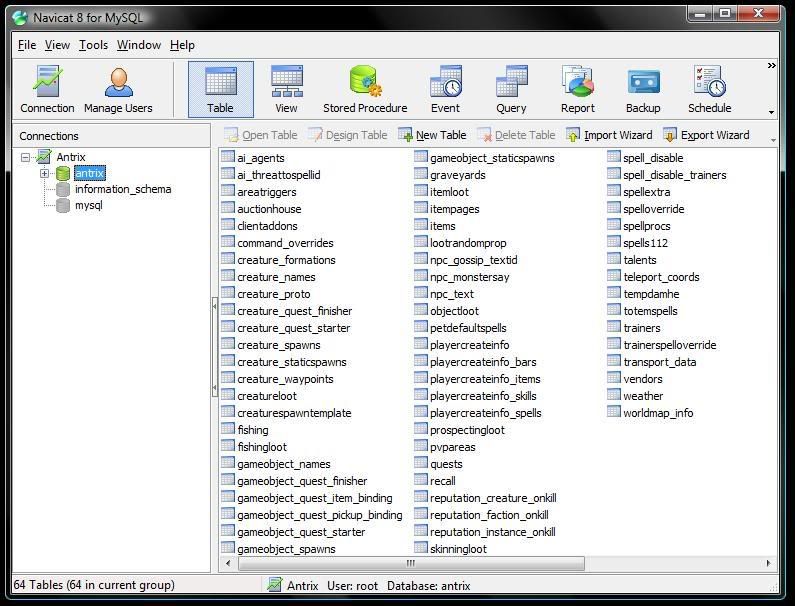
Hit close, at reclick on the Antrix database, there should be tables in the Database.
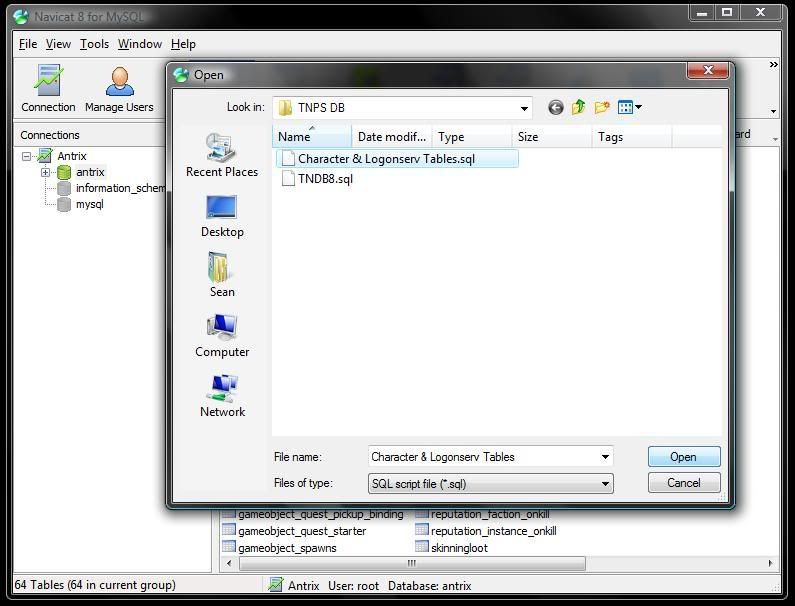
But, thats not all of them, lets do this over again, with the missing tables sql file.
CLick Execute batch again.
Go to files, now choise the other one that is in there.
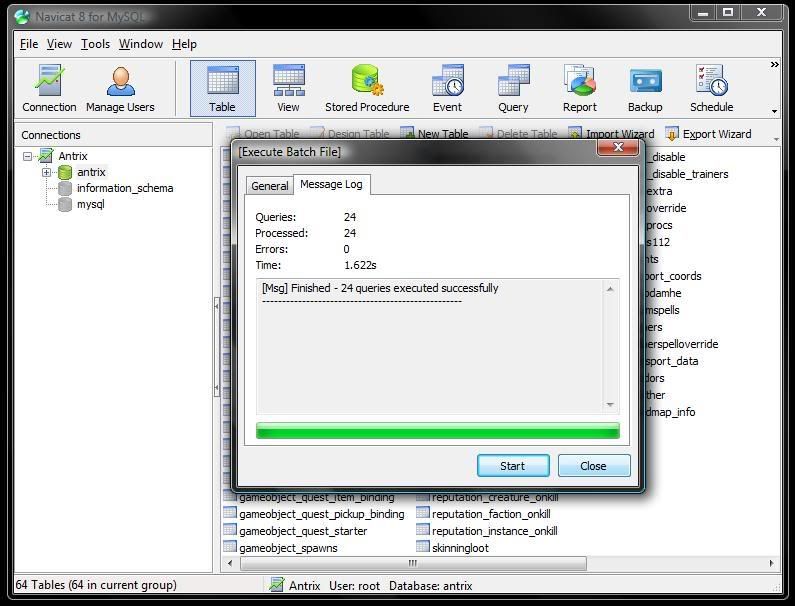
Hit sart, and wait a little bit, this one is very fast.
Done!
Now you have a complete database.
.: Installing SQLyog and importing a database by using it :.
You can download it here :
http://www.webyog.com/downloads/SQLyog607.exe
So, let's start :
Just wait until it's finished.
-- Now it's installed - we'll import the database in the next step (see the next post) --
- We will import / install the database now ! --
This is just an advertisement.
We'll create a new connection now.
Enter any name, I used localhost.
Enter your SQL password (the one you entered when you installed MySQL)
Just press connect.
Yeah, I want to save the changes.
SQLyog is started now and ready !
We'll create a new database now.
I called it 'ascent'.
Now we will import the database.
A new window pops up now.
We will select the SQL file now. You have to unzip the folder before. I used another SQL file here.
It's ready to execute it - so let's go !
Now it'll take some minutes.
If it's finished, you can just close the window and go to the next step - to install and prepare Ascent
.: Ascent :.
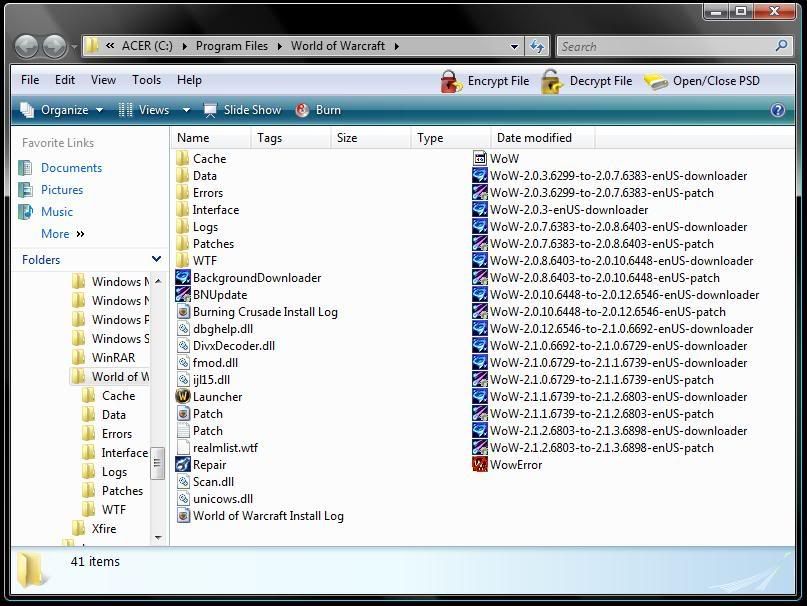
Now to get Antrix it self going.
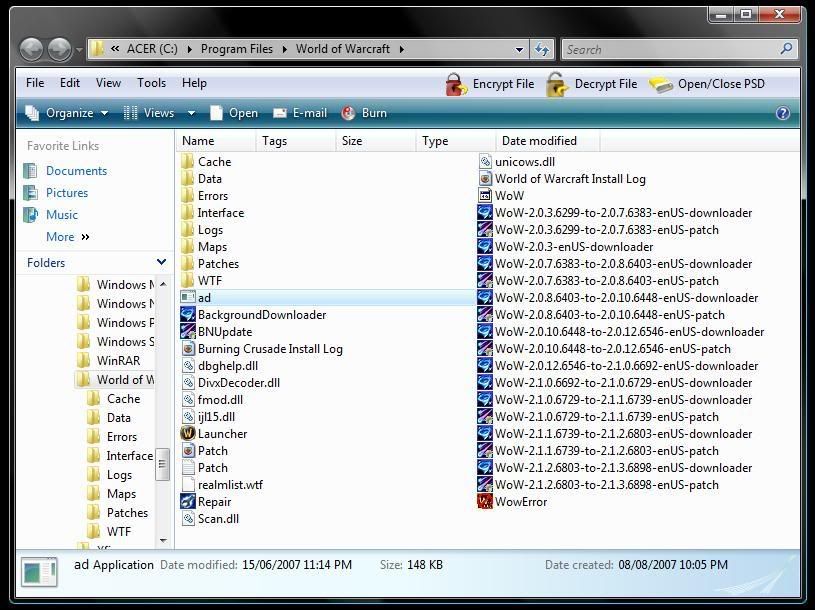
But first we need to get the map files for antrix.
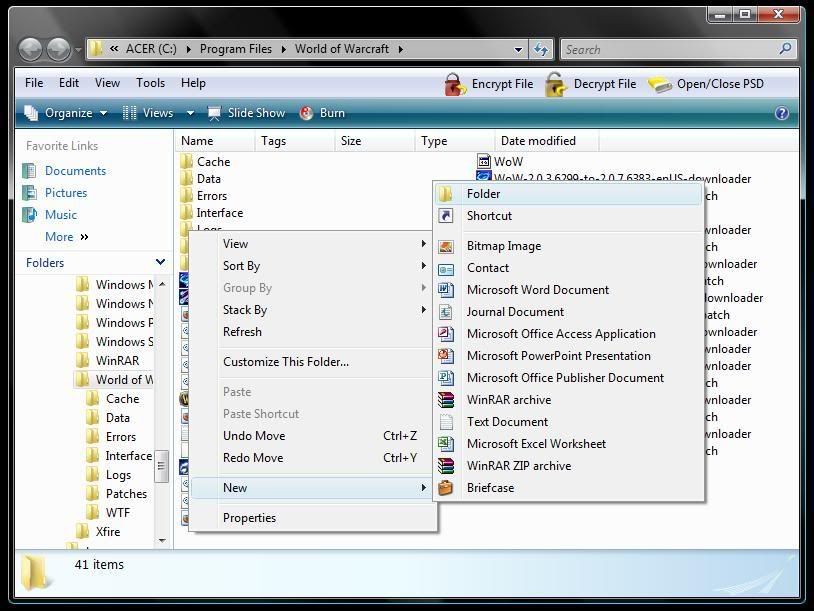
GO to your WoW folder.
Create a new.
Call the New Folder, Maps
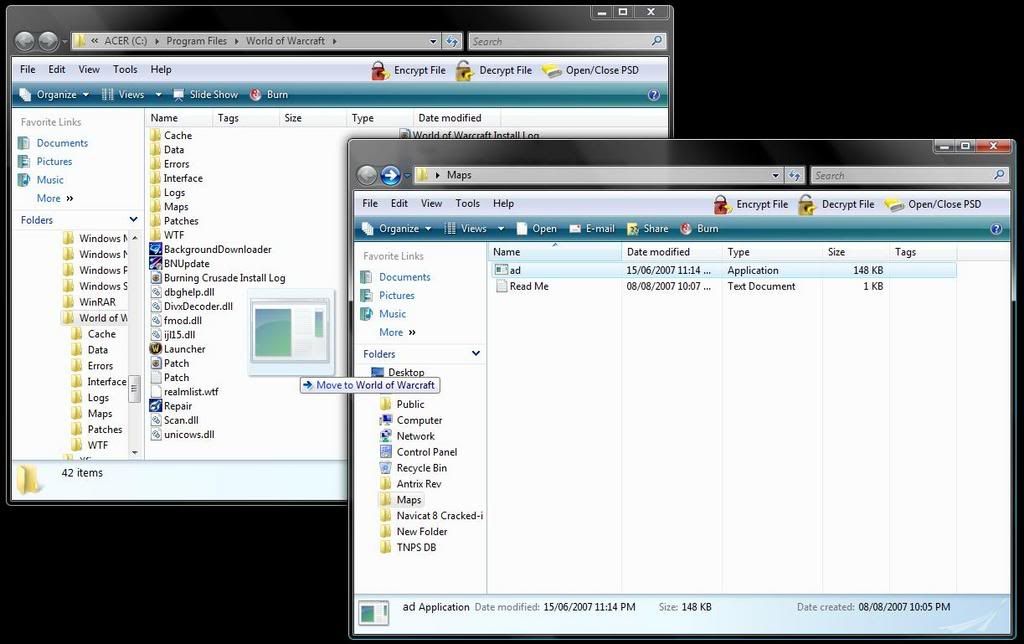
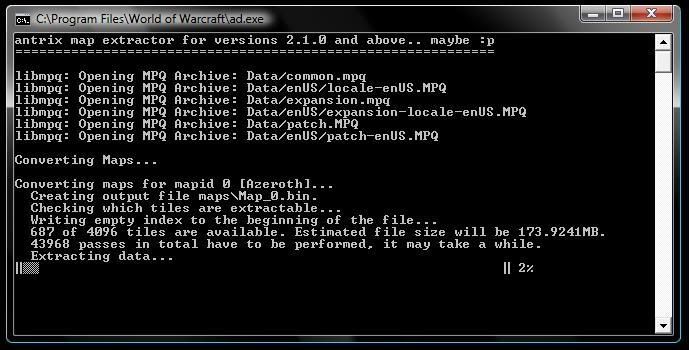
Move AD.exe from Maps Extractor folder, from download ( Link 1 )
Start AD.exe and it should look like this.
Once it is done move the Maps folder to your Antrix Rev folder from Download ( Link 1 )
Now to configure Antrix Server.
Antrix.conf
Change the Red highlighted spots to the MySQL password.
Don't forget do delete the both <die> trigger !!!
Logonserver.conf
Red highlighted spot you will need to change the password, and the blue,
you will need to change to play on it or it will not allow builds after
6739. For example, build 6898 is version 2.1.3 of WoW.
Realms.conf
Change the Red Highlighted spots to your server adress. If the server is just for you, change it to 127.0.0.1. If you want to have a public server, take a look in this topic :
Board Message
The
Blue Highlighted spot you might want to change the name of your realm.
.: Now to Start the Server :.
Now got to your Antrix rev folder, and start both Antrix.exe, and logonserver.exe
There you go! Your own private server!
You mite need to make a account manualy, unless you have your site going already.
.: How to create an account by using SQLyog :.
.: How to create an account by using Navicat :.

![[Guide]How To Setup a Private Server - Ascent Rev 38XX Branch (Stable)](./ocpbanners/1/2/9/8/0/2/2/01d9781faec8bfe3abf9095ac9e57d1e.jpg)
![[Guide]How To Setup a Private Server - Ascent Rev 38XX Branch (Stable)](https://www.ownedcore.com/assets/mm/images/wits.png "TradeSafe Middleman")
![[Guide]How To Setup a Private Server - Ascent Rev 38XX Branch (Stable)](https://www.ownedcore.com/forums/images/styles/OwnedCoreFX/addimg/wicc.png "CoreCoins")

Shout-Out
User Tag List
Results 1 to 3 of 3
-
03-08-2008 #1
 Member
- Reputation
- 1
- Join Date
- Aug 2007
- Posts
- 6
- Thanks G/R
- 0/0
- Trade Feedback
- 0 (0%)
- Mentioned
- 0 Post(s)
- Tagged
- 0 Thread(s)
[Guide]How To Setup a Private Server - Ascent Rev 38XX Branch (Stable)
![[Guide]How To Setup a Private Server - Ascent Rev 38XX Branch (Stable)](https://www.ownedcore.com/images/ba/g/b2.gif)
-
03-08-2008 #2
Knight-Captain
- Reputation
- 115
- Join Date
- Jun 2007
- Posts
- 423
- Thanks G/R
- 0/0
- Trade Feedback
- 0 (0%)
- Mentioned
- 0 Post(s)
- Tagged
- 0 Thread(s)
nice guide man
-
03-20-2008 #3
Member
- Reputation
- 1
- Join Date
- Mar 2008
- Posts
- 19
- Thanks G/R
- 0/0
- Trade Feedback
- 0 (0%)
- Mentioned
- 0 Post(s)
- Tagged
- 0 Thread(s)
nice job


 Reply With Quote
Similar Threads
-
[guide] How to make a private server with ac-w pack 7.1
By Choxxmage in forum WoW EMU Guides & TutorialsReplies: 4Last Post: 10-30-2008, 02:12 PM -
[Video Tutorial] How to Setup WotLK Private Servers w/video
By Deathtrooper in forum WoW EMU Guides & TutorialsReplies: 3Last Post: 10-26-2008, 10:33 AM -
[Picture Guide]How to Setup a WOTLK Server
By WargRider in forum WoW EMU Guides & TutorialsReplies: 3Last Post: 10-01-2008, 08:40 AM -
[Guide]How to run a Private Server
By Pedregon in forum WoW EMU Guides & TutorialsReplies: 3Last Post: 07-11-2008, 07:09 PM -
[Guide] how to make a private server on the Mac OS
By KerotheFox in forum WoW EMU Guides & TutorialsReplies: 8Last Post: 03-02-2008, 01:46 PM
-
OwnedCore Forums
casino news World of Warcraft Pokemon GO MMO Overwatch RTS Casino reviews bc game bc game bc game bc game bc game bc game bc game bc game bc game bc game bc game bc game bc game bc game bc game bc game bc game bc game bc game bc game bc game bc game bc game bc game bc game bc game bc game bc game bc game bc game bc game bc game bc game bc game bc game bc game bc game bc game bc game bc game bc game bc game bc game bc game bc game bc game bc game bc game bc game bc game -
casino
Casino Gambling Online casinos Casino en ligne Jackpot City no deposit bonus codes roobet Casino reviews Bitcoin casino Paypal Casino Lucky8 1xbit heycasino ✅Play Frank Casino - Découvrir l'élégance ✅Platinum Play Casino Book of dead Slot Review ⭐ ThorCasino - 100% Up ✅Bc Game no Deposit 21 Casino Casino - Best Casino de Deauville un ⭐ Bitstarz Casino - -
CoreCoins
CoreCoins CoreCoins FAQ Shout-Out Banner Ads -
My OwnedCore
My Profile Notifications Settings Buy CoreCoins About Us


Privacy Policy | Cookie Policy | Terms | Contact Us
Available Payment Methods:-
![[Guide]How To Setup a Private Server - Ascent Rev 38XX Branch (Stable)](https://www.ownedcore.com/images/paybutton/paypal.png)
![[Guide]How To Setup a Private Server - Ascent Rev 38XX Branch (Stable)](https://www.ownedcore.com/images/paybutton/skrill.png)
![[Guide]How To Setup a Private Server - Ascent Rev 38XX Branch (Stable)](https://www.ownedcore.com/images/paybutton/payop.png)
-
Casino
Millionz | ZenCasino | Dublinbet | Cresus Casino | Lucky Dreams Casino | Casobet | Casino | Welcome Bonuses | Sportsbook | Casino deposit offers | Jackpotcity | BitCasino | InstantPay | Betflip Casino | No deposit bonus | Slot machines | PalmSlots Casino | Oshi Casino | Lucky31 | Casino Bonus | BuzzLuck | Drake Casino | NeedForSpin | Bovada casino | Bc Game | MrGreen | Lucky8 | Rollino Casino