All credit goes to Denny Tang of Photoshop Tutorials - Home, an amazing site.
Step 1: Open an image into Photoshop
To open an image, choose File> Open. Browse for the image file and click OK.
Step 2: Create a new layer
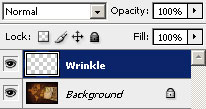
To begin, we'll create a new layer for the wrinkle texture. Click on the New Layer button in the Layers Pallet or choose Layer> New Layer. Rename this layer to "Wrinkle". To rename a layer, simply double click on the layer text and edit.
Step 3: Create the wrinkle texture
Creating the wrinkle texture is easier than you think. To do this, we'll be using the Gradient tool. Select the Gradient tool and copy the settings indicated below:
Using your mouse, randomly click and drag to create a random gradient pattern.
Step 4: Save the image for later
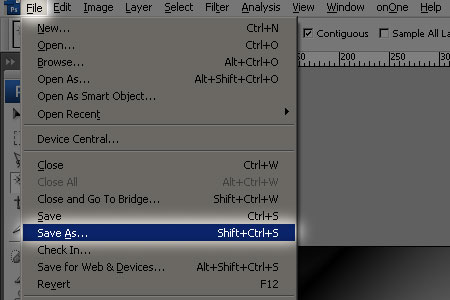
Later in the tutorial, we'll need to distort the photo so that it looks folded. For that step, we'll be using the Distort filter which requires opening a bump map file. Now that we have the texture created, we'll save this bump map we've created for later. Choose File> Save As and save this temporarily on the desktop as a Photoshop document (ex. bump map.psd).
Step 5: Convert the bump map into a texture using Photoshops Emboss filter
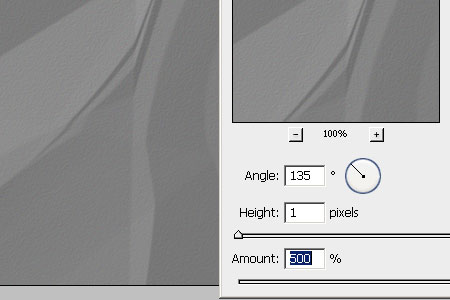
Using the Emboss filter, we can convert the bump map into a 3D texture. Choose Filter> Stylize> Emboss. In the Emboss tool, set the amount to height to 1 pixel and amount to 500%. You can adjust the angle to modify the direction of the light to match. Sometimes you need to have the angle match the lighting. For example, if you were to hang this picture on the wall with a light right above the image, you'll need to set the angle to 90º so that it matches the direction of the light.
The texture lacks contrast but we'll fix this in the next steps by increasing the contrast. You may be wondering why we're not fixing this by adjusting the height in the Emboss filter settings. The reason for this is because creases will become blurred as the height is increased. Unless you're trying to make your photo look like it was printed on a piece of fabric, a wrinkled photo won't look very realistic with soft creases.
Step 6: Blend the layer using the Soft Light mode
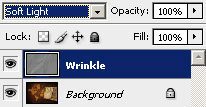
Before we fix the contrast of the texture, change the blending mode to Soft Light. This will give us a live preview of the effect while we're adjusting the contrast.
Step 7: Adjust the depth using the Brightness/Contrast adjustment
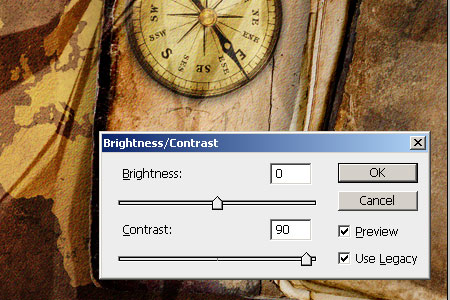
By increasing the contrast of the wrinkle texture, the wrinkles will look stronger and become more visible. Choose Image> Adjustments> Brightness/Contrast to open the Brightness/Contrast adjustment tool. If you're using Photoshop CS3, checkmark Use Legacy because the new algorithm in Photoshop CS3 isn't able to add enough contrast to the texture. Slide the contrast slider towards to right to increase the contrast. As you're adjusting the contrast, look at the image behind it to see a live preview of the effect.
Step 8: Distort the photo using the Displace filter
Before we distort the layer, it is a good idea to keep the original image as the "Background" layer so that you have it as a reference when you open the file back in the future. Select the Background layer and press Ctrl+J to duplicate the layer or choose Layer> Duplicate Layer.
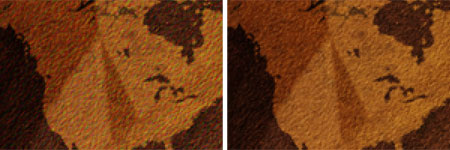
With the new Background copy layer selected, open the Displace filter by going to Filter> Distort> Displace. Use the default settings for now and click OK. A window will appear where you can select the bump map texture. Open the Photoshop file we saved earlier in step 4 and click OK. The photo should now be distorted to better match the wrinkle texture. To get the right settings, you'll need to do do this by trial and error; undo and redo the Displace filter with different horizontal and vertical scale settings. Usually the default settings of Horizontal Scale: 10 and Vertical Scale 10: creates good results but depending on your image, you may need to undo and use different settings.
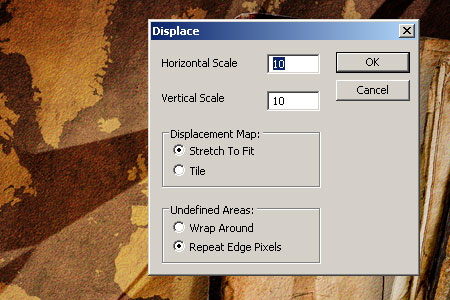
Before and after applying the Displace filter
Step 9: Remove the chroma noise
By step 8, you probably thought you were done. But if you look closely, you'll notice excessive chroma noise (grainy color artifacts) that wasn't there in the original photo. To fix this, simply select the Wrinkle layer and desaturate by pressing Shift+Ctrl+U or choosing Image> Adjustments> Desaturate.
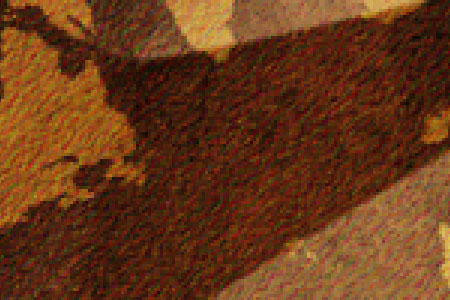
Before and after desaturating the Wrinkle layer
Step 7: Remove the grainy texture (optional)
The wrinkle texture also contains a grainy texture that adds to the look of natural paper. But if you want the photo to look smooth without the paper texture, continue with this tutorial.
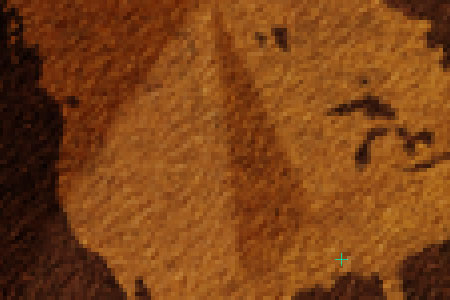
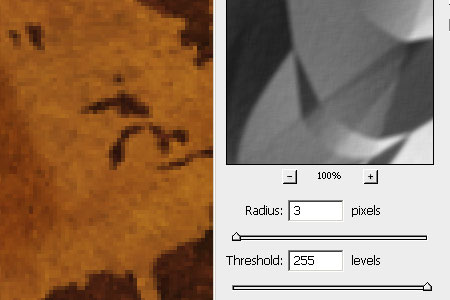
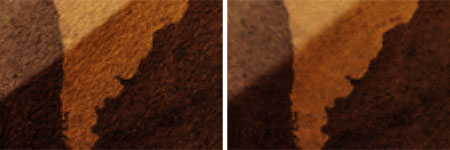
To remove the grain, first select the Wrinkle layer and choose Filter> Blur> Surface Blur. The Surface Blur filter will blur only the flat surface areas of the texture to make it look smoother. Set the threshold to 255 levels and adjust the radius to blur out the paper texture. I recommend using a radius setting of no more than 3 pixels to keep the creases looking sharp. The Surface Blur filter will also make the creases softer so use this filter sparingly.
Before and after removing the paper texture with the Surface Blur filter
And there you go. With this I was able to make
when I had the photoshop extended trial for 2 days.
Shout-Out
User Tag List
Results 1 to 8 of 8
-
01-20-2008 #1Member

- Reputation
- 7
- Join Date
- Dec 2007
- Posts
- 23
- Thanks G/R
- 0/0
- Trade Feedback
- 0 (0%)
- Mentioned
- 0 Post(s)
- Tagged
- 0 Thread(s)
[Tutorial] How to make a wrinkled photo.
Last edited by DestroyerofWorlds; 01-21-2008 at 11:38 AM. Reason: Added link, typing isn't enough
-
01-20-2008 #2Contributor
![[Kronus] is offline](https://www.ownedcore.com/forums/images/styles/OwnedCoreFX/statusicon/user-offline.png)

- Reputation
- 184
- Join Date
- Sep 2006
- Posts
- 459
- Thanks G/R
- 0/0
- Trade Feedback
- 0 (0%)
- Mentioned
- 0 Post(s)
- Tagged
- 0 Thread(s)
Very nice, i can give you PS CS3 if you want. + rep

-
01-20-2008 #3Member

- Reputation
- 7
- Join Date
- Dec 2007
- Posts
- 23
- Thanks G/R
- 0/0
- Trade Feedback
- 0 (0%)
- Mentioned
- 0 Post(s)
- Tagged
- 0 Thread(s)
Thanks for the rep, and what version? I cracked extended already... have to love youtube.
-
01-21-2008 #4Account not activated by Email

- Reputation
- 655
- Join Date
- Jul 2007
- Posts
- 700
- Thanks G/R
- 0/0
- Trade Feedback
- 0 (0%)
- Mentioned
- 0 Post(s)
- Tagged
- 0 Thread(s)
I've seen this tutorial on many different sites, please give the link to owner of the tutorials page you got this from.
-
01-21-2008 #5Contributor


- Reputation
- 183
- Join Date
- Dec 2006
- Posts
- 1,010
- Thanks G/R
- 0/0
- Trade Feedback
- 0 (0%)
- Mentioned
- 0 Post(s)
- Tagged
- 0 Thread(s)
-
01-21-2008 #6Account not activated by Email

- Reputation
- 655
- Join Date
- Jul 2007
- Posts
- 700
- Thanks G/R
- 0/0
- Trade Feedback
- 0 (0%)
- Mentioned
- 0 Post(s)
- Tagged
- 0 Thread(s)
Erm.. excuse me if IM wrong but the same rules have applied on nearly every ripped tutorial on this site. If you are re-distributing it. You mension who and were from (he has) and you give a drect link to it! (he hasn't done)
Nuff said.
-
01-21-2008 #7Member

- Reputation
- 7
- Join Date
- Dec 2007
- Posts
- 23
- Thanks G/R
- 0/0
- Trade Feedback
- 0 (0%)
- Mentioned
- 0 Post(s)
- Tagged
- 0 Thread(s)
Well, sorry, I gave you the site, and the name of the person who posted it, I didn't think you needed any more...
-
01-21-2008 #8Account not activated by Email

- Reputation
- 655
- Join Date
- Jul 2007
- Posts
- 700
- Thanks G/R
- 0/0
- Trade Feedback
- 0 (0%)
- Mentioned
- 0 Post(s)
- Tagged
- 0 Thread(s)
Thank you, Its just it has been the rule on the graphics forum and everyone has followed it. I did say it nicely at first then Tasha just got under my skin. Anyway, nice share mate, can lead to very effective designs.
- Puff
Similar Threads
-
[Tutorial] How to make an Animation in Photoshop
By BrightChild in forum Art & Graphic DesignReplies: 21Last Post: 07-10-2008, 12:06 AM -
[Tutorial] How to Make W.O.W Siggys
By EviNion in forum Art & Graphic DesignReplies: 0Last Post: 07-06-2008, 06:56 PM -
[Tutorial] How to make a website in photoshop part 1 & 2
By slaughterer in forum Art & Graphic DesignReplies: 2Last Post: 06-09-2008, 05:43 PM -
[Guide/Tutorial] How to make a private server 2.3+ [PICTURES]
By xUrbanx in forum WoW EMU Guides & TutorialsReplies: 8Last Post: 03-08-2008, 09:02 PM -
[Video Tutorial]How I make signatures
By Minimized in forum Art & Graphic DesignReplies: 16Last Post: 02-05-2008, 07:09 PM
![[Tutorial] How to make a wrinkled photo.](https://www.ownedcore.com/forums/images/styles/OwnedCoreFX/addimg/menu4.svg)

![[Tutorial] How to make a wrinkled photo.](https://www.ownedcore.com/forums/./ocpbanners/1/3/9/6/9/4/8/08b6377e7ee13e5b1d2306cbeed08f8c.png)
![TradeSafe Middleman [Tutorial] How to make a wrinkled photo.](https://www.ownedcore.com/assets/mm/images/wits.png)
![CoreCoins [Tutorial] How to make a wrinkled photo.](https://www.ownedcore.com/forums/images/styles/OwnedCoreFX/addimg/wicc.png)







 Reply With Quote
![[Tutorial] How to make a wrinkled photo.](https://www.ownedcore.com/images/ba/g/b2.gif)


![[Tutorial] How to make a wrinkled photo.](https://www.ownedcore.com/images/paybutton/paypal.png)
![[Tutorial] How to make a wrinkled photo.](https://www.ownedcore.com/images/paybutton/skrill.png)
![[Tutorial] How to make a wrinkled photo.](https://www.ownedcore.com/images/paybutton/payop.png)