
hey guys i did not make this tut i thought i would share!! but it is easily one of my favorites So first of all, here are the images I used to create this, you're going to need to sign up at planetrenders.net to download them. When you get there, view the full sized image, and right click on it and click "save image as," save it somewhere where you remember it, because you'll need to use it.A Lair Render
C4D
Another C4d
A background stock
Alright, so first thing we're going to do is start a new document with the following settings:
Name: Anything
Preset: Custom
Width: 370, Pixels
Height: 100, Pixels
Resolution: 72, Pixels/Inch
Color Mode: RGB Color, 8 bit
Background Contents: Transparent
Now open up the background stock. It looks like this:Now get out the rectangular marquee tool(Square selection tool), and set your selection type to "fixed size." Set Width to 370, and Height to 100.Now click anywhere inside the document to make a selection the exact size of your document. I tried to pick a spot that didn't have too much contrast in the brightness, but it's up to you with what you pick. Here's the spot I chose:
Now copy and paste it into the document you started. It should fill the whole thing, otherwise you probably set the fixed size wrong. For simplification purposes, you can close the window with the entire background stock on it. You won't need it anymore.Now duplicate the layer with the background stock on it. Drag the picture of it's layer into the "new layer," button.Now get out the smudge tool, and kind of just smudge it randomly. However, keep in mind we are trying to keep a good flow for our signature, and considering our render has a flow that goes up and left, you should definitely smudge it in that direction. Now I actually went back to the background stock, and took a realy bright portion to smudge. Here's what I ended up with:
Now set the opacity of the layer with the smudged background to 30%.Here's what I have now:
Now I added 3 lines using the pen tool. Their color is b5b0a7.Here's what the lines look like:
And here's what they look like in the image:
Now we're going to add one of the C4Ds. Open up this one:
Now copy and paste it into your document, and I want you to use the free transform tool to get it like this:
If you can't tell, that is this part of the C4D:
I did not resize it any, however, I did change the Hue/Saturation a bit. You should do the same. Use Image->Hue/Saturation.Set the layer with the C4D to 50% opacity, and its blending to "lighten," here's what your document should look like so far:
Now I added some random black lines. You can just copy the ones I made. Right click here and use "save target as," or "save link as." Copy them into your document, and change the layer opacity to 50%, and set the blending to "darken." Here's the effect I got:
Now we're going to add this C4D in:
I used this portion:
And used the free transform tool, as well as hue and saturation to put it right here:
There is an extra smudge, I'm pretty sure I did that on accident... You can do it as well, if you think it makes it look better.Now change its blending to "lighten." I did not change the opacity. Here's what the document should look similar to now:
Now copy the render into your document. Use the free transform tool to get something like this:
Now duplicate the layer, and use filter->other->High Pass. Set it to 1.1 Pixels.Set the layer opacity of the layer with the highpass to 10%.Merge the two layers with the render on it(the one with high pass, and the normal one).Now use Image->Brightness/Contrast, and set brightness to 15, and contrast to 40. You should end up with something like this:
Now use filter->Render->lighting effects. Use something like this:
Now duplicate the layer with the render on it, and open the free transform tool. Set the width to 4.2%, and click the button with the check on it. Now get the free transform tool out again, and resize it so your newly formed blob is the same size as the render. Set the layer to 30% opacity, and you should get something like this:
If you haven't noticed, I also added a little bit of blur to the shoulder. To do this, duplicate the layer with the render on it, and use filter->blur->blur. Now erase everything except for the shoulder on the blurred layer. Also, sharpen the layer that's not blurred. This is for depth purposes.Now merge all the layers with the render on it. Now merge all the layers that don't have the render on it together, so you should now have 2 layers, one with the render, and the other with the background. Now hide the layer with the render on it, and create a new layer. Use Image->Apply image. (use the default settings) Now unhide the layer with the render on it, and move the render on top of all the other layers. You should now have two layers with the background on it, and one with the render on it. Delete the background layer that you didn't use the image->apply image to get.Now you should only have one background layer, and one layer with the render on it. Click on the background layer, and use filter->render->lighting effects. You want to achieve something like this:
I have it set so that the lighting is coming from above.Here's what it looks like with the render:
Now create a new layer on top of all the other layers, and use image->apply image.Now make sure you have your foreground and background colors set to black and white(hit the "d" key to make sure), and use image->adjustments->gradient map, and just keep the default settings and click ok.Set the opacity of this layer to 36%.Your image should now look something like this:
Once again, create a new layer on top of all the others, and use image->apply image.Now on this new layer, use image->adjustments->hue/saturation, and for the settings, enter the following:Edit: Master
Hue: +33
Saturation: +25
Lightness: -16
You should end up with something like this:Now create a new layer, on top of all the others, and fill it with black. Then click the "layer mask" button. Now click the layer mask part of the layer, and use control+i to inverse it. Now get out your gradient tool, set it to foreground->transparent, and set your foreground color to white. Now use the "reflected" gradient type, and create a gradient like this(on the layer mask):
Your image should end up looking like this:
Now create a new layer on top of all the others, and use control+a to select all. Now use edit->stroke, and use the following settings:Width: 1px
Color: Black
Location: Inside
Mode: Normal
Opacity: 100%
Preserve transparency: Unchecked
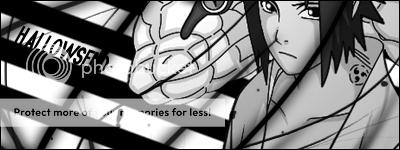
Now get out the text tool, and make sure your foreground color is white. You can write your name anywhere on the image. I used an 18pt font, with a font called "Monotype Corsiva." Here's what I ended up with:
this is not my tutorial once again i found it on the internet all credit goes to Xisle of psprofessor.net


User Tag List
Thread: Awsome Lair sig tut
Results 1 to 4 of 4
-
11-09-2007 #1
 Member
- Reputation
- 18
- Join Date
- Mar 2007
- Posts
- 104
- Thanks G/R
- 0/0
- Trade Feedback
- 0 (0%)
- Mentioned
- 0 Post(s)
- Tagged
- 0 Thread(s)
Awsome Lair sig tut
Last edited by jcako; 11-09-2007 at 04:58 AM.
BOM POW

-
11-09-2007 #2
滚开! 大声笑。I 是令人敬畏的。

- Reputation
- 366
- Join Date
- Sep 2007
- Posts
- 720
- Thanks G/R
- 0/0
- Trade Feedback
- 0 (0%)
- Mentioned
- 0 Post(s)
- Tagged
- 0 Thread(s)
Re: Awsome Lair sig tut
Great Job Jcako, +rep.
-
11-09-2007 #3
Member
- Reputation
- 18
- Join Date
- Mar 2007
- Posts
- 104
- Thanks G/R
- 0/0
- Trade Feedback
- 0 (0%)
- Mentioned
- 0 Post(s)
- Tagged
- 0 Thread(s)
Re: Awsome Lair sig tut
thx manOriginally Posted by Hallowsend BOM POW
-
11-10-2007 #4
Active Member

- Reputation
- 37
- Join Date
- Feb 2007
- Posts
- 513
- Thanks G/R
- 0/0
- Trade Feedback
- 0 (0%)
- Mentioned
- 0 Post(s)
- Tagged
- 0 Thread(s)
Re: Awsome Lair sig tut
lol i look at this tut ( the real one ) about 5 mins be4 looking at this
Science has not yet taught us if madness is or is not the sublimity of the intelligence.


 Reply With Quote
Similar Threads
-
Simple C4d sig tut
By Wesk. in forum Art & Graphic DesignReplies: 5Last Post: 08-29-2007, 04:28 PM -
Sprite sig tut
By r3v in forum Art & Graphic DesignReplies: 5Last Post: 07-02-2007, 08:46 PM -
Popout Sig Tut
By ClearFlare in forum Art & Graphic DesignReplies: 12Last Post: 06-01-2007, 07:28 PM -
Sig tut
By Wesk. in forum Art & Graphic DesignReplies: 10Last Post: 05-12-2007, 09:00 AM -
Sig tut.
By Fuzz in forum Art & Graphic DesignReplies: 9Last Post: 05-11-2007, 04:55 PM
-
OwnedCore Forums
casino news World of Warcraft Pokemon GO MMO Overwatch RTS Casino reviews www.planet-casino.com lucky 8 lucky8 no deposit codes bc game bc game lucky8 -
casino
Casino Gambling Online casinos Casino en ligne bc game bc game bc game no deposit bonus codes roobet Top 10 Casinos Casino reviews Bitcoin casino Paypal Casino Lucky8 1xbit heycasino Question about Should I take this Website 2 Frozen EU Accounts to I need help recovering what countries only req [Giveaway] US many 60+ US Gamecard Give Away :) Scams? Worth it? -
CoreCoins
CoreCoins CoreCoins FAQ Shout-Out Banner Ads -
My OwnedCore
My Profile Notifications Settings Buy CoreCoins About Us


Privacy Policy | Cookie Policy | Terms | Contact Us
Available Payment Methods:-


-
Casino
vave | casino | casino | casino | amazon | casino | amazon | casino | amazon | casino | casino | amazon | vave | amazon | casino | amazon | vave | casino | casino | casino | casino | casino | casino | casino | amazon | amazon | amazon | amazon | vave | casino | casino | mystake | amazon | amazon | casino | vave | casino | amazon | mystake | casino | amazon | casino | casino | amazon | amazon | casino | casino | casino | casino | casino | amazon | casino | amazon | amazon | amazon | casino | mystake | amazon | casino | casino