![::Tutorial:: [Text] Light Burst [Pro]](https://www.ownedcore.com/forums/images/styles/OwnedCoreFX/addimg/menu4.svg)
Hey there Mmowned, I have known this technique for awhile and used it for Mmovie concept logo.
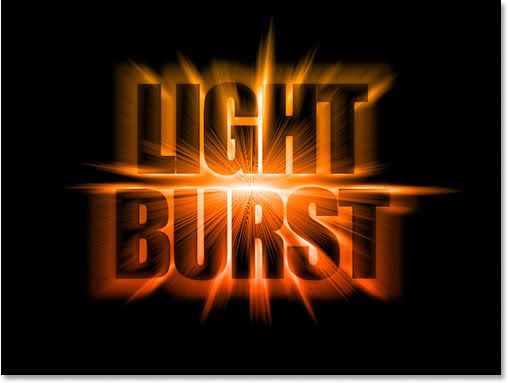
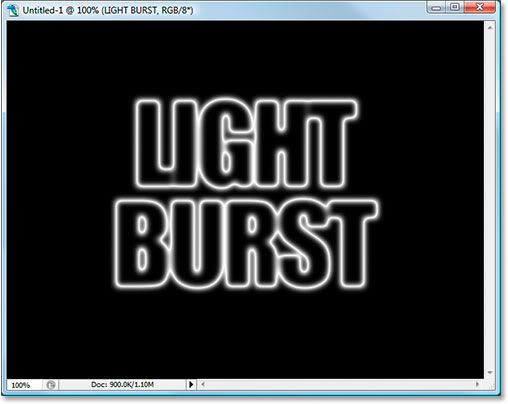
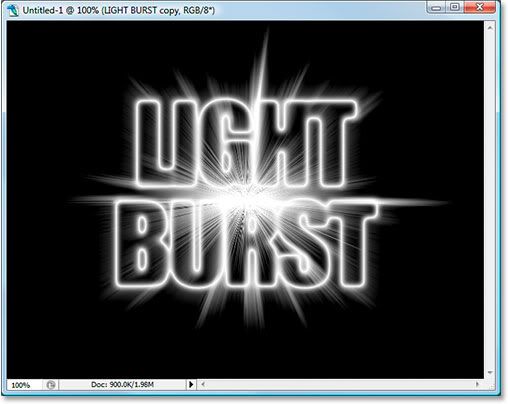
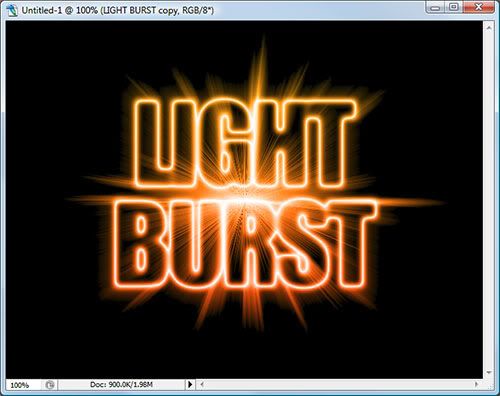
What were going to make is a professional looking text effect with colour burst. Liek the one below.
Step 1: Open A New Photoshop Document
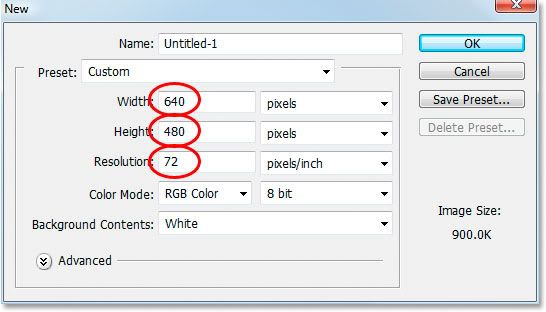
Open a new document in Photoshop by going up to the File menu and choosing New..., or by using the keyboard shortcut, Ctrl+N (Win) / Command+N (Mac). You can choose your own width and height for your document, but if you want to follow along, I chose the 640x480 size from the list of available presets to keep things simple. I've also left my Resolution value set to its default of 72 pixels/inch. Since I'm creating this effect for the web, it makes no difference what I set the resolution value to, so the default value is fine:
Step 2: Add Your Text
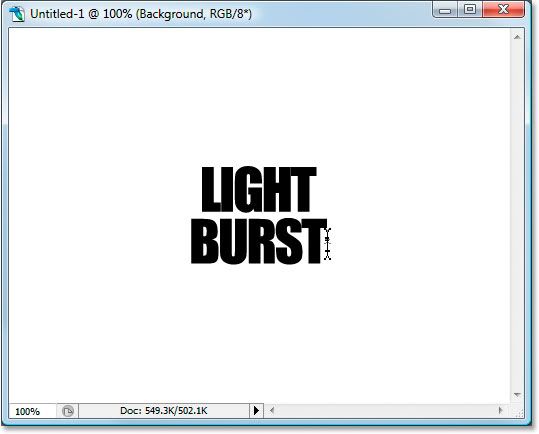
With your new blank document open, grab the Type tool from the Tools palette or by pressing T on your keyboard. Make sure black is selected as your foreground color. If it isn't, just press D on your keyboard to reset it to black. Choose your font in the Options Bar at the top of the screen. Thick, heavy fonts work best for this effect. Then, go ahead and enter your text. I'm going to use "Impact", and I'll type the words "LIGHT BURST":
Step 3: Resize Your Text With Free Transform
With your text layer selected in the Layers palette, use the keyboard shortcut Ctrl+T (Win) / Command+T (Mac) to bring up the Free Transform box and handles around your text. Hold down Shift+Alt (Win) / Shift+Option (Mac) and drag out any of the corner handles to make your text larger and fill up more of the document area. Holding Shift constrains the text proportions, and holding Alt/Option resizes the text from the center:
Make sure to still leave plenty of room around the text for our light burst effect. Press Enter (Win) / Return (Mac) when you're done to accept the transformation.
Step 5: Add A Selection Around Your Text And Save It
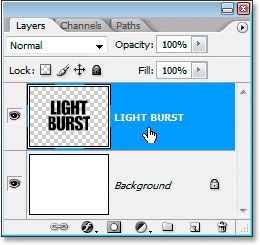
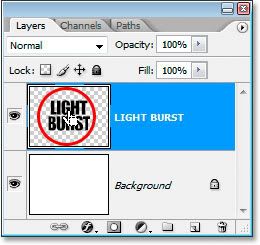
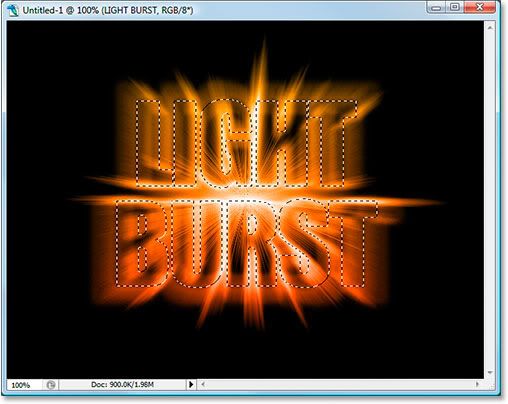
Ctrl-click (Win) / Command-click directly on the thumbnail preview area of the text layer in the Layers palette to quickly load a selection around your text:
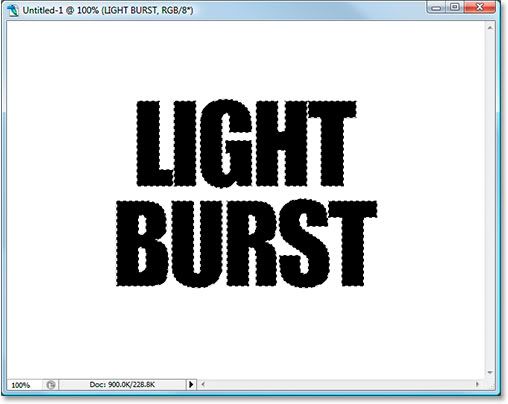
Your text will now have a selection around it:
With the text selected, go up to the Select menu at the top of the screen and choose Save Selection. When the Save Selection dialog box appears, just click OK. There's no need to name it or make any changes to the options.
Once you've saved your selection, press Ctrl+D (Win) / Command+D (Mac) to deselect your text.
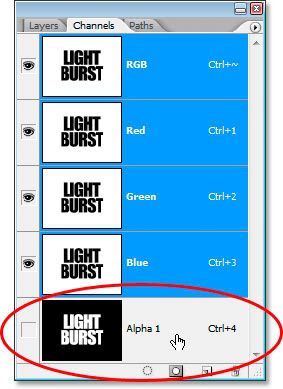
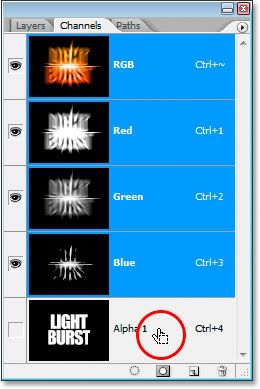
Switch over to your Channels palette for a moment (it's grouped in beside the Layers palette) and you'll see your selection saved as a new channel named "Alpha 1" at the very bottom. We'll be coming back here a bit later to load our selection again:
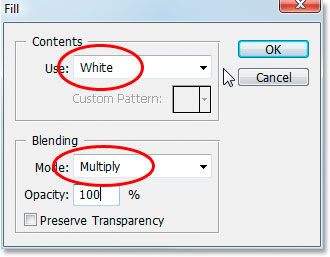
Click OK when you're done. Nothing will seem to have happened in your document window, but if you look at your text layer's thumbnail in the Layers palette, you'll see that all of the empty space around the text has now been filled with white, while leaving the text black thanks to that "Multiply" mode.
Step 7: Apply The Gaussian Blur Filter To The Text
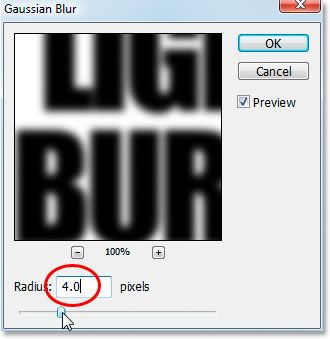
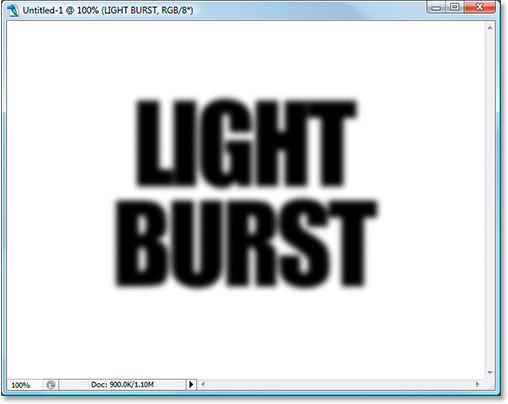
Go up to the Filter menu at the top of the screen, choose Blur, and then choose Gaussian Blur. When the Gaussian Blur dialog box appears, enter a Radius value of about 4 pixels and click OK to apply a slight blurring to the text:
Here's the text after applying Gaussian Blur:
Step 8: Apply The "Solarize" Filter To The Text
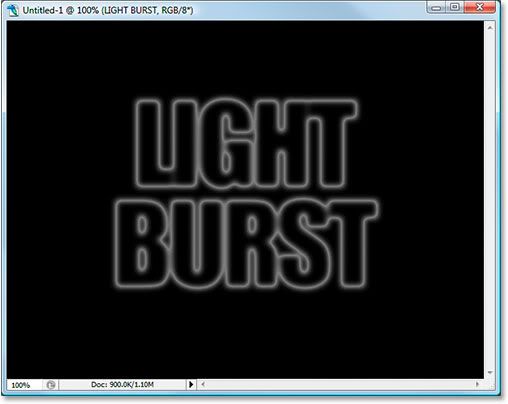
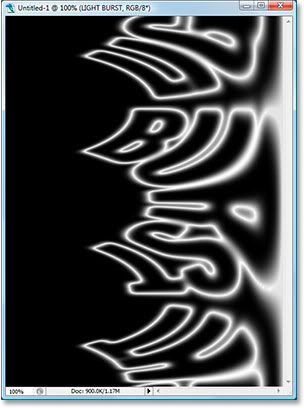
With the text layer still selected, go back up to the Filter menu and this time choose Stylize, and then choose Solarize. This will turn the document black, and your text will appear as a white stroke:
Step 9: Lighten The Text With Levels
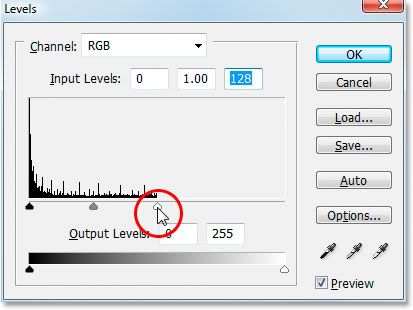
The text is looking a little dark, so let's lighten it. Use the keyboard shortcut Ctrl+L (Win) / Command+L (Mac) to bring up Photoshop's Levels command, and drag the white point slider on the right in towards the left until you reach the right edge of the histogram:
Click OK. The text will now appear much brighter:
Step 10: Make A Copy Of The Text Layer
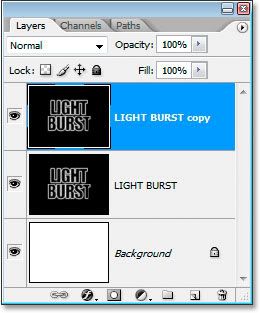
We need to make a copy of the text layer at this point, so to do that, with the text layer selected, use the keyboard shortcut Ctrl+J (Win) / Command+J (Mac), which will add a copy of the layer above it in the Layers palette:
Make sure the copy of the text layer is selected because all of these next steps are to be done on the copy. We won't be touching the original again until near the end.
Your text will now look very strange indeed:
Step 12: Rotate The Canvas 90 Degrees Clockwise
Go up to the Image menu at the top of the screen, select Rotate Canvas, and then choose 90° CW to rotate the canvas 90 degrees clockwise:
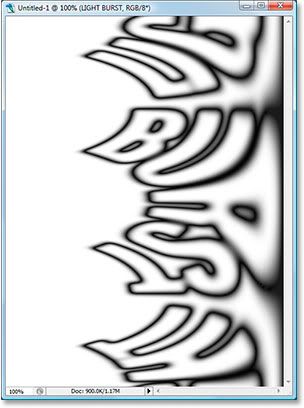
Step 13: Invert The Image
Use the keyboard shortcut Ctrl+I (Win) / Command+I (Mac) to invert the image, so black becomes white and white becomes black:
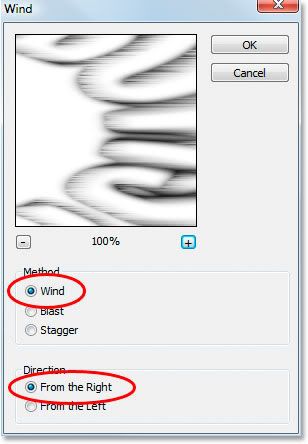
Click OK to apply the Wind filter once. Then press the keyboard shortcut Ctrl+F (Win) / Command+F (Mac) twice to apply the same filter two more times.
Step 15: Invert The Image Again
Press Ctrl+I (Win) / Command+I (Mac) to invert the image once again:
Step 16: Apply The "Wind" Filter Three More Times
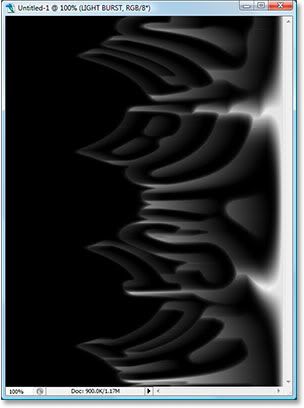
With the image inverted, press the keyboard shortcut Ctrl+F (Win) / Command+F (Mac) three more times to apply the filter to the image three more times:
Step 17: Brighten The Image Again With Levels
We need to brighten the image again using Levels, but this time, we'll let Photoshop do the work for us by using Auto Levels. To do that, press Shift+Ctrl+L (Win) / Shift+Command+L (Mac) to apply the Auto Levels command to the image, which will brighten it up:
Step 18: Rotate The Canvas 90 Degrees Counterclockwise
Go back up to the Image menu at this point, choose Rotate Canvas once again, and this time choose 90° CCW to rotate the canvas back to the way it was originally:
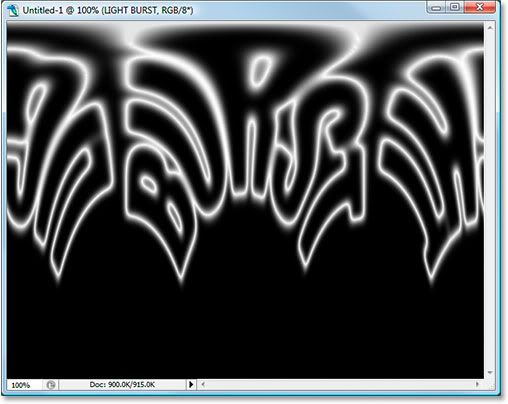
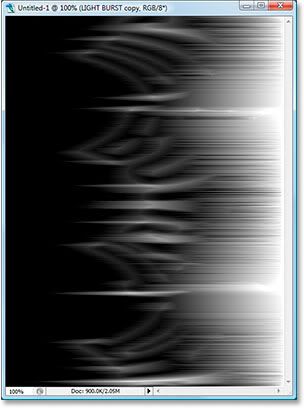
Your image should now look something like this:
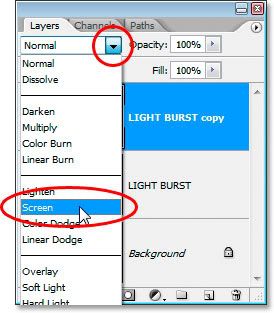
Step 20: Set The Layer Blend Mode To "Screen"
Go up to the blend mode options in the top left of the Layers palette and change the blend mode of the text copy layer from "Normal" to Screen by clicking on the down-pointing arrow and selecting "Screen" from the list:
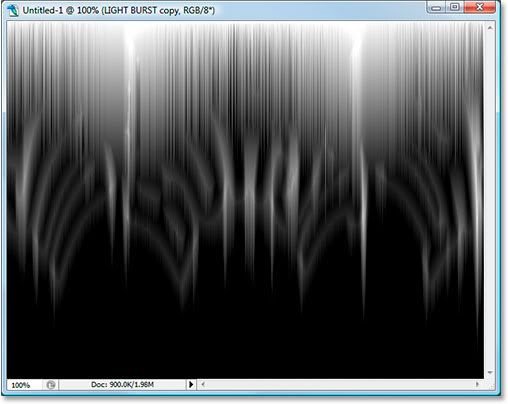
This reveals the original text layer beneath it:
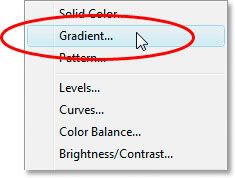
And select "Gradient" from the list:
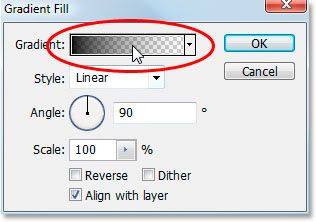
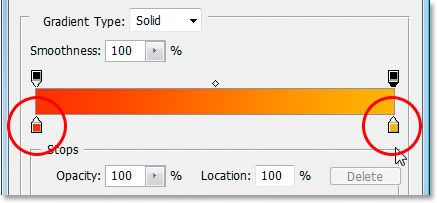
When the Gradient Fill dialog box pops up, click inside the gradient preview area at the top:
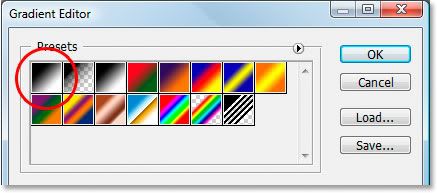
This will bring up the Gradient Editor dialog box. Click on the gradient swatch in the top left, the black to white gradient first, and this will make sure that both colors on either side of the gradient have their opacity set to 100%:
Then set your gradient colors to whatever you like. I've set the color on the left to a reddish-orange, and the color on the right to a yellowish-orange:
Exit out of the gradient dialog boxes once you've chosen your colors.
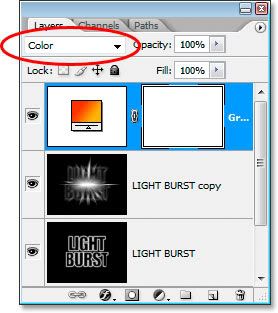
Step 22: Change The Blend Mode Of The Gradient Fill Layer To "Color"
With the Gradient fill layer selected, go back to the blend mode options in the top left of the Layers palette and change the layer's blend mode to Color:
The image is now colorized with the colors from the gradient:
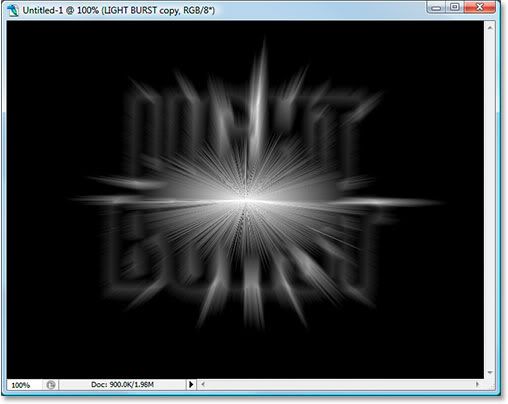
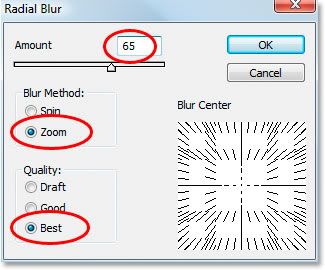
Set the Amount to about 65 pixels, the Blur Method to Zoom, and the Quality to Best, as circled above, and then click OK to apply the filter to the original text:
Step 24: Load The Saved Text Selection
Only a couple of things left to do. First, switch over to your Channels palette again like we did earlier. We're going to reload that selection we saved. To do that, simply right-click (Win) / Control-click (Mac) anywhere on the Alpha 1 channel at the very bottom, which will load the selection back into the document window:
Switch back to the Layers palette when you're done. The selection is now loaded in the image:
One thing left to do...
Step 25: Fill The Selection With Black
With the original text layer selected in the Layers palette and black still as your foreground color, press Alt+Backspace (Win) / Option-Delete (Mac) to fill the selection with black and finish the effect.
Press Ctrl+D (Win) / Command+D (Mac) to remove the selection, and you're done!
After all that, here's the final "light burst" text effect:
And there we have it!
- Sorry for the massive thread size but it is a great one to learnyou can benefit a lot from this. Gives you a great text effect and better understandings of layers, alpha channels and A LOT more.
- Puff

![::Tutorial:: [Text] Light Burst [Pro]](https://www.ownedcore.com/forums/./ocpbanners/1/2/9/8/0/2/2/01d9781faec8bfe3abf9095ac9e57d1e.jpg)
![::Tutorial:: [Text] Light Burst [Pro]](https://www.ownedcore.com/assets/mm/images/wits.png "TradeSafe Middleman")
![::Tutorial:: [Text] Light Burst [Pro]](https://www.ownedcore.com/forums/images/styles/OwnedCoreFX/addimg/wicc.png "CoreCoins")

Shout-Out
User Tag List
Results 1 to 15 of 30
-
11-02-2007 #1
 Account not activated by Email
- Reputation
- 655
- Join Date
- Jul 2007
- Posts
- 700
- Thanks G/R
- 0/0
- Trade Feedback
- 0 (0%)
- Mentioned
- 0 Post(s)
- Tagged
- 0 Thread(s)
::Tutorial:: [Text] Light Burst [Pro]
![::Tutorial:: [Text] Light Burst [Pro]](https://www.ownedcore.com/images/ba/g/b2.gif)
-
11-02-2007 #2
Contributor

- Reputation
- 211
- Join Date
- Jan 2007
- Posts
- 373
- Thanks G/R
- 0/0
- Trade Feedback
- 0 (0%)
- Mentioned
- 0 Post(s)
- Tagged
- 0 Thread(s)


Re: ::Tutorial:: [Text] Light Burst [Pro]
nice tut +rep

-
11-02-2007 #3
Account not activated by Email
- Reputation
- 655
- Join Date
- Jul 2007
- Posts
- 700
- Thanks G/R
- 0/0
- Trade Feedback
- 0 (0%)
- Mentioned
- 0 Post(s)
- Tagged
- 0 Thread(s)
Re: ::Tutorial:: [Text] Light Burst [Pro]
Thank you King-Satchmo
-
11-02-2007 #4
Contributor

- Reputation
- 158
- Join Date
- Oct 2007
- Posts
- 440
- Thanks G/R
- 0/1
- Trade Feedback
- 0 (0%)
- Mentioned
- 0 Post(s)
- Tagged
- 0 Thread(s)
Re: ::Tutorial:: [Text] Light Burst [Pro]
very nice tut! +rep


-
11-02-2007 #5
Account not activated by Email
- Reputation
- 655
- Join Date
- Jul 2007
- Posts
- 700
- Thanks G/R
- 0/0
- Trade Feedback
- 0 (0%)
- Mentioned
- 0 Post(s)
- Tagged
- 0 Thread(s)
Re: ::Tutorial:: [Text] Light Burst [Pro]
 Obviously its here for the Forum, but thanks for the '0' rep Keytachi...
*Puff Disappointed*
-
11-02-2007 #6
 !!jeULyJf8ld1

- Reputation
- 522
- Join Date
- Feb 2007
- Posts
- 2,256
- Thanks G/R
- 0/0
- Trade Feedback
- 0 (0%)
- Mentioned
- 0 Post(s)
- Tagged
- 0 Thread(s)

Re: ::Tutorial:: [Text] Light Burst [Pro]
That's an awesome and very clean guide Puff.
Really great job on writing it.
I would really like to rep you, but I have to spread out first. Remind me tomorrow or in 2 days in the SB.
19/5/2013
-
11-02-2007 #7
Account not activated by Email
- Reputation
- 655
- Join Date
- Jul 2007
- Posts
- 700
- Thanks G/R
- 0/0
- Trade Feedback
- 0 (0%)
- Mentioned
- 0 Post(s)
- Tagged
- 0 Thread(s)
Re: ::Tutorial:: [Text] Light Burst [Pro]
Thanks Remah
I appreciate the feedback.
-
11-02-2007 #8
Contributor
- Reputation
- 158
- Join Date
- Oct 2007
- Posts
- 440
- Thanks G/R
- 0/1
- Trade Feedback
- 0 (0%)
- Mentioned
- 0 Post(s)
- Tagged
- 0 Thread(s)
Re: ::Tutorial:: [Text] Light Burst [Pro]
amagawd! im sorry! i forgot to add the rep xD already corrected my mistake :P *disdisappoints Puff*
-
11-02-2007 #9
Account not activated by Email
- Reputation
- 655
- Join Date
- Jul 2007
- Posts
- 700
- Thanks G/R
- 0/0
- Trade Feedback
- 0 (0%)
- Mentioned
- 0 Post(s)
- Tagged
- 0 Thread(s)
Re: ::Tutorial:: [Text] Light Burst [Pro]
Hehe
at least you acknowledged it Thank you very much Keytachi...
- Puff
-
11-02-2007 #10
Active Member

- Reputation
- 72
- Join Date
- Nov 2006
- Posts
- 288
- Thanks G/R
- 0/0
- Trade Feedback
- 0 (0%)
- Mentioned
- 0 Post(s)
- Tagged
- 0 Thread(s)
Re: ::Tutorial:: [Text] Light Burst [Pro]
Nice one + rep
Edit: got to spread some around before i give you any again apparantly lol i wont forget
Edit 2: gave remah some and 2 more people, but still got to wait, will try tomorrowLast edited by windybone; 11-02-2007 at 12:45 PM.
-
11-02-2007 #11
Account not activated by Email
- Reputation
- 655
- Join Date
- Jul 2007
- Posts
- 700
- Thanks G/R
- 0/0
- Trade Feedback
- 0 (0%)
- Mentioned
- 0 Post(s)
- Tagged
- 0 Thread(s)
Re: ::Tutorial:: [Text] Light Burst [Pro]
Thanks Windybone
I believe ya ^.^
-
11-02-2007 #12
!!jeULyJf8ld1
- Reputation
- 522
- Join Date
- Feb 2007
- Posts
- 2,256
- Thanks G/R
- 0/0
- Trade Feedback
- 0 (0%)
- Mentioned
- 0 Post(s)
- Tagged
- 0 Thread(s)
Re: ::Tutorial:: [Text] Light Burst [Pro]
Hey thanks.Originally Posted by windybone 19/5/2013
-
11-02-2007 #13
Active Member
- Reputation
- 26
- Join Date
- Feb 2007
- Posts
- 388
- Thanks G/R
- 0/0
- Trade Feedback
- 0 (0%)
- Mentioned
- 0 Post(s)
- Tagged
- 0 Thread(s)
Re: ::Tutorial:: [Text] Light Burst [Pro]
Terrific guide. +rep
-
11-02-2007 #14
Account not activated by Email
- Reputation
- 655
- Join Date
- Jul 2007
- Posts
- 700
- Thanks G/R
- 0/0
- Trade Feedback
- 0 (0%)
- Mentioned
- 0 Post(s)
- Tagged
- 0 Thread(s)
Re: ::Tutorial:: [Text] Light Burst [Pro]
Thank you
-
11-02-2007 #15
Contributor
- Reputation
- 158
- Join Date
- Dec 2006
- Posts
- 627
- Thanks G/R
- 0/0
- Trade Feedback
- 1 (100%)
- Mentioned
- 0 Post(s)
- Tagged
- 0 Thread(s)
Re: ::Tutorial:: [Text] Light Burst [Pro]
Very nice tut. +rep.


 Reply With Quote
Similar Threads
-
[Tutorial]Text thingy in Photoshop
By Sveiningos in forum Art & Graphic DesignReplies: 3Last Post: 06-30-2008, 02:54 AM -
[tutorial]3d text effect
By NeonMonkeys in forum Art & Graphic DesignReplies: 15Last Post: 10-19-2007, 10:07 PM -
Photoshop Text Effect Tutorial
By Froogle in forum Art & Graphic DesignReplies: 9Last Post: 08-27-2007, 05:42 PM -
Tutorial: World of Warcraft type text.
By marick626 in forum Art & Graphic DesignReplies: 2Last Post: 06-29-2007, 05:51 AM -
Tutorial: Making Text Stand Out
By Phase228 in forum Art & Graphic DesignReplies: 3Last Post: 06-25-2007, 08:47 PM
-
OwnedCore Forums
casino news World of Warcraft Pokemon GO MMO Overwatch RTS Casino reviews bc game bc game bc game bc game bc game bc game bc game bc game bc game bc game bc game bc game bc game bc game bc game bc game bc game bc game bc game bc game bc game bc game bc game bc game bc game bc game bc game bc game bc game bc game bc game bc game bc game bc game bc game bc game bc game bc game bc game bc game bc game bc game bc game bc game bc game bc game bc game bc game bc game bc game -
casino
Casino Gambling Online casinos Casino en ligne bc game bc game bc game bc game bc game bc game bc game bc game bc game bc game bc game no deposit bonus codes roobet Casino reviews Bitcoin casino Paypal Casino Lucky8 1xbit heycasino ✅MyEmpire Casino - ✅Yeti Casino - 23 Free Casino online That ✅Jackpotcity Casino - Online Casinos that ⭐Betway Casino - Best Neteller Casino Metaspins Casino - ✅Millionz Casino - -
CoreCoins
CoreCoins CoreCoins FAQ Shout-Out Banner Ads -
My OwnedCore
My Profile Notifications Settings Buy CoreCoins About Us


Privacy Policy | Cookie Policy | Terms | Contact Us
Available Payment Methods:-
![::Tutorial:: [Text] Light Burst [Pro]](https://www.ownedcore.com/images/paybutton/paypal.png)
![::Tutorial:: [Text] Light Burst [Pro]](https://www.ownedcore.com/images/paybutton/skrill.png)
![::Tutorial:: [Text] Light Burst [Pro]](https://www.ownedcore.com/images/paybutton/payop.png)
-
Casino
MrGreen | Lucky Dreams Casino | Drake Casino | Rollino Casino | Casino Reviews | BuzzLuck | Lucky31 | Jackpotcity | ZenCasino | PalmSlots Casino | NeedForSpin | Slot machines | How to Play BlackJack Online | BitCasino | Bitstarz | Dublinbet | Casino Bonus | No deposit bonus | Bc Game | Bovada casino | Welcome Bonuses | Bonus code | Sportsbook | InstantPay | Millionz | Mystake Casino | Casino | Oshi Casino