![[Guide] Armor Swap Part 2](images/styles/OwnedCoreFX/addimg/menu4.svg)
OK BEFORE READING THIS GUIDE PLEASE NOTE THE FOLLOWING:
You will need
Mywarcraftstudio
A word processor
PLEASE PLEASE PLEASE have model editing experience. THIS IS HARD. If you have not model edited before, please see my other guides, listed here
Mount Swap: http://www.mmowned.com/forums/model-...ount-swap.html
Sound Swap: http://www.mmowned.com/forums/model-...ound-swap.html
Also please have read Part 1, which is listed here
http://www.mmowned.com/forums/model-...-part-1-a.html
Theses are things you should know about armor swapping:
1. ONLY HELM AND SHOULDERPADS HAVE .M2 FILES. PLEASE PLEASE DONT BE ASKING WHERE THE ROBE .M2 FILES ARE. All robes, pants, gloves, bracers, boots, ect. have the SAME basic model, and you cant change that. Its kinda hard to understand but trust me.
2. KNOW YOUR RACE/SEX this is KEY in a successful armor swap. Armor looks different on every race, and sex please make sure you know this.
In the wow files its race then sex. M is male F is female, here is the race breakdown:
DW-Dwarf
GN-Gnome
HU-Human
NI-Night Elf
OR-Orc
SC-Undead
TA-Tauren
TR-Troll
3. Make sure you are fimiliar with your armor. It is important to locate in MWS where your armor is. I HIGHLY suggest using tier armor, its very easy to find. All tier 0 and .5 is know as Dungeon(ClassNameHere) and all tier 1 2 & 3 are know as Raid(ClassNameHere). Another thing is tier 1 is known as Raid(ClassName)_A, tier 2 is B, and tier 3 is C. Also there are many areas where armor is located. There is ITEMS and Items which both have many sub folders. For the most part they are not to hard to find, and try using www.goblinworkshop.com
4. Please make sure you do vest to vest, and robe to robe. They have different amounts of .blps
Now for the guide
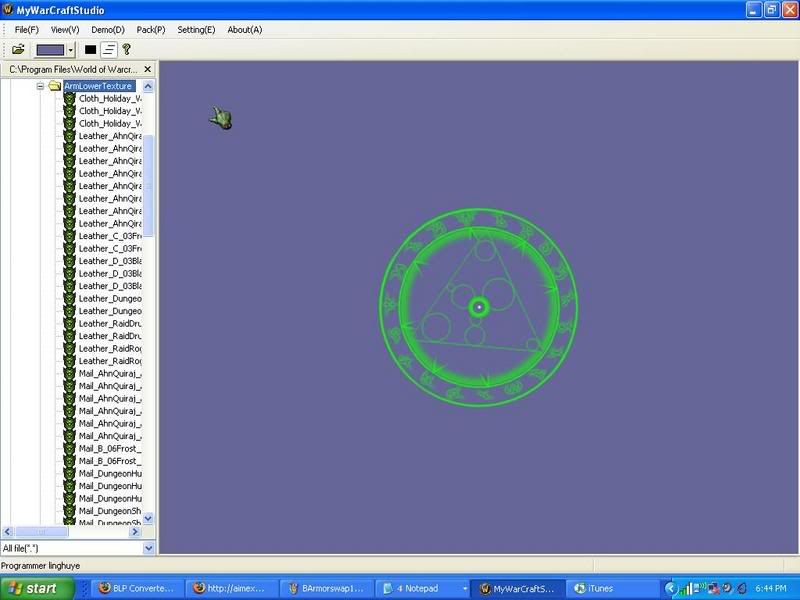
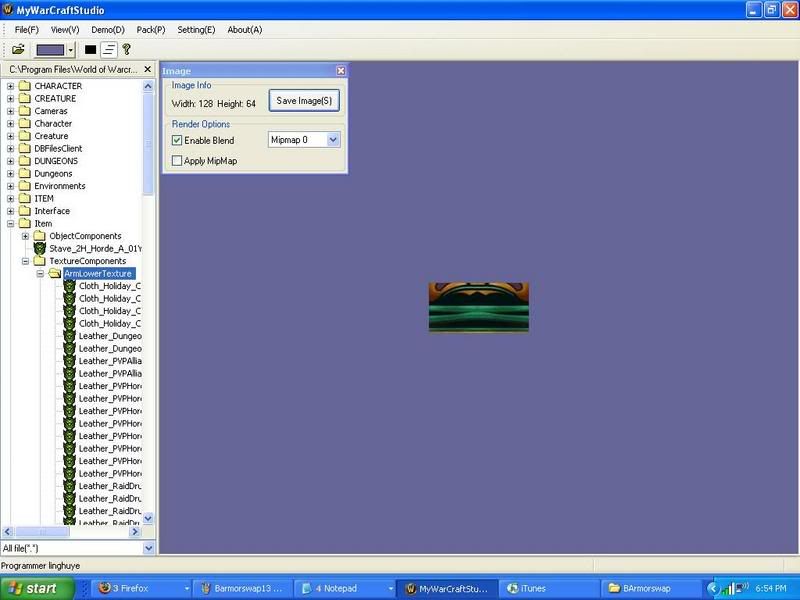
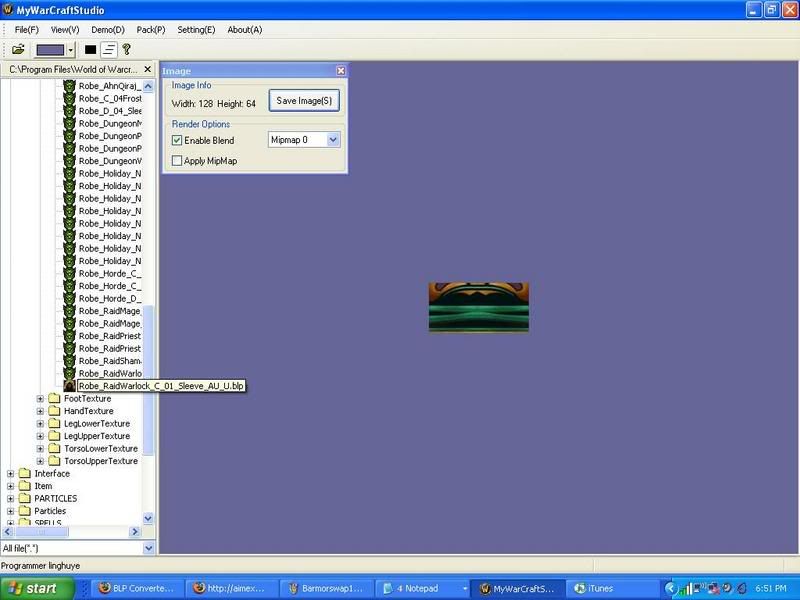
1. Open patch.mpq with MWS then go to ITEM/TextureComponents/ . Texture Components are everything besides helm and shoulder
2. Now click on ArmLowerTexture
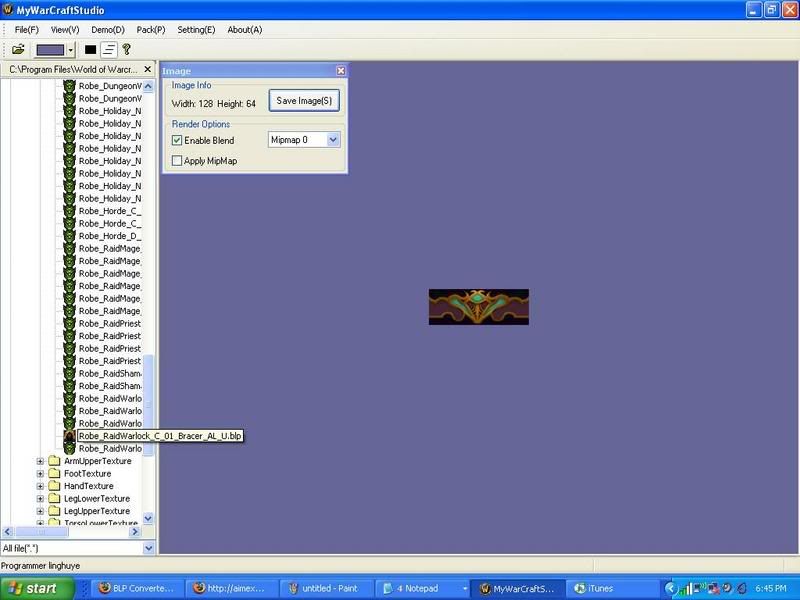
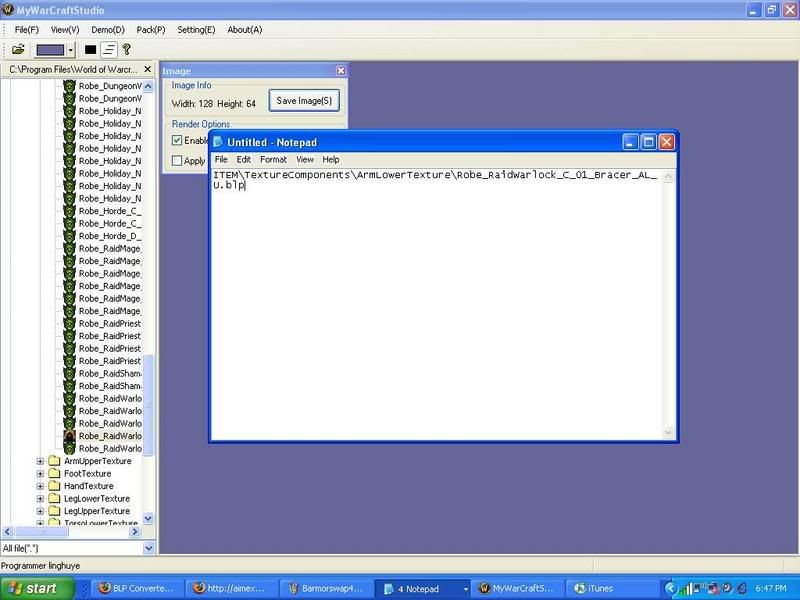
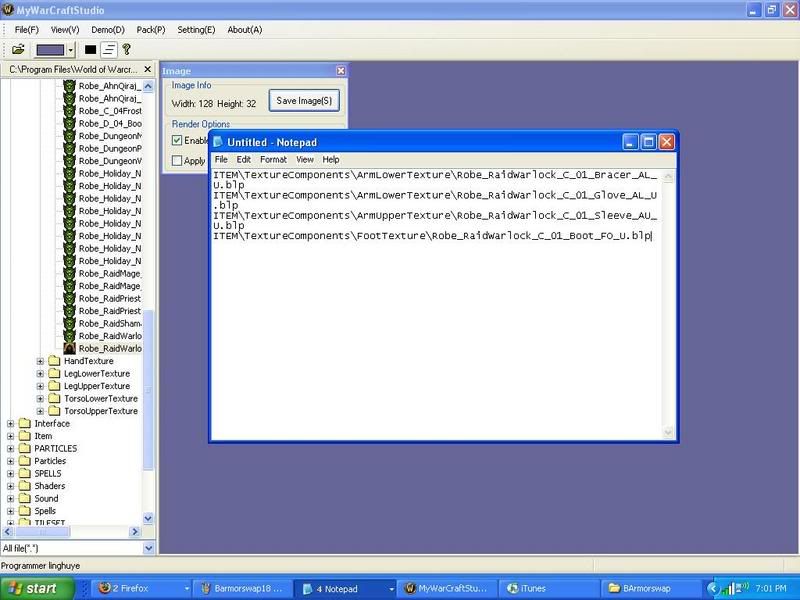
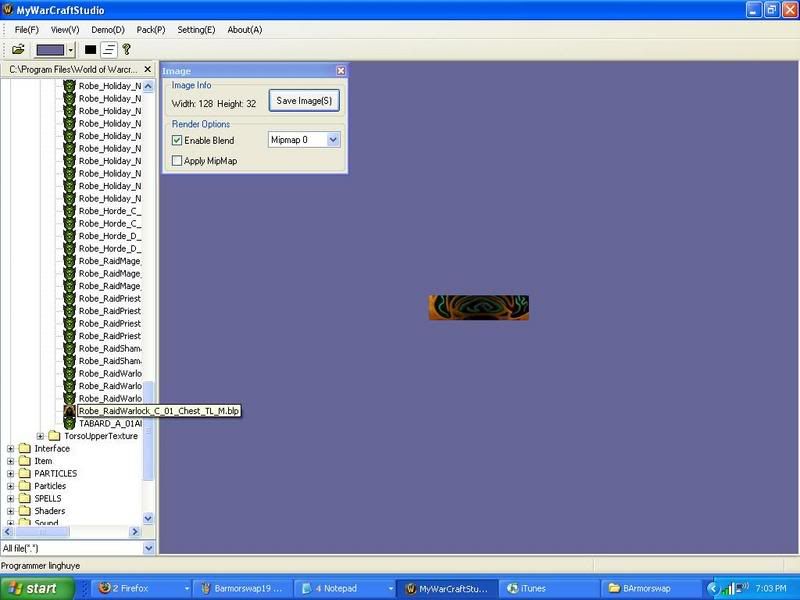
3. Now scroll to the bottom and find Robe_RaidWarlock_C_01_Bracer_AL_U.blp. Basically what this reads as its part of a tier, dealing with raids, for warlocks, tier 3, its part of a bracer, and its part of ArmLower (AL)
4. Right click and select copy treepath
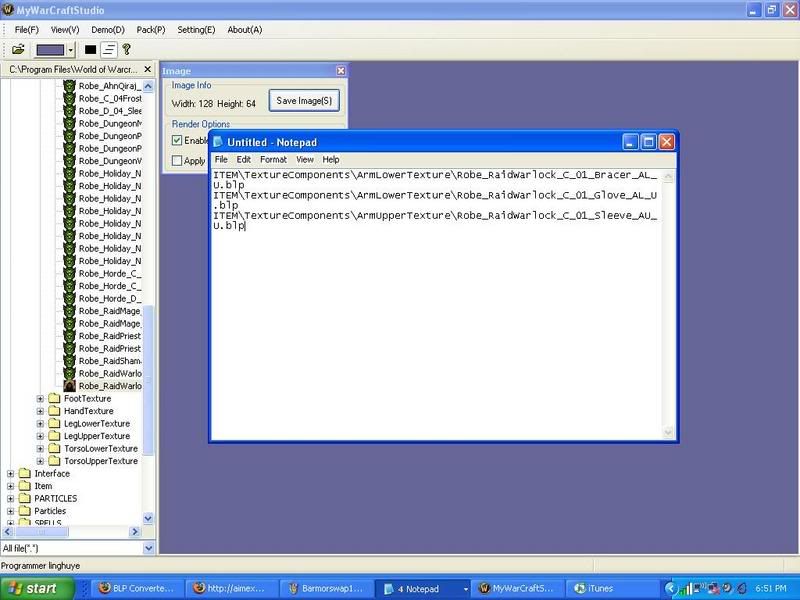
5. Now paste it into a word processor (Notepad=least system lag)
6. Then extract the file, and put it in its own folder in World Of Warcraft/Data
7. Should look like this
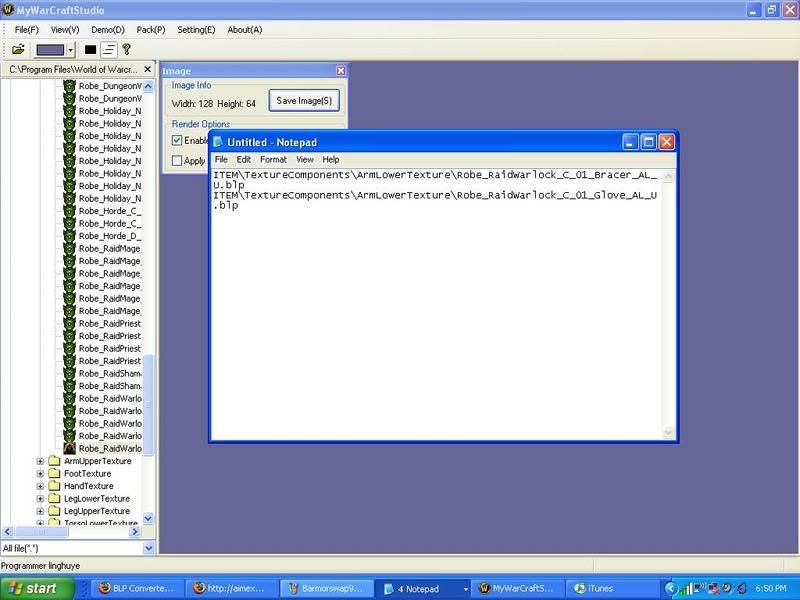
8. Then go to the nect file in ArmLower called Robe_RaidWarlock_C_01_Glove_AL_U.blp
9. Your all big boys, u can extract the file urself, and copy the treepath into a word document
10. Now what we basically is all the Arm Lower textures are extracted, and now we need to find what they are replacing it with
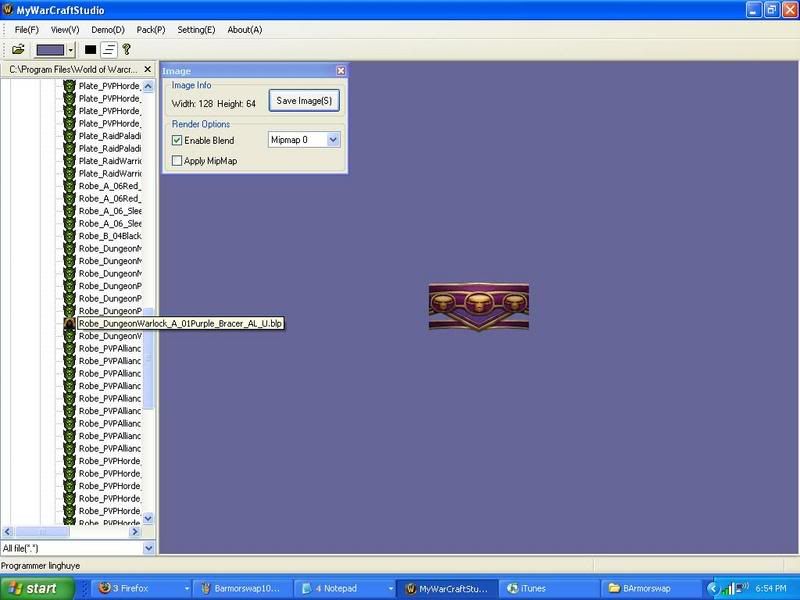
11. Now we are going to find the files we are going to modelchange "over" Click on Item/TextureComponents/ArmLowerTexture
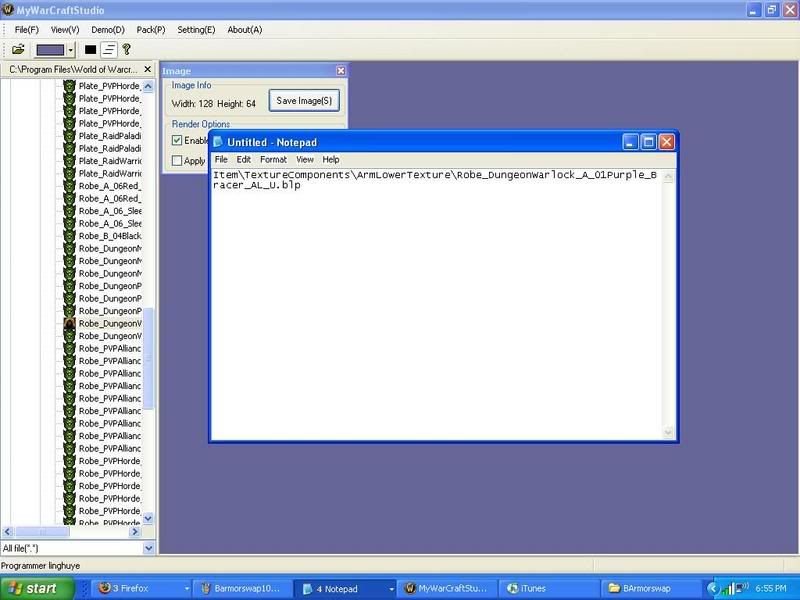
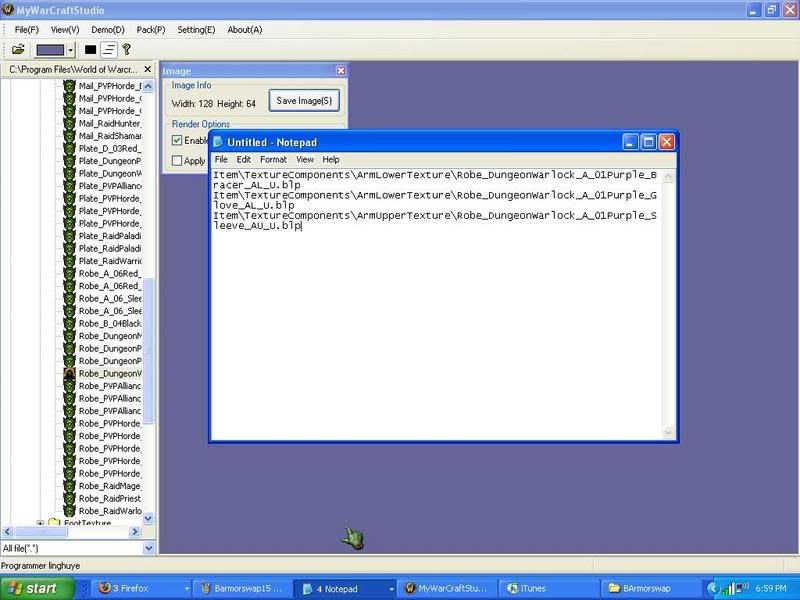
12. Now find Robe_DungeonWarlock_A_01Purple_Bracer_AL_U.blp. This reads as a Tier, from Dungeon set, for warlocks, its the purple version, its for bracers, and for the arm lowerCopy the treepath into a new notepad document
13. Should look like this
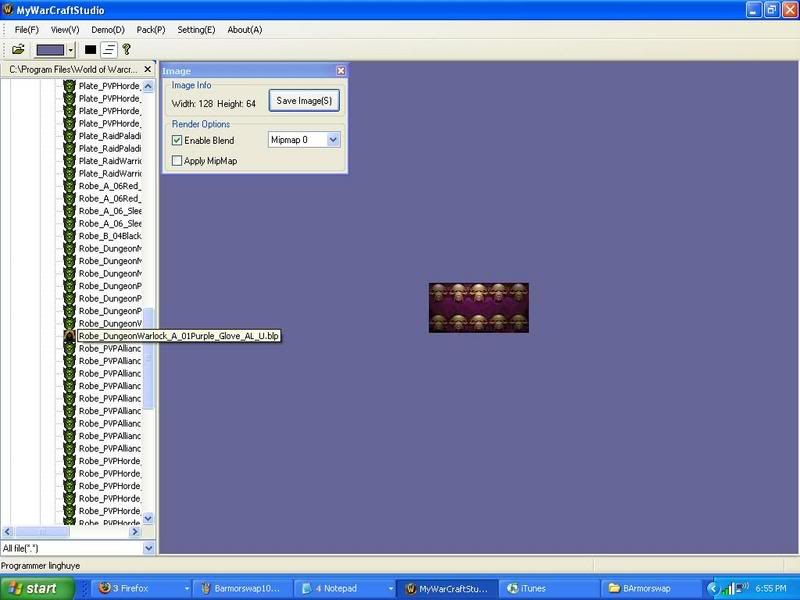
14. Now find the next texture, which is Robe_DungeonWarlock_A_01Purple_Glove_AL_U.blp
15. Once again copy and paste treepath into the 2nd notepad
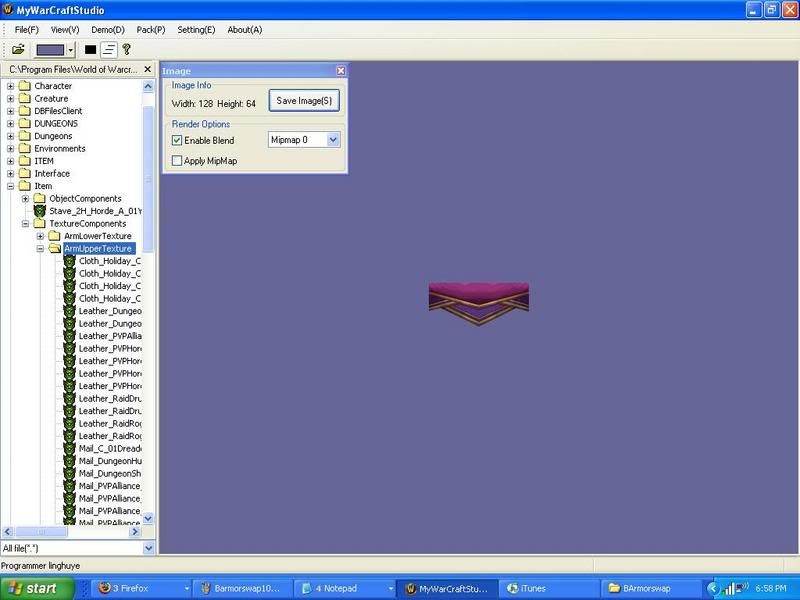
16. Now go to ITEM/TextureComponents/ArmUpperTexture
17. Find Robe_RaidWarlock_C_01_Sleeve_AU_U.blp. You know the drill, extract it to the data file blah blah blah
18. Copy the treepath into the first text documetn
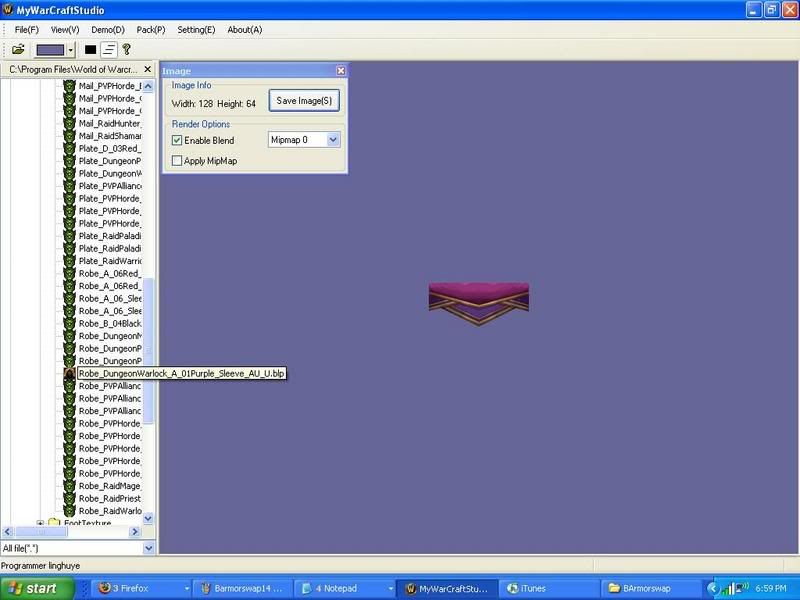
19. Now go to Item/TextureComponents/ArmUpperTexture now we are finding the dreadmist version
20. Find Robe_DungeonWarlock_A_01Purple_Sleeve_AU_U.blp
21. Once again, copy into 2nd text document (Dreadmist one)
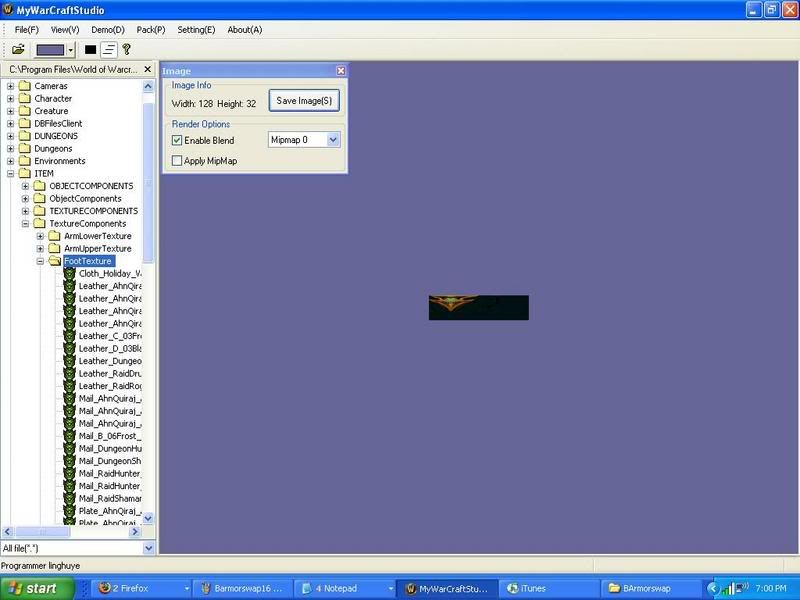
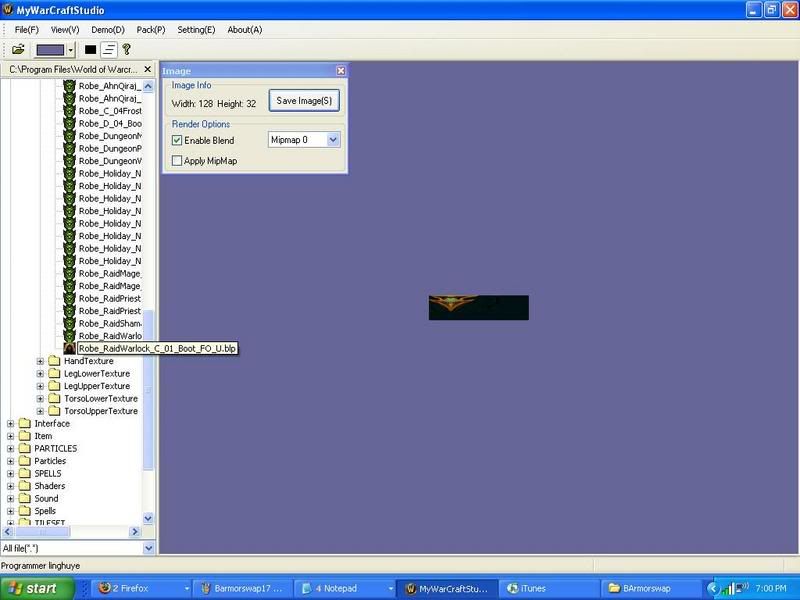
22. Now go back to ITEM/TextureComponets/FootTexture
23. Find Robe_RaidWarlock_C_01_Boot_FO_U.blp
24. Ok you know what to do from here. Extract, copy paste treepath. Continue to do this, extracting tier 3 and copying treepaths for both dreadmist and tier 3 till u get to TorsoLowerTexture THEN STOP FOR CRISE SAKE!!! NOTE some areas have more than 1 .blp some they have one, all depends
25. Now u should have everything except for TorsoUpperTexture and TorsoLowerTexture. Now heres something u wanna pay close attention to. As many of u may notice, men and women have different chests, irl, and this reflects in WoW. So u will notice that there is Robe_RaidWarlock_C_01_Chest_TL_M.blp and Robe_RaidWarlock_C_01_Chest_TL_F.blp. Obviously M is male F is female, before we were dealing with U, unisex. So now make sure u do your sex's armor, and do this for both TorsoLower and TorsoUpper
26. Now if ur reading this guide, u know how to model change, so rename all the files so that they match up with what they are being changed to. I dont know why but i dont have a pic for this. NOTE: MAKE SURE TO MATCH UP BRACERS WITH BRACERS, GLOVES WITH GLOVES, AL WITH AL, AU WITH AU, ECT. I CANT STRESS THIS ENOUGH!
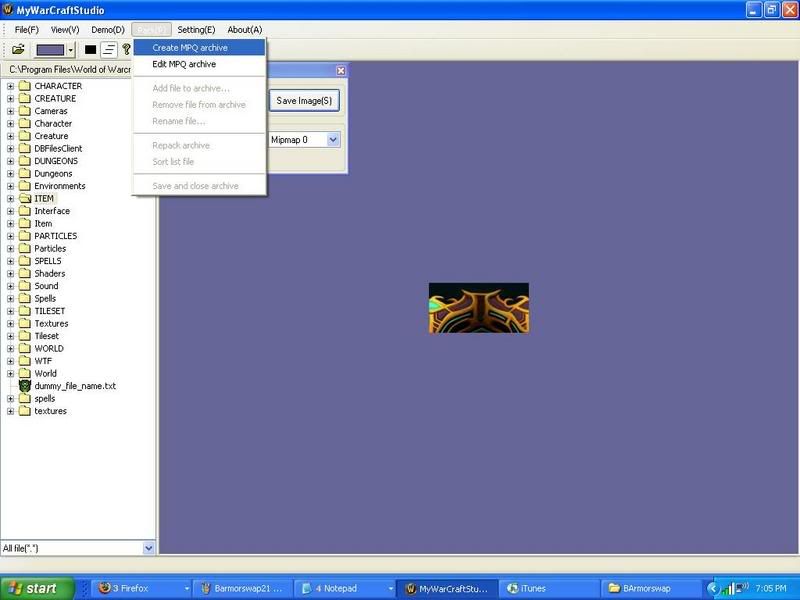
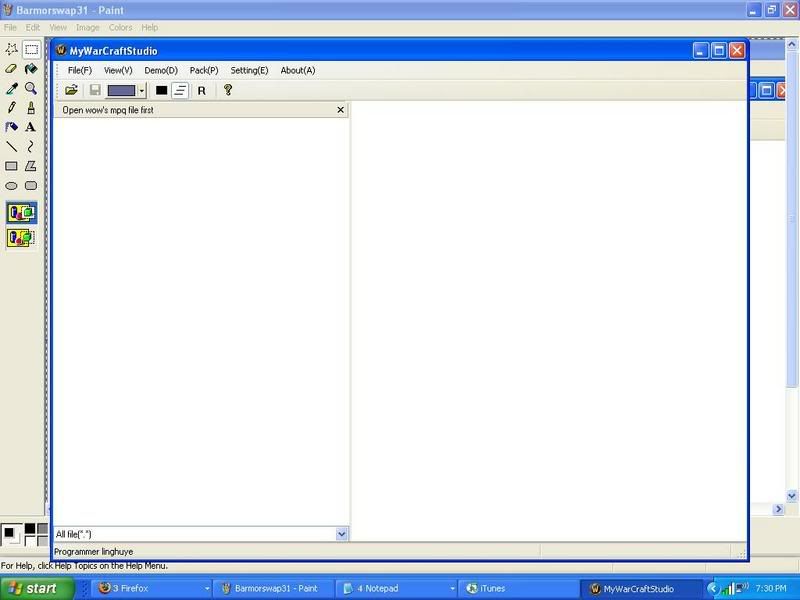
27. Now you should have all the files extracted and treepaths copied. Make sure u have the same ammount of .blps for each. Once this is done, select Pack, then click Create New MPQ archive, and name it Speech2.mpq
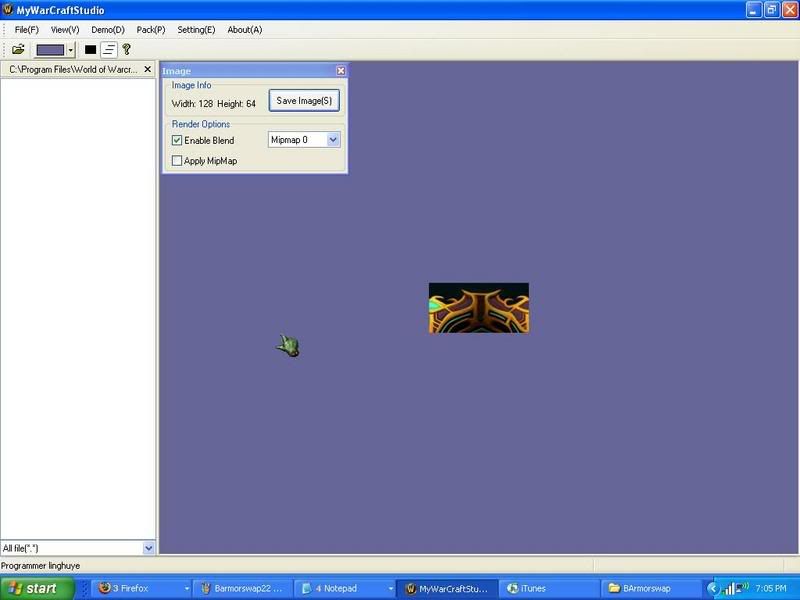
28. You should see something like this
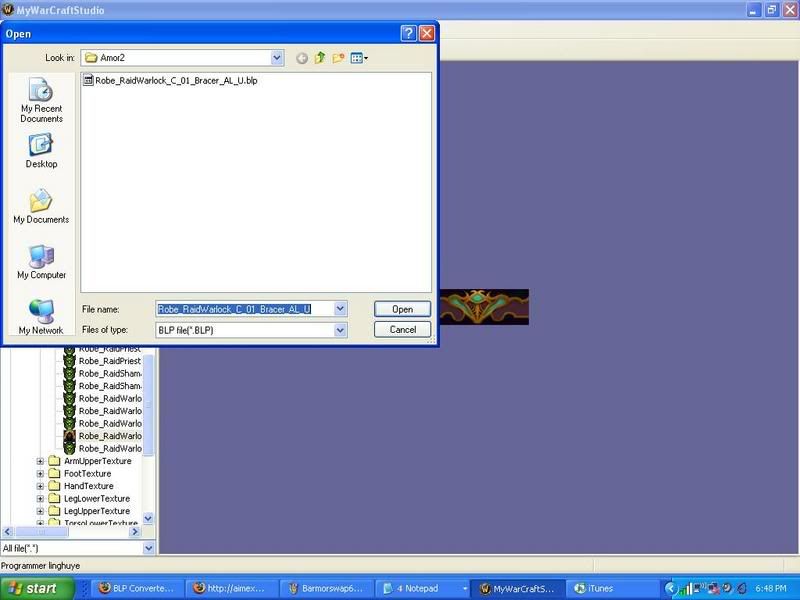
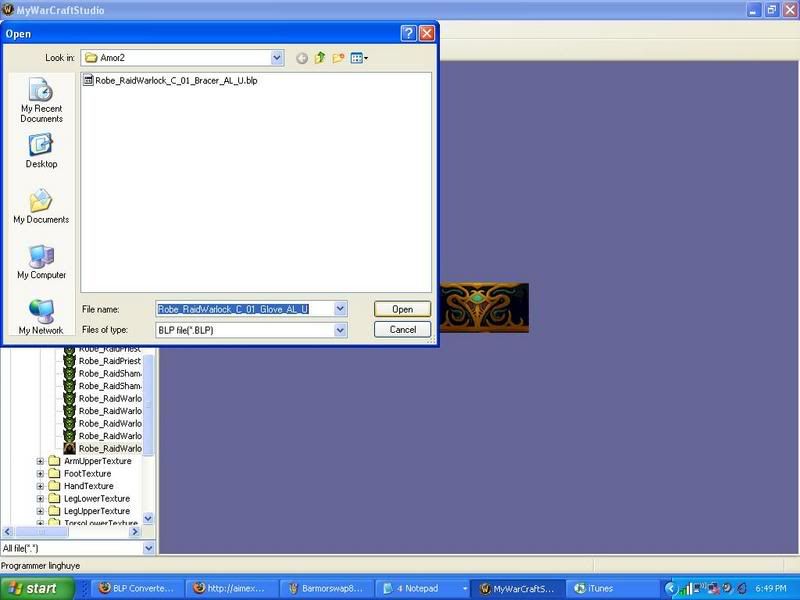
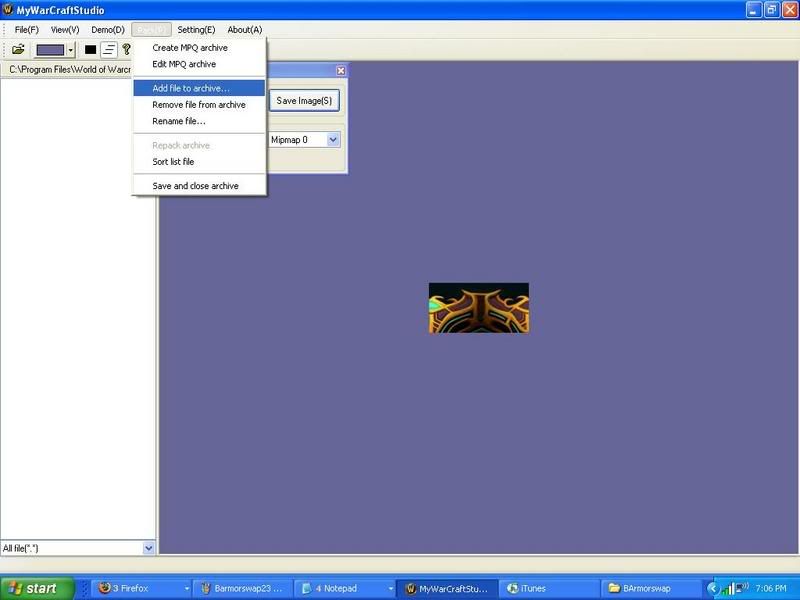
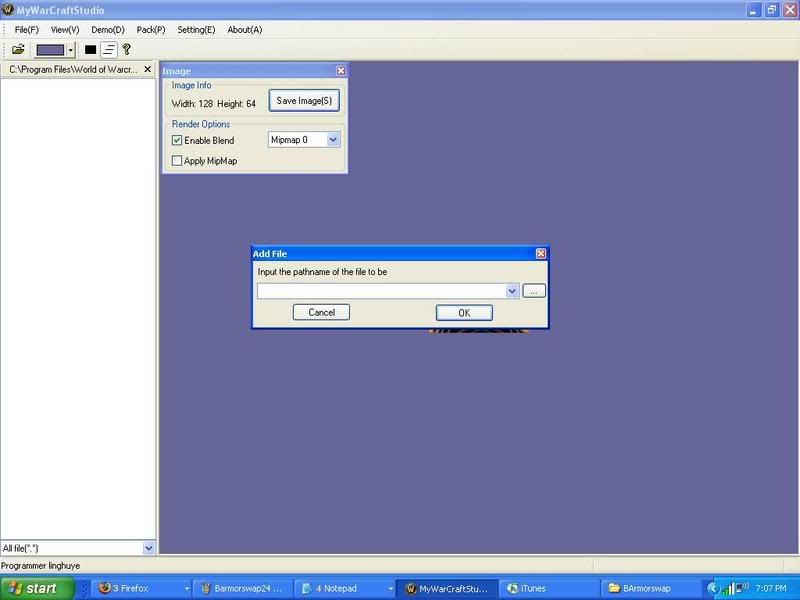
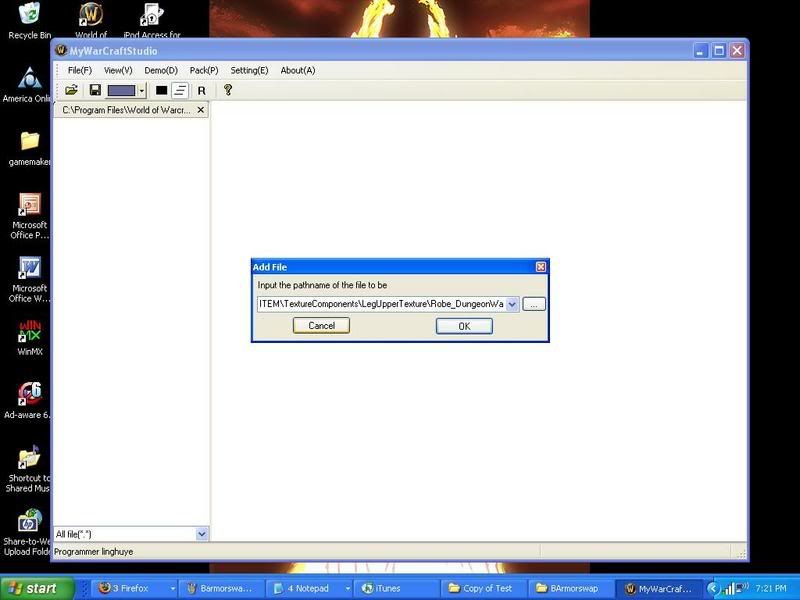
29. Now click on Pack, and click add file to mpq archive
30. Now you should see this, and select the ....
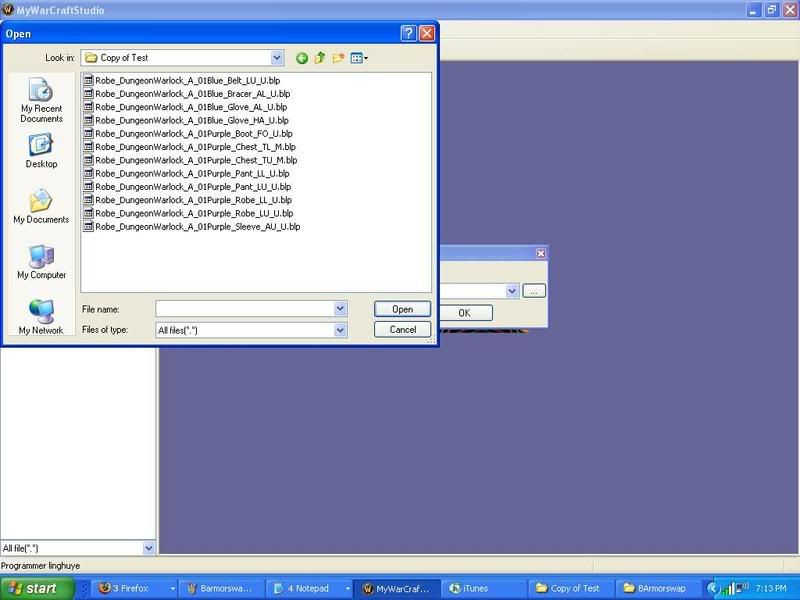
31. Now you should see this. Select the first file. NOTE: For some reason i did the wrong name swap. I will fix this at a later date imagine thats the on with the Purple not blue and click open
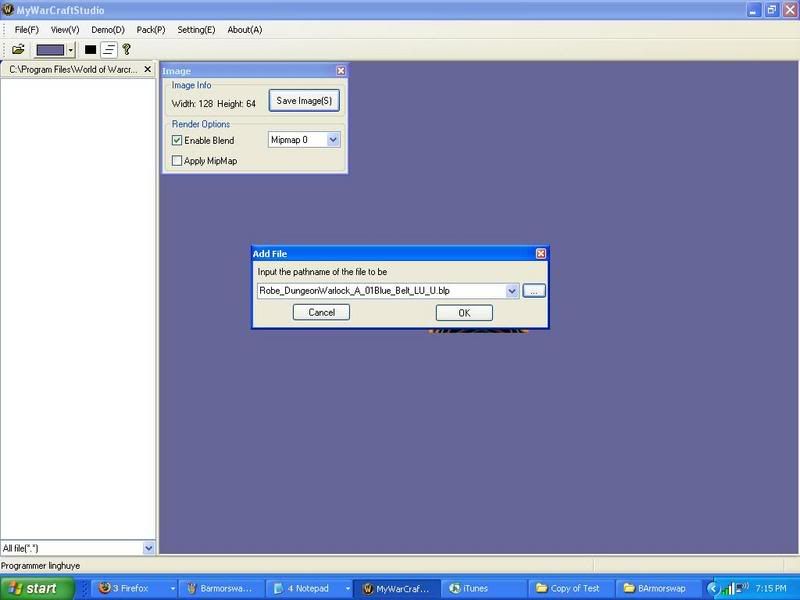
32. Now you should see this, DONT CLICK OK!!!
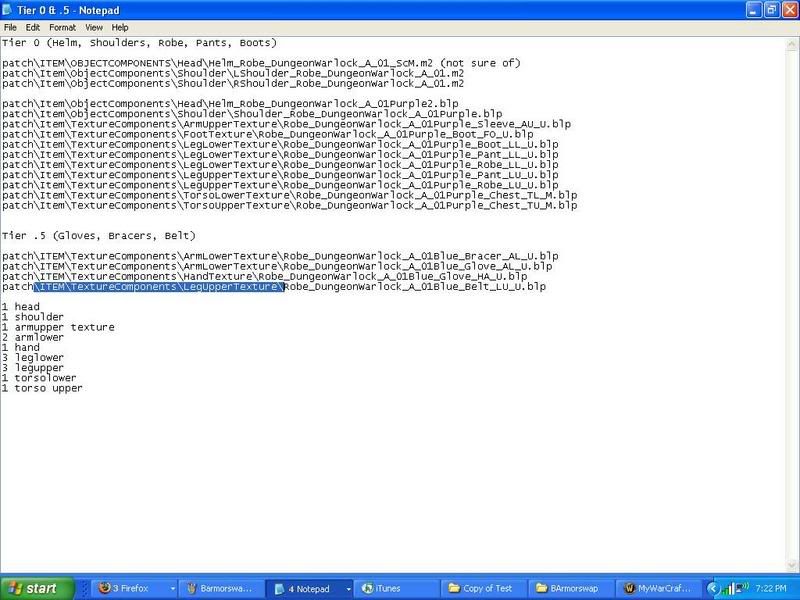
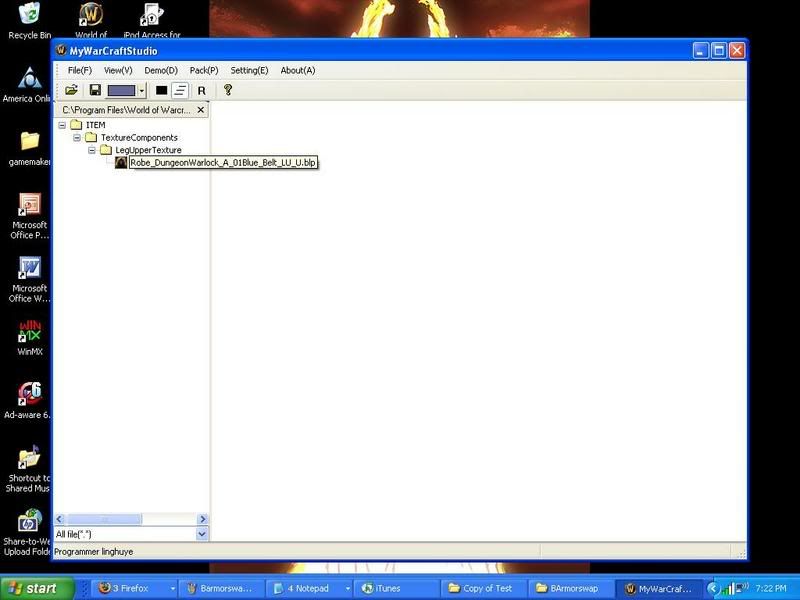
33. Go to ur word document with the treepaths and paste the corolating tree path before the name of the blp, like this
34. When pasted in should look like this
35. If you expand the treepath it should look like this
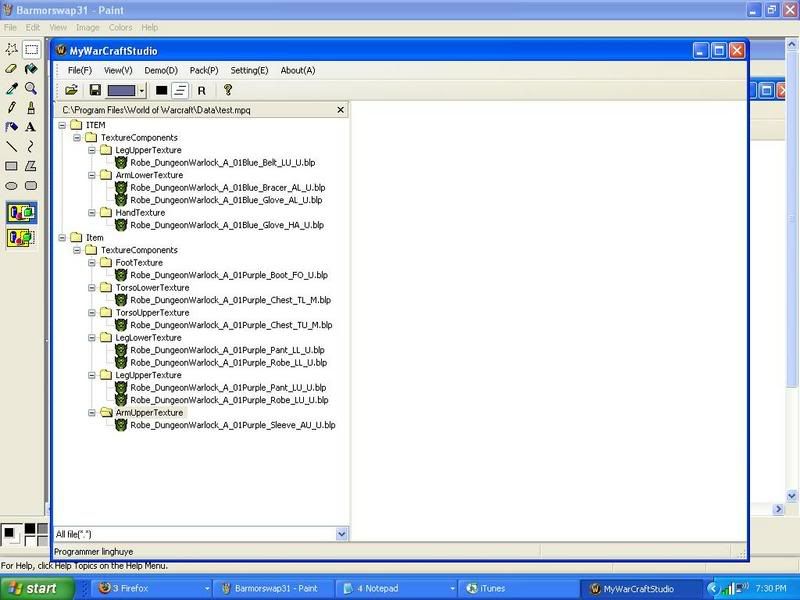
36. Now do the same with the rest, add file, paste tree path, till you have this
37. Now save .mpq and TA DA!!! You have suceessfully armor swapped (if u did part 1 also)
SOME NOTES:
I do realize there are some little errors in this guide, none of which will effect what u did. Just currently the comp im typing this guide on, is not the comp it took the Screen Shos on. I shorted this guide more than my normal ones, because u should be pretty confident with MC before u do an armor swap. And if u can do that, i should only really need to give u the just of whats going on.
ALSO make sure u do robe-->robes and vests to vests. They have different amounts of textures, so this is the easiest way.
I really hope this was helpful, and please, if u like, check out my other model editing guides

![[Guide] Armor Swap Part 2](../images/ba/9/top-1.gif)
![[Guide] Armor Swap Part 2](https://www.ownedcore.com/assets/mm/images/wits.png "TradeSafe Middleman")
![[Guide] Armor Swap Part 2](https://www.ownedcore.com/forums/images/styles/OwnedCoreFX/addimg/wicc.png "CoreCoins")

Shout-Out
User Tag List
Thread: [Guide] Armor Swap Part 2
Results 1 to 15 of 20
-
09-19-2006 #1
 Retired Super Moderator


- Reputation
- 730
- Join Date
- Aug 2006
- Posts
- 2,413
- Thanks G/R
- 0/0
- Trade Feedback
- 0 (0%)
- Mentioned
- 0 Post(s)
- Tagged
- 0 Thread(s)
[Guide] Armor Swap Part 2
Last edited by Fault; 10-08-2006 at 07:35 AM.

Created by MyFitnessPal.com - Free Calorie Counter
"If I and everyone else could contribute to MMOwned like you do it would be a terrific place." Don't PM me with request, only Questions
![[Guide] Armor Swap Part 2](https://www.ownedcore.com/images/ba/g/b2.gif)
-
09-19-2006 #2
 Member
- Reputation
- 1
- Join Date
- Sep 2006
- Posts
- 2
- Thanks G/R
- 0/0
- Trade Feedback
- 0 (0%)
- Mentioned
- 0 Post(s)
- Tagged
- 0 Thread(s)
Re: GUIDE: Armor Swap Part 2
omg dude like, amazing. U are a god. *waits for someone to notice the irony
-
09-19-2006 #3
Member
- Reputation
- 13
- Join Date
- Mar 2006
- Posts
- 40
- Thanks G/R
- 0/0
- Trade Feedback
- 0 (0%)
- Mentioned
- 0 Post(s)
- Tagged
- 0 Thread(s)
Re: GUIDE: Armor Swap Part 2
omg dude like, amazing. U are a god.
ahah on the real thanks man doesnt look to complicated
+ rep =D.... Dont Argue with noobs because they will just bring you down to there level and beat you with experience...
-
09-20-2006 #4
Member
- Reputation
- 1
- Join Date
- Sep 2006
- Posts
- 1
- Thanks G/R
- 0/0
- Trade Feedback
- 0 (0%)
- Mentioned
- 0 Post(s)
- Tagged
- 0 Thread(s)
Re: GUIDE: Armor Swap Part 2
Wow that is awsome I want to try to do this but I don't want to screw anything up.
-
09-20-2006 #5
Member
- Reputation
- 2
- Join Date
- Sep 2006
- Posts
- 101
- Thanks G/R
- 0/0
- Trade Feedback
- 0 (0%)
- Mentioned
- 0 Post(s)
- Tagged
- 0 Thread(s)
Re: GUIDE: Armor Swap Part 2
I'm learning more from his avatar

Nice guide!!!!*Insert Awe-Inspiring Signature Here*
-
09-20-2006 #6
Retired Super Moderator
- Reputation
- 730
- Join Date
- Aug 2006
- Posts
- 2,413
- Thanks G/R
- 0/0
- Trade Feedback
- 0 (0%)
- Mentioned
- 0 Post(s)
- Tagged
- 0 Thread(s)
Re: GUIDE: Armor Swap Part 2
It aint to hard, try it. If u mess up i can help uOriginally Posted by lollercakes
Created by MyFitnessPal.com - Free Calorie Counter
"If I and everyone else could contribute to MMOwned like you do it would be a terrific place." Don't PM me with request, only Questions
-
09-21-2006 #7
Member
- Reputation
- 1
- Join Date
- Sep 2006
- Posts
- 1
- Thanks G/R
- 0/0
- Trade Feedback
- 0 (0%)
- Mentioned
- 0 Post(s)
- Tagged
- 0 Thread(s)
Re: GUIDE: Armor Swap Part 2
ok this is a dumb and probably ovious question but this is specifically for private servers right? I don't think you could get away with this on official servers. also, say i wanted to swap for an AQ40 set, what would be the code for a pally, what would be the code for that?
-
09-21-2006 #8
Retired Super Moderator
- Reputation
- 730
- Join Date
- Aug 2006
- Posts
- 2,413
- Thanks G/R
- 0/0
- Trade Feedback
- 0 (0%)
- Mentioned
- 0 Post(s)
- Tagged
- 0 Thread(s)
Re: GUIDE: Armor Swap Part 2
Aparently, u dont understand what modelediting isOriginally Posted by ethanpp77 This is for any server, ESPECIALLY live. I use MC all the time (obiously if i have 4 guides on it) on live servers. I dont have the AQ name right now, but to my memeory, its called aq in the file name
Created by MyFitnessPal.com - Free Calorie Counter
"If I and everyone else could contribute to MMOwned like you do it would be a terrific place." Don't PM me with request, only Questions
-
09-22-2006 #9
Contributor

- Reputation
- 171
- Join Date
- May 2006
- Posts
- 301
- Thanks G/R
- 0/0
- Trade Feedback
- 0 (0%)
- Mentioned
- 0 Post(s)
- Tagged
- 0 Thread(s)
Re: GUIDE: Armor Swap Part 2
Good job putting it all together, but nothing new.
-
09-22-2006 #10
Retired Super Moderator
- Reputation
- 730
- Join Date
- Aug 2006
- Posts
- 2,413
- Thanks G/R
- 0/0
- Trade Feedback
- 0 (0%)
- Mentioned
- 0 Post(s)
- Tagged
- 0 Thread(s)
Re: GUIDE: Armor Swap Part 2
Ummm, there aint any other guides on this here...Originally Posted by Poker
Created by MyFitnessPal.com - Free Calorie Counter
"If I and everyone else could contribute to MMOwned like you do it would be a terrific place." Don't PM me with request, only Questions
-
10-08-2006 #11
Member
- Reputation
- 1
- Join Date
- Sep 2006
- Posts
- 3
- Thanks G/R
- 0/0
- Trade Feedback
- 0 (0%)
- Mentioned
- 0 Post(s)
- Tagged
- 0 Thread(s)

Re: GUIDE: Armor Swap Part 2
Goblinworkshop doesnt have the models (.m2 & .blp) for Bloodwoven Mitts of the Eagle - how would one find it so I can rename it?
-
10-08-2006 #12
Retired Super Moderator
- Reputation
- 730
- Join Date
- Aug 2006
- Posts
- 2,413
- Thanks G/R
- 0/0
- Trade Feedback
- 0 (0%)
- Mentioned
- 0 Post(s)
- Tagged
- 0 Thread(s)
Re: GUIDE: Armor Swap Part 2
If its not listed, not all are, but some are, u need to look at what the gloves look like. I trust those are cloth, so mostlikely they be under Cloth_, which is in the hand texture folder or w/e. Note: there is no .m2 of it, there is only a blp
Created by MyFitnessPal.com - Free Calorie Counter
"If I and everyone else could contribute to MMOwned like you do it would be a terrific place." Don't PM me with request, only Questions
-
10-17-2006 #13
Active Member

- Reputation
- 15
- Join Date
- Aug 2006
- Posts
- 115
- Thanks G/R
- 0/0
- Trade Feedback
- 0 (0%)
- Mentioned
- 0 Post(s)
- Tagged
- 0 Thread(s)
Re: GUIDE: Armor Swap Part 2
Great!!!
+rep!
[NO QUESTIONS HERE]!!
[NO QUESTIONS HERE]!!
[NO QUESTIONS HERE]!!
-
11-10-2006 #14
Member
- Reputation
- 3
- Join Date
- Nov 2006
- Posts
- 16
- Thanks G/R
- 1/0
- Trade Feedback
- 0 (0%)
- Mentioned
- 0 Post(s)
- Tagged
- 0 Thread(s)
Re: GUIDE: Armor Swap Part 2
hmm, as the Mage T3 robe lower part is ''unisexual'' and Netherwind isnt so what should I do to make this combo working? have now T3 upper part and T2 lower part
-
11-10-2006 #15
Member
- Reputation
- 1
- Join Date
- Nov 2006
- Posts
- 11
- Thanks G/R
- 0/0
- Trade Feedback
- 0 (0%)
- Mentioned
- 0 Post(s)
- Tagged
- 0 Thread(s)

Re: GUIDE: Armor Swap Part 2
awesome man! Great guide. +rep


 Reply With Quote
Similar Threads
-
[Guide] Mount Swapping
By Fault in forum WoW ME Tools & GuidesReplies: 229Last Post: 03-06-2008, 06:16 PM -
[Guide] Armor Swap Part 1
By Fault in forum WoW ME Tools & GuidesReplies: 55Last Post: 06-15-2007, 05:59 AM -
Coming Very Soon Armor Swap Guide
By Fault in forum World of Warcraft Model EditingReplies: 3Last Post: 09-07-2006, 07:09 PM -
[Guide] Sound Swap
By Fault in forum WoW ME Tools & GuidesReplies: 0Last Post: 09-07-2006, 05:34 PM -
First Full armor swap
By Fault in forum WoW ME Questions and RequestsReplies: 3Last Post: 08-29-2006, 08:59 PM
-
OwnedCore Forums
casino news World of Warcraft Pokemon GO MMO Overwatch RTS Casino reviews bc game bc game bc game bc game bc game bc game bc game bc game bc game bc game bc game bc game bc game bc game bc game bc game bc game bc game bc game bc game bc game bc game bc game bc game bc game bc game bc game bc game bc game bc game bc game bc game bc game bc game bc game bc game bc game bc game bc game bc game bc game bc game bc game bc game bc game bc game bc game bc game bc game bc game -
casino
Casino Gambling Online casinos Casino en ligne Jackpot City no deposit bonus codes roobet Casino reviews Bitcoin casino Paypal Casino Lucky8 1xbit heycasino ✅Machance Casino - Cresus Casino Bonus - Casinos en ligne avec Pinnacle Bookmaker Casino No deposit Bonus Casino Bitcoin in the Betclic Bookmaker - Best ⭐ Top Live Casino Casobet Casino - 120% -
CoreCoins
CoreCoins CoreCoins FAQ Shout-Out Banner Ads -
My OwnedCore
My Profile Notifications Settings Buy CoreCoins About Us


Privacy Policy | Cookie Policy | Terms | Contact Us
Available Payment Methods:-
![[Guide] Armor Swap Part 2](https://www.ownedcore.com/images/paybutton/paypal.png)
![[Guide] Armor Swap Part 2](https://www.ownedcore.com/images/paybutton/skrill.png)
![[Guide] Armor Swap Part 2](https://www.ownedcore.com/images/paybutton/payop.png)
-
Casino
Bc Game | Bovada casino | Crypto Casino | ZenCasino | Drake Casino | BitCasino | Casobet | MrGreen | Rollino Casino | Stake Casino | Dublinbet | BuzzLuck | No deposit bonus | Millionz | Sportsbook | Lucky Dreams Casino | Oshi Casino | Casino Reviews | Cresus Casino | Lucky8 | Slot machines | Bonus code | How to Play BlackJack Online | Betflip Casino | Lucky31 | Casino deposit offers | Welcome Bonuses | USA CASINO | Casino